Make easy 3d paper snowflakes for beautiful winter & Christmas decorations. 3 free templates. Best paper crafts ideas for kids & family!
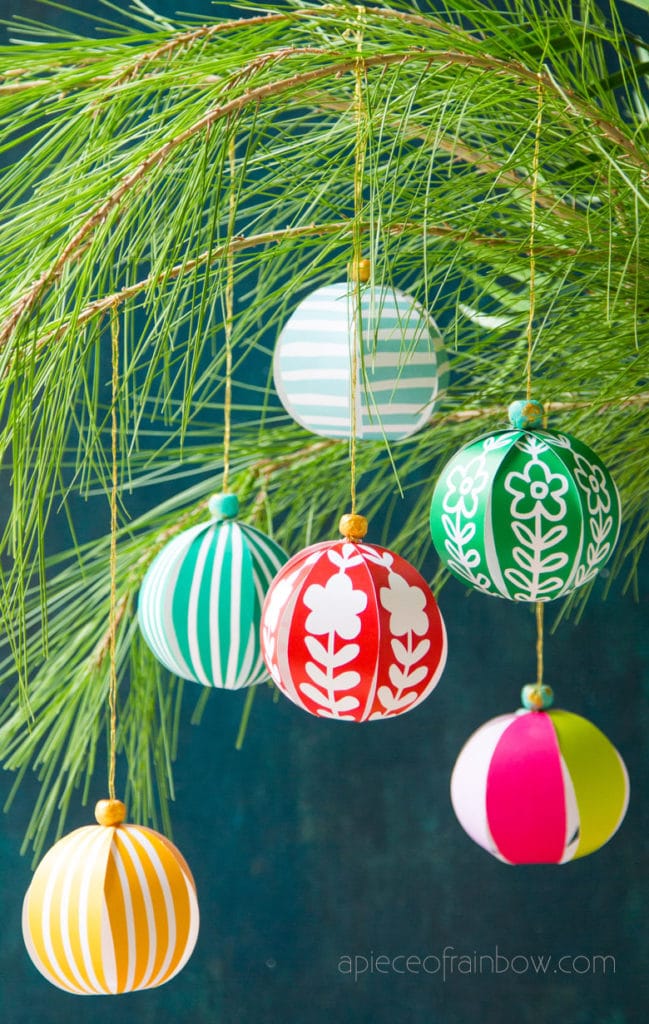
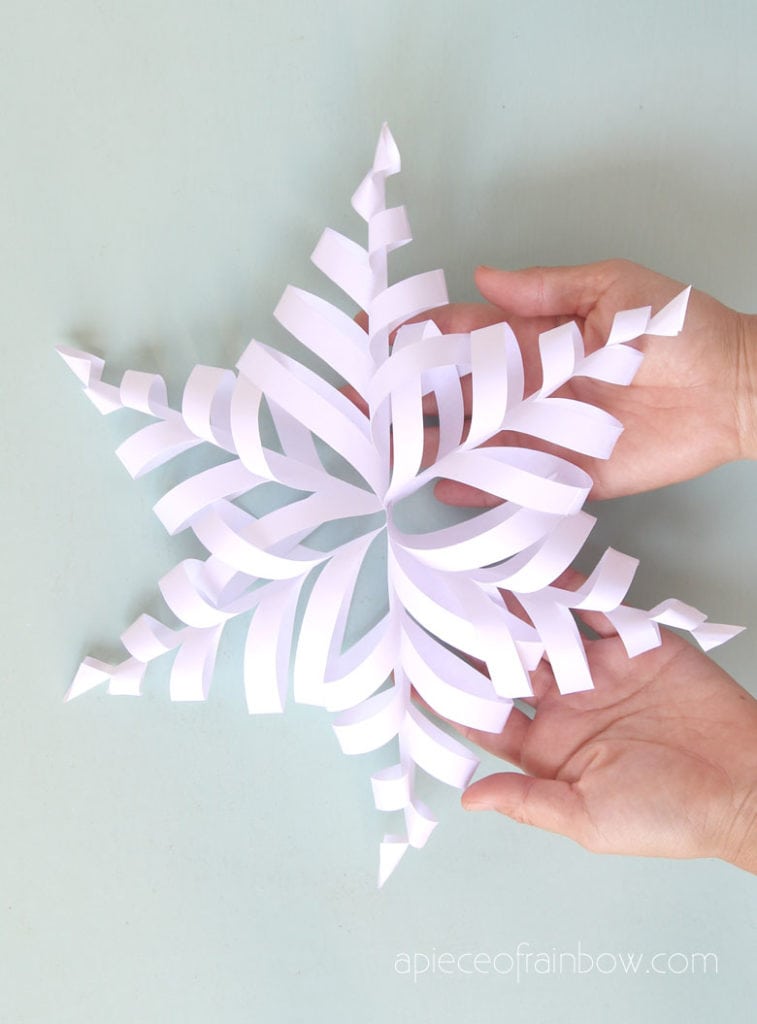
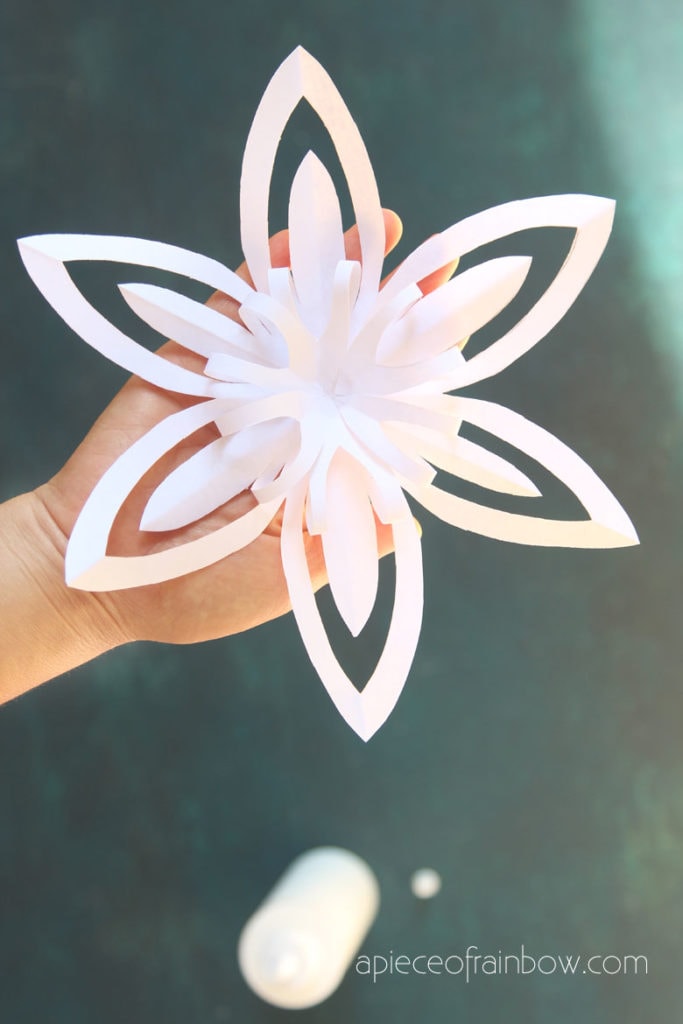
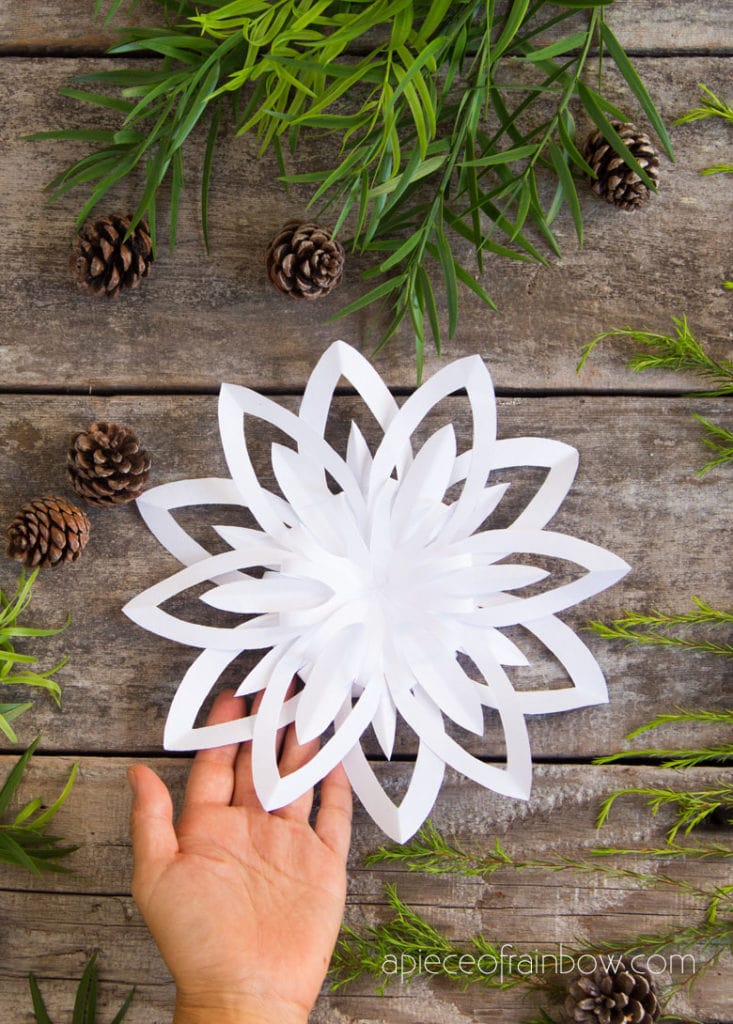
Look at these big gorgeous 3d paper snowflakes! They may look fancy, but they are super easy and take no time to make!
Wouldn’t they look beautiful hanging on a Christmas tree or a New Year garland? All you need are 2 pieces of paper to make each 3d snowflake.
If you are looking for 2D paper cut snowflakes, we have a tutorial here with 12 beautiful free templates you can download!
Table of Contents
- Check out the video tutorials for each 3D snowflake, or skip to written tutorial below!
- Materials and tools to make 3D paper snowflakes
- Step 1: cut and fold 6 pieces of square paper
- Step 2: draw and cut designs
- Step 3: glue 3D paper snowflakes
- Here’s the video tutorial for the second 3D paper snowflake, and written tutorial below.
- Here’s the video tutorial for the third 3D paper snowflake, and written tutorial below.
Check out the video tutorials for each 3D snowflake, or skip to written tutorial below!
*Some resources in article are affiliate links. Full disclosure here.
Materials and tools to make 3D paper snowflakes
 You may also like: Easy DIY paper Christmas ornaments with free templates!
- You can use regular white copy paper, color paper, metallic paper, scrapbook paper, or even recycled paper. Get creative!
- Glue or glue sticks, scissors, pencil and eraser for drawing the patterns before cutting.
Step 1: cut and fold 6 pieces of square paper
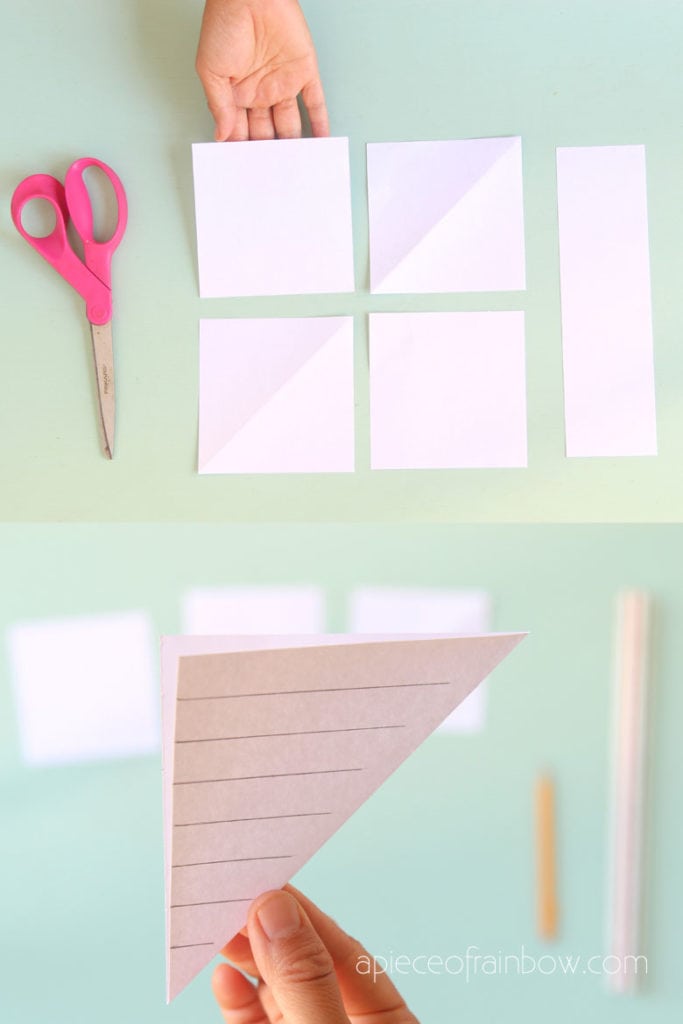
Let’s start with the first design. You will need 6 small square pieces of paper for each 3D snowflakes.
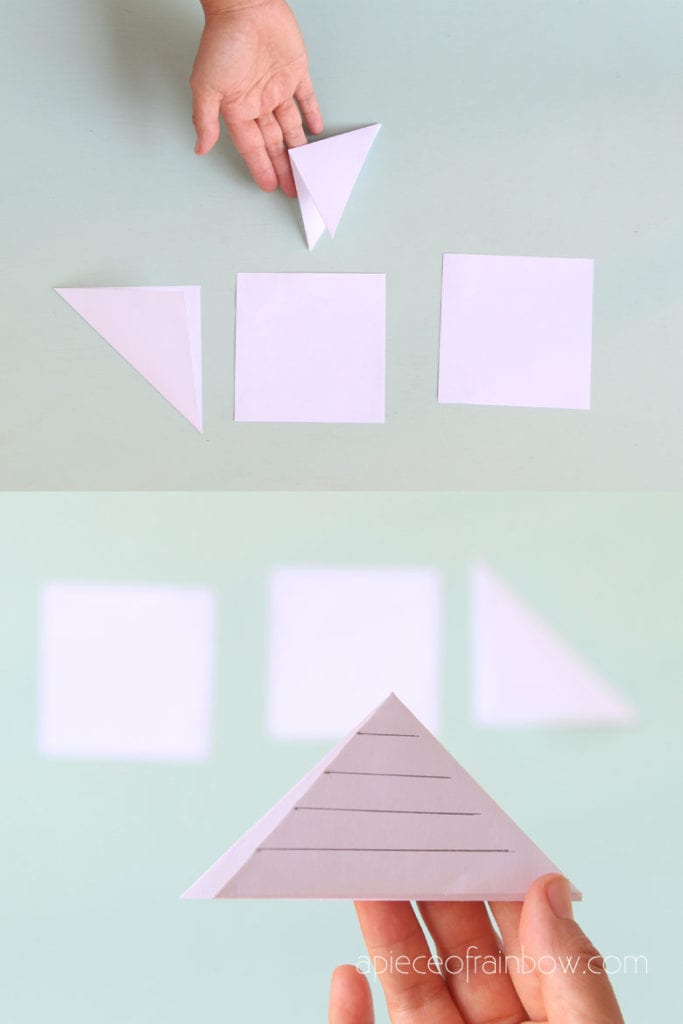
We used 6 small pieces of squares cut from 8.5″ x 11″ white copy paper, with 4 small squares on each sheet as shown in photo below.
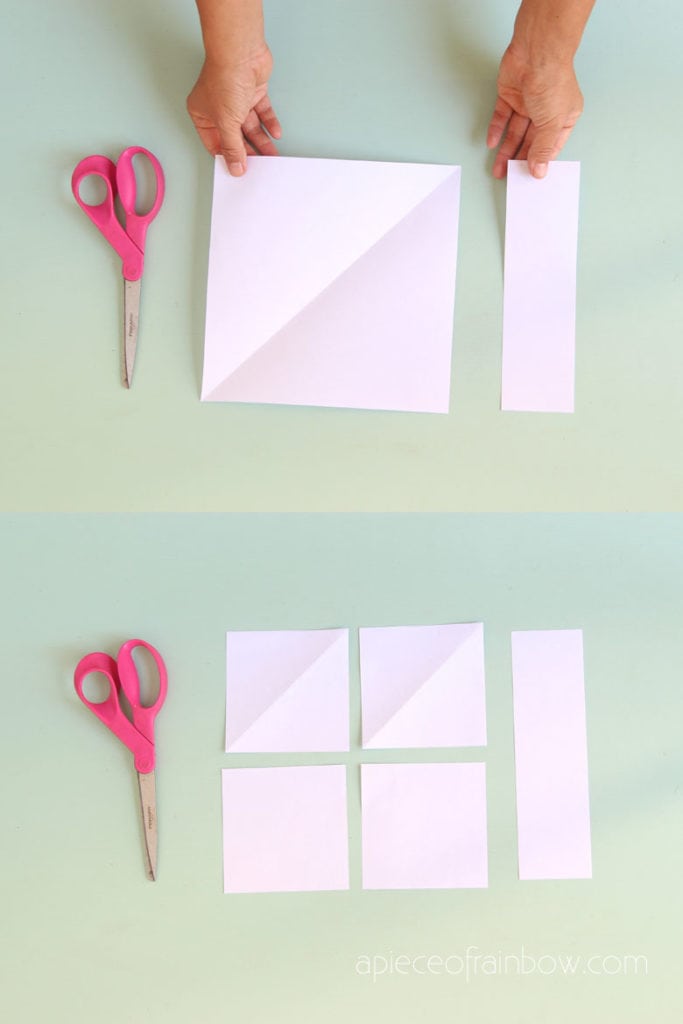
Our finished 3D snowflake measures about 12″ wide. If you want bigger snowflakes, start with bigger sheets of square paper.
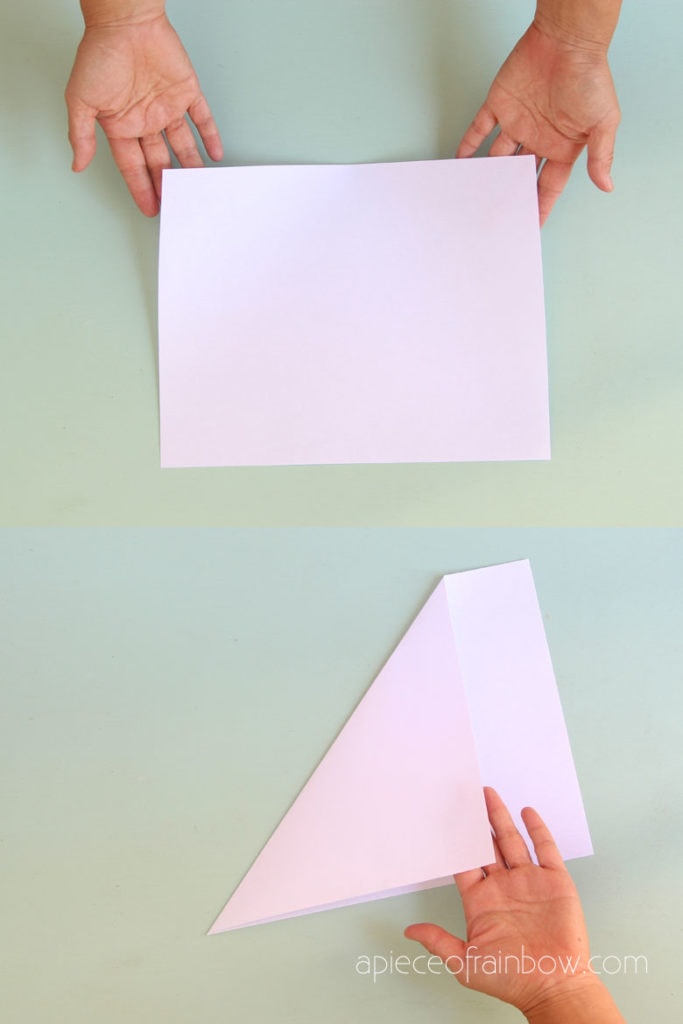
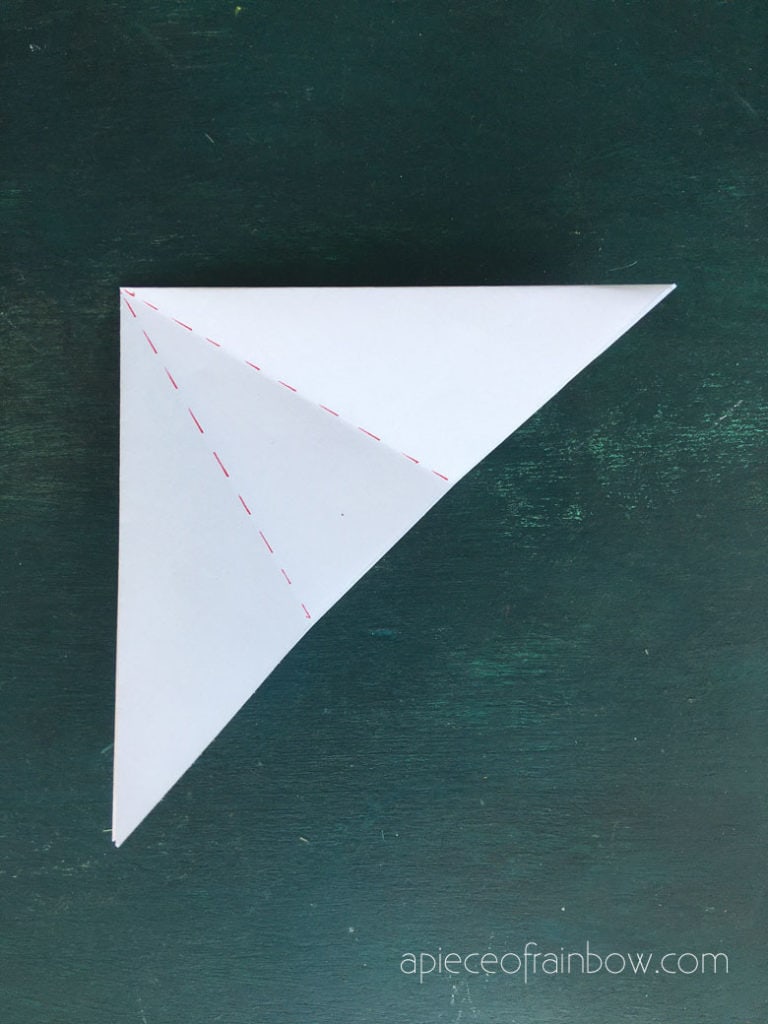
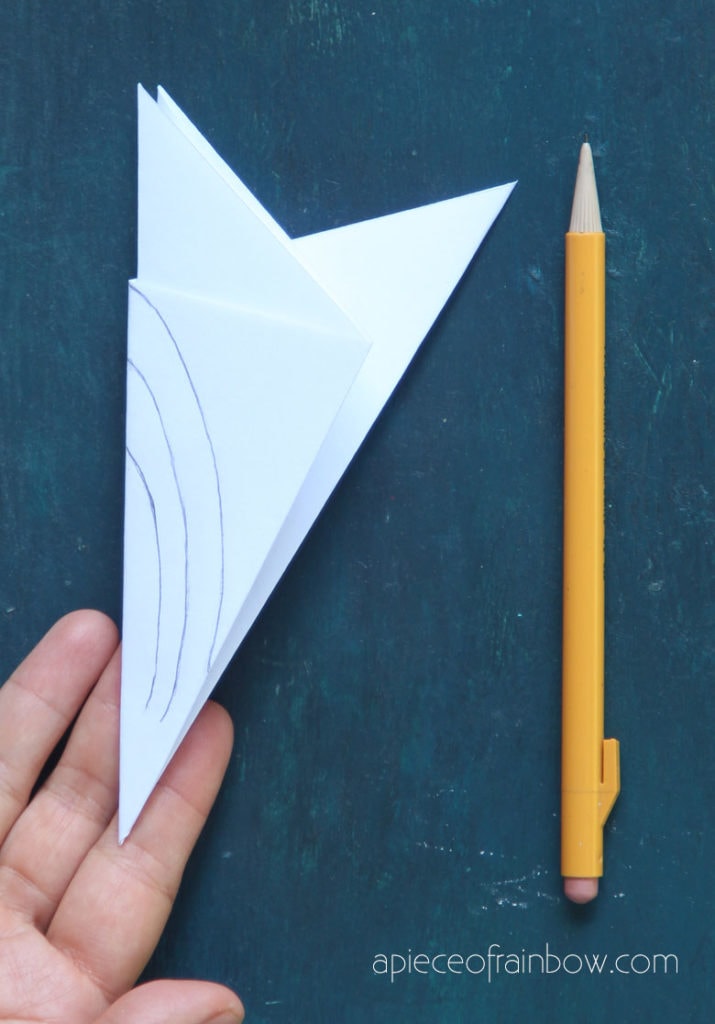
Fold the square diagonally in half to form a triangle. Fold the large triangle again in half to make a smaller triangle.
Step 2: draw and cut designs
Draw parallel lines on each small triangles as shown.
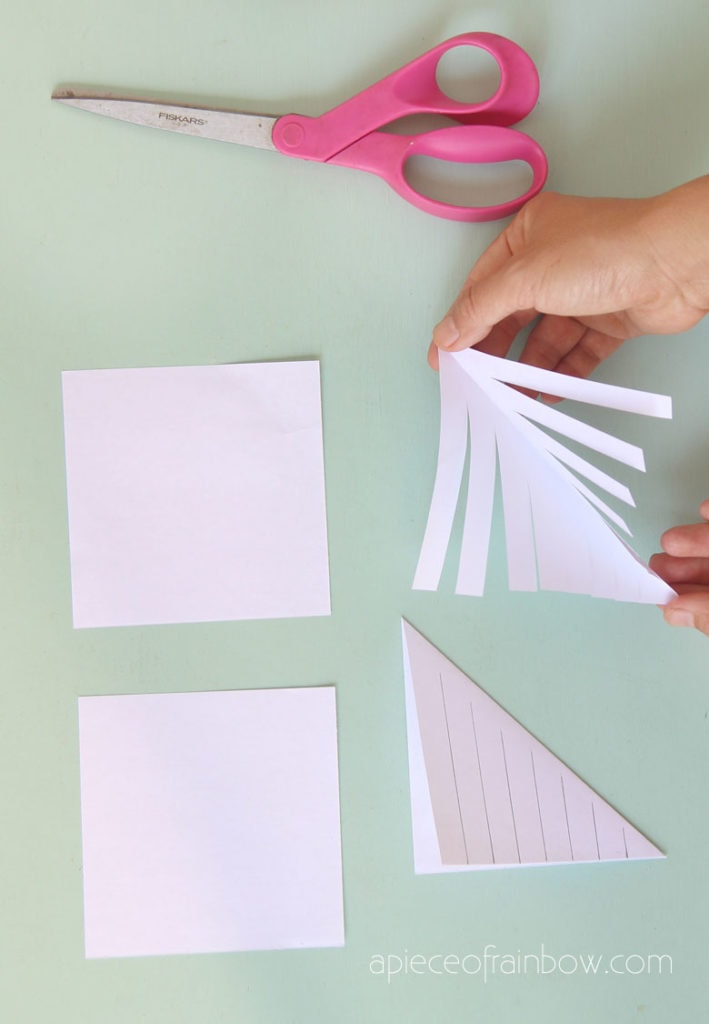
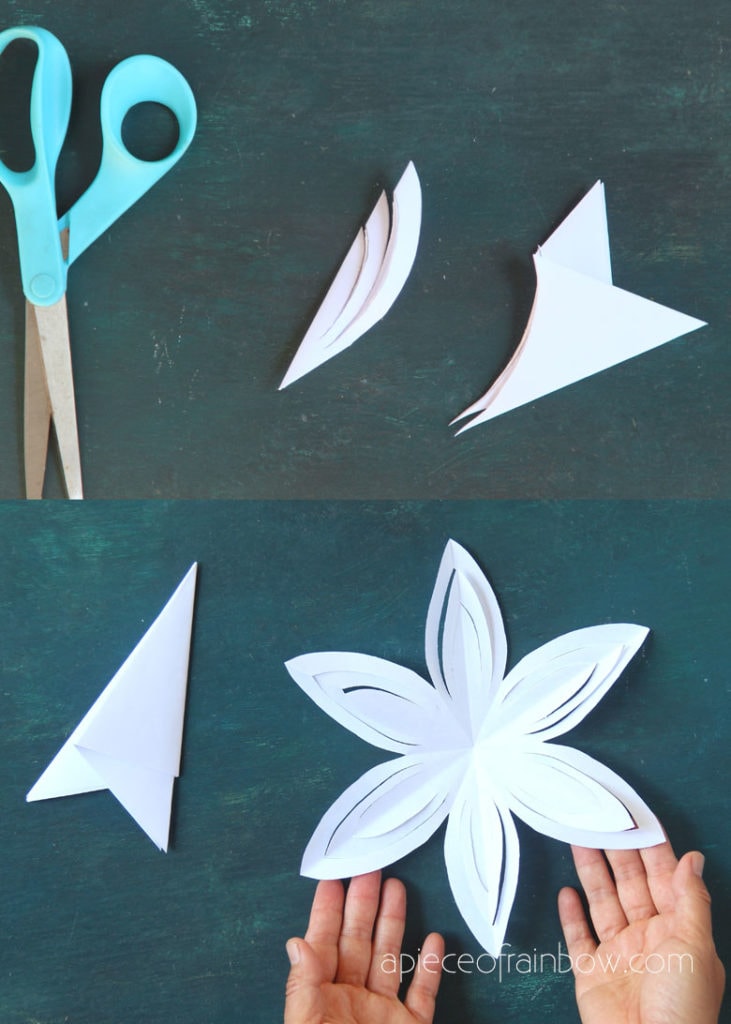
Cut along each line and stop before cutting through the entire triangle.
Step 3: glue 3D paper snowflakes
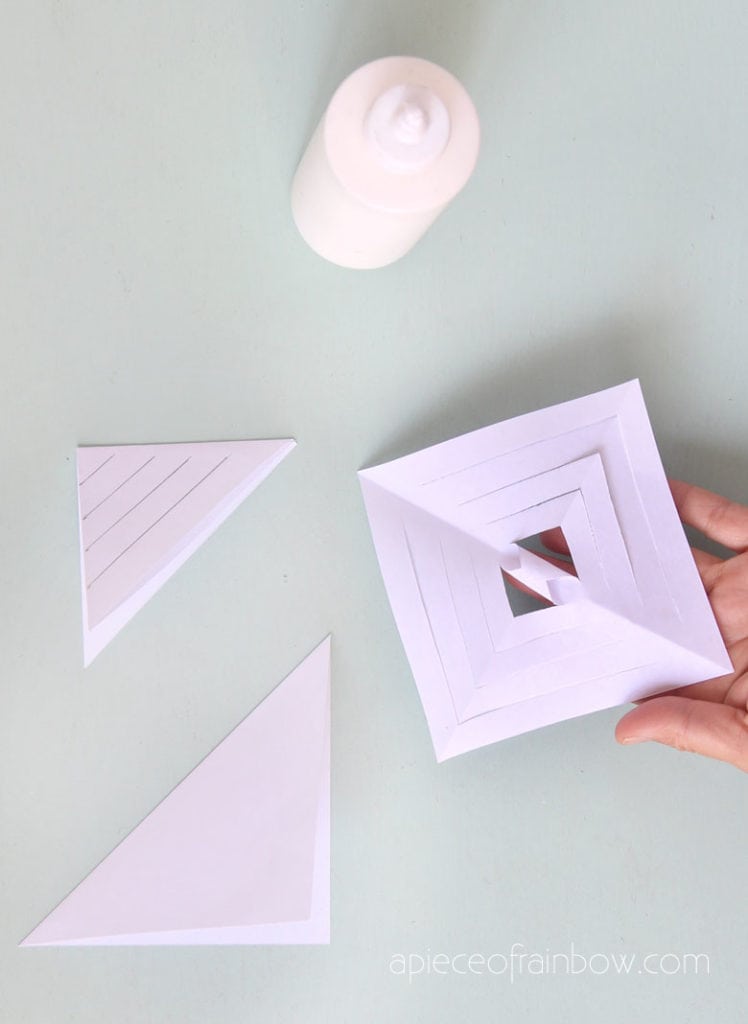
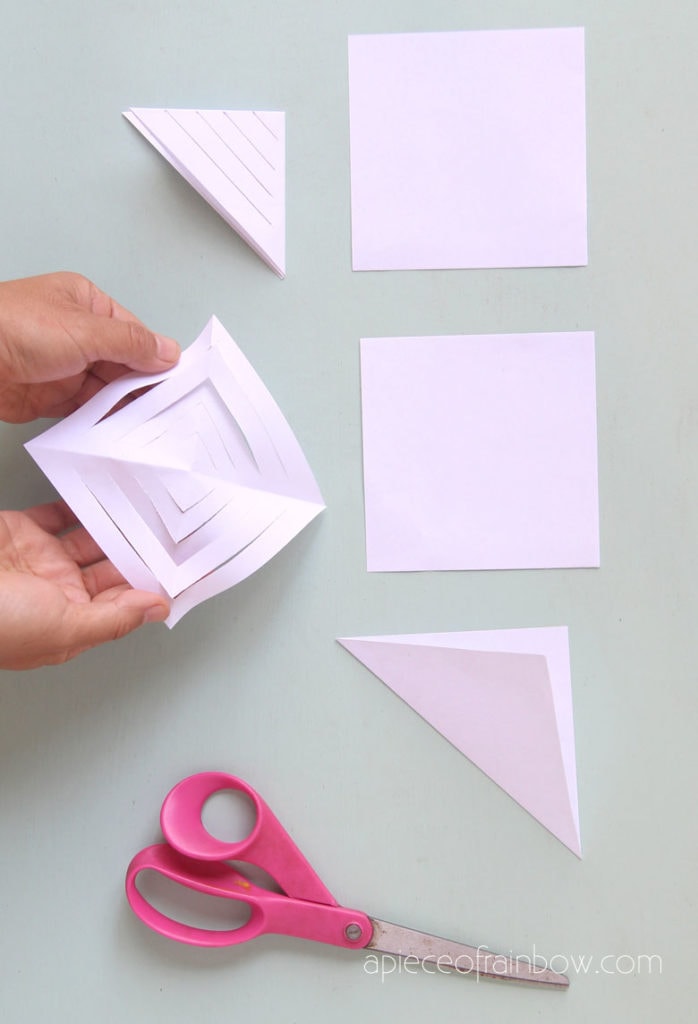
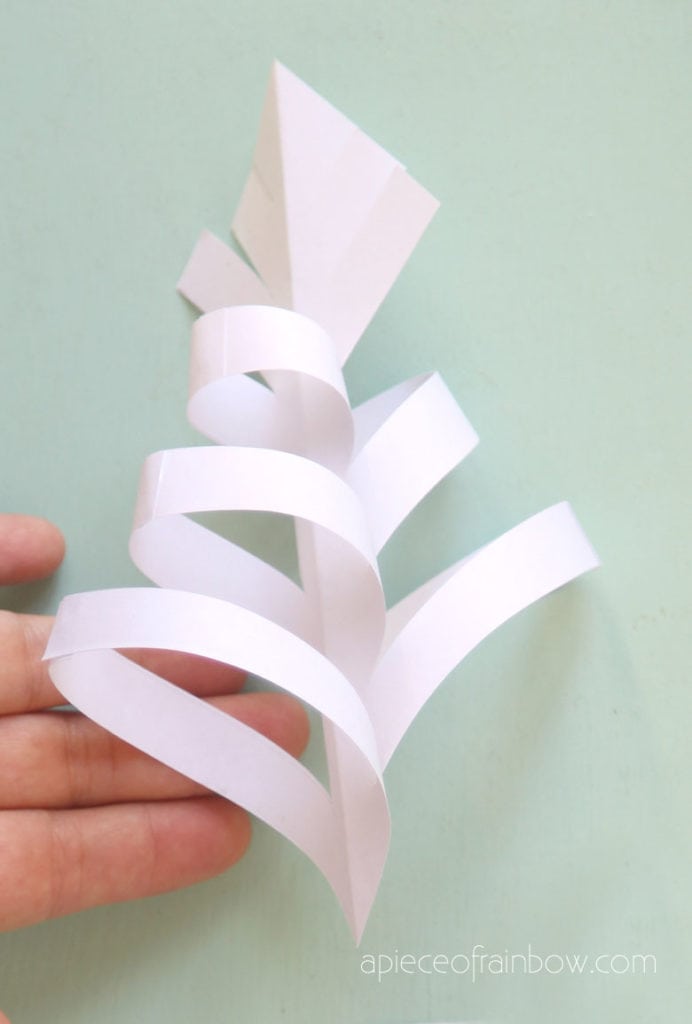
Unfold the square and glue the cut designs as shown in photos and video. It is easier to start at the center and glue the smaller pieces first.
The key is to alternate the directions each time you glue 2 opposite pieces together.
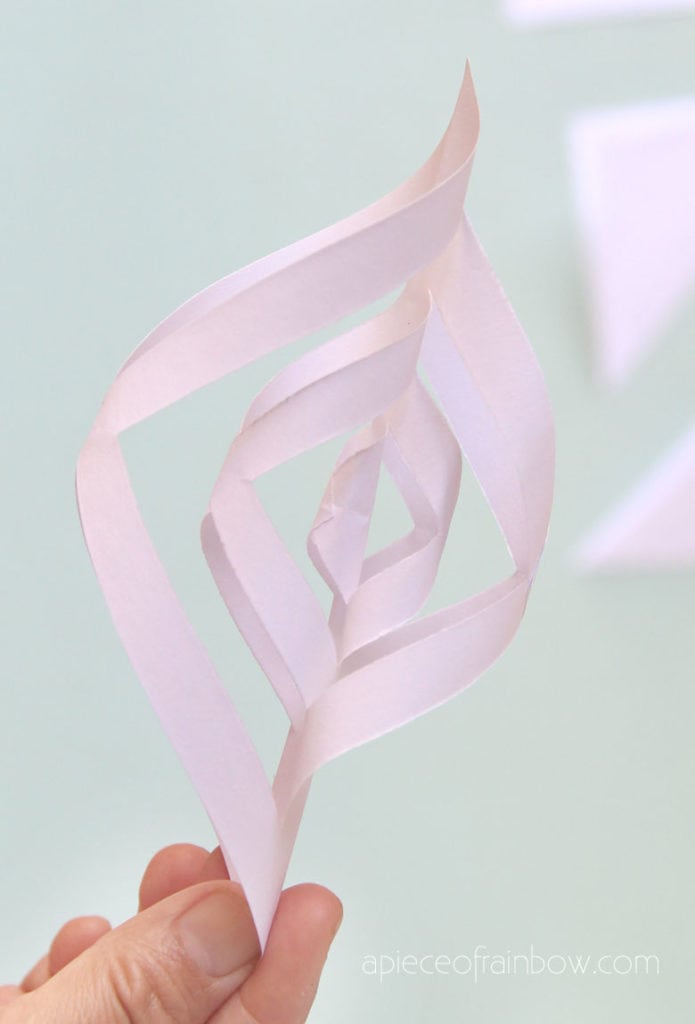
Now we have one of the 6 ” petals ” of the snowflake. Repeat the steps to make the remaining 5 petals.
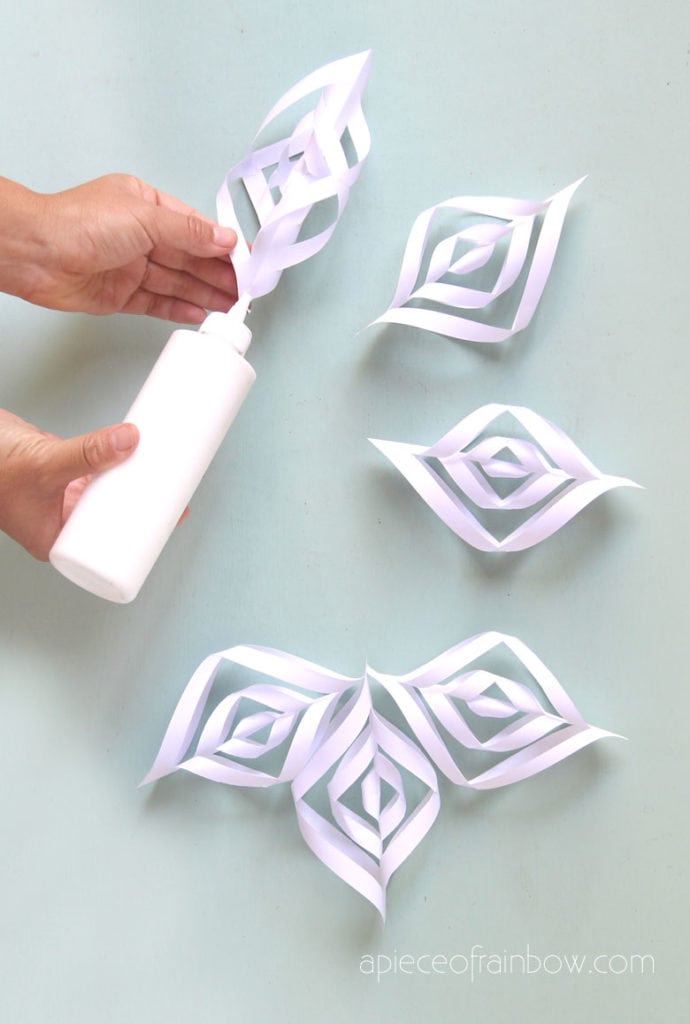
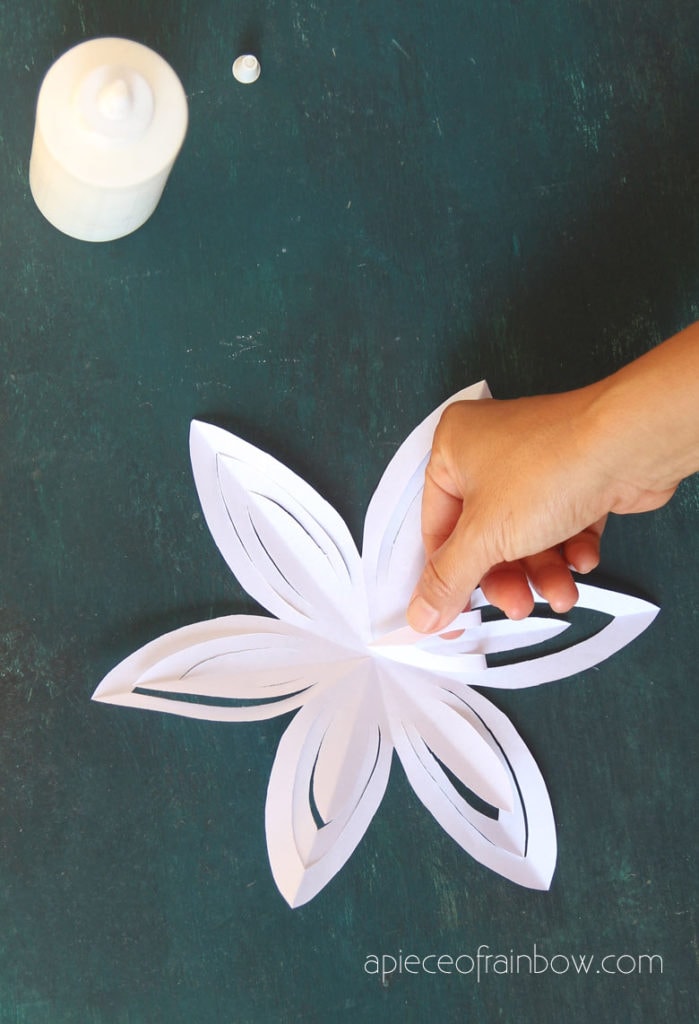
Next glue the center tips of all 6 petals together to create our 3D paper snowflake. You can glue them one by one, or as 2 groups of 3.
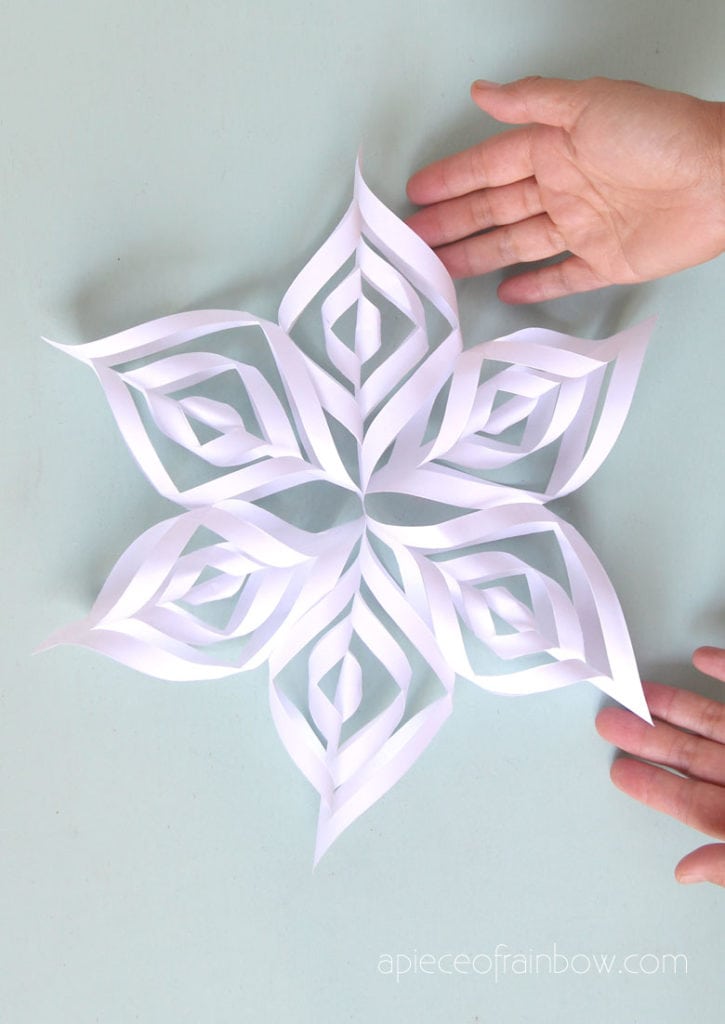
Now the 3D snowflake is complete. It’s very easy to attach a piece of ribbon or string to one of the tips so you can hang the snowflake.
Here’s the video tutorial for the second 3D paper snowflake, and written tutorial below.
The second 3d paper snowflake is very similar to the first one.
NOTE: This snowflake can be a little floppy when hanging. You can put a little dab of glue where each of the six petals touch, it would hold the shape nicely. Another idea is to consider using such as this card stock.
Instead of folding the triangle twice, we only need to fold it once.
After drawing the lines and cutting them, glue each pair of the cut strips at the end tips.

Just like how we made the first snowflake, alternate the directions you fold each pair.
Check out the video at top if you need more clarification.
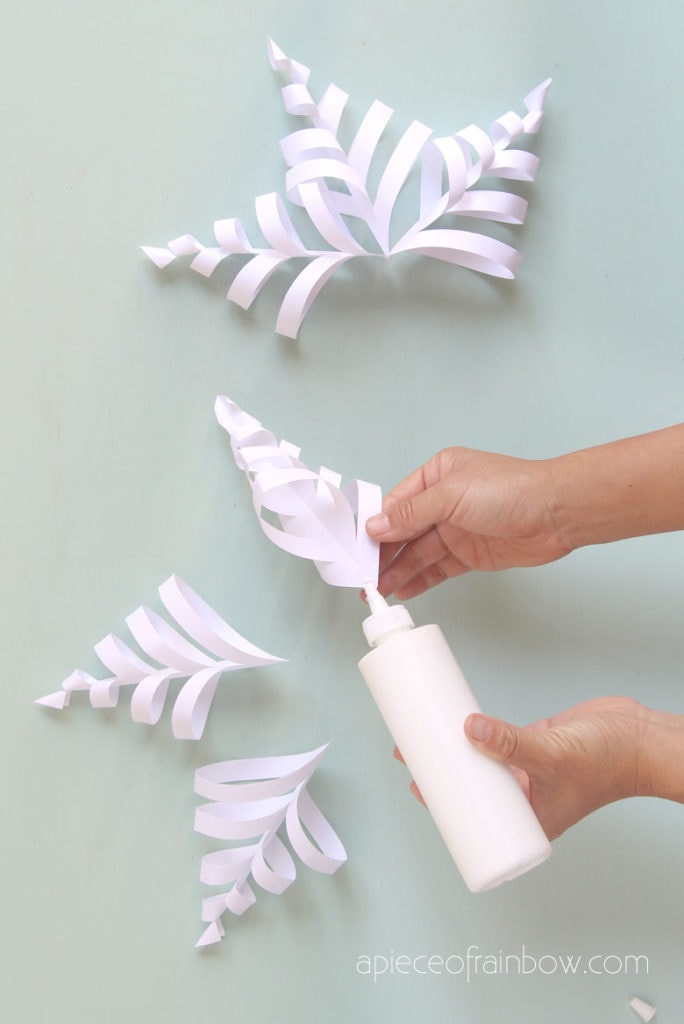
Make 6 of these ‘petals’ and glue them together at the center to form on large 3d paper snowflake.
NOTE: This snowflake can be a little floppy when hanging. You can put a little dab of glue where each of the six petals touch, it would hold the shape nicely. Another idea is to consider using such as this card stock.
Here’s the video tutorial for the third 3D paper snowflake, and written tutorial below.
The third paper snowflake is made with a different technique.
 It starts out the same way as how we made these 6 pointed snowflakes.
Fold a square piece of paper diagonally in half, then in half again to create a triangle. Fold in equal thirds into a wedge. Check out this tutorial or the video above if you need more details.
Draw and cut the design as shown.
Open up the wedge into a 6 sided paper snowflake.
Fold part of the cut piece in each petal, and glue the tips to the center of the snowflake to create a dimensional design.
You can use this 3d paper snowflake as is, or glue two of them back to back so the 3d details are visible on both sides.
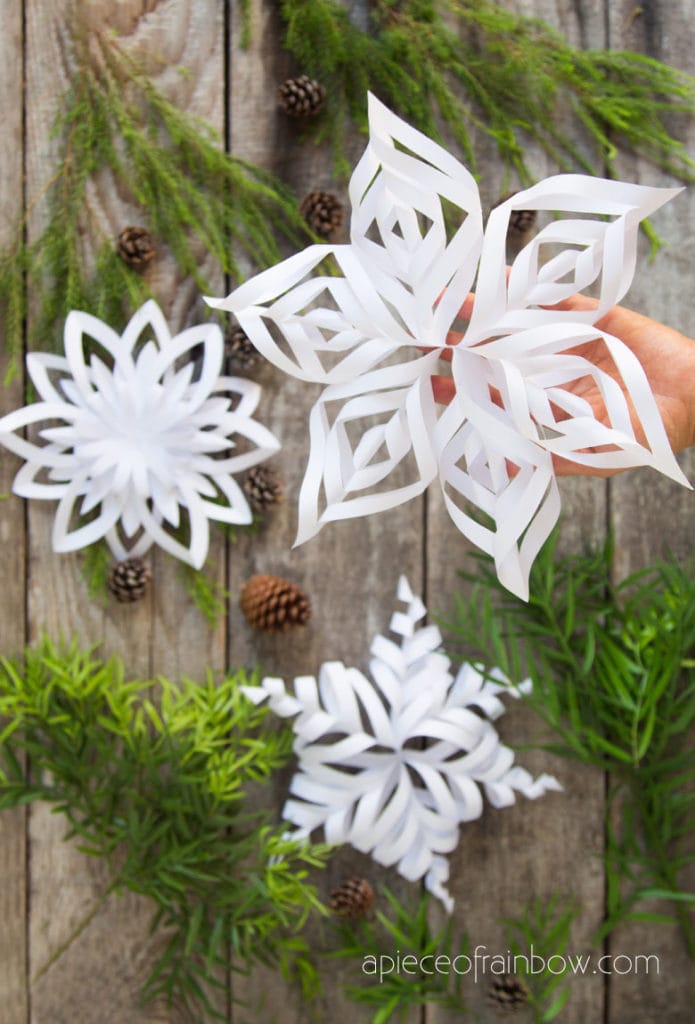
Here they are! We just finished making all 3 of our 3D paper snowflakes. Now it’s time to have fun with them in your winter and Christmas decorations!
In case you missed these, here are some more variations of 3d paper snowflakes we made a couple of years ago. Check out the tutorial here!
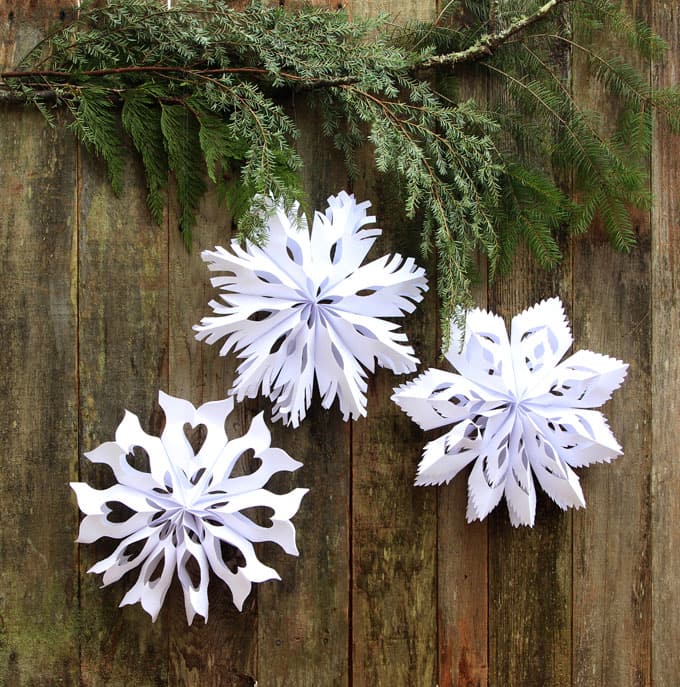 Check out the DIY snowflakes tutorial here.
Farmhouse DIY Kitchen Island ( an IKEA hack!)

Grow Beautiful Fiddle Leaf Fig (5 Best Care Tips!)

DIY Paper Mache Clay Pedestal Bowl
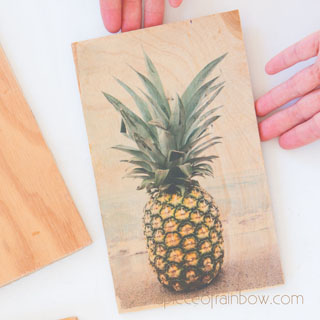
Best & Easiest Way to Transfer Images to Wood & Canvas

Fiddle Leaf Fig Propagation: 100% Success in 2 Easy Ways!
DIY Beautiful Large Wall Art {$5 & 1 hour!}

Wall Shelf From Faux Vintage Books

DIY Niche Shelf: Old Bathroom Medicine Cabinet Makeover

5 Minute Anthropologie Knobs Knockoff ( Beautiful Drawer Knobs DIY )

DIY Bed Frame & Wood Headboard ($1500 Look for $200!)
Easy DIY Pendant Light with Origami Lampshade