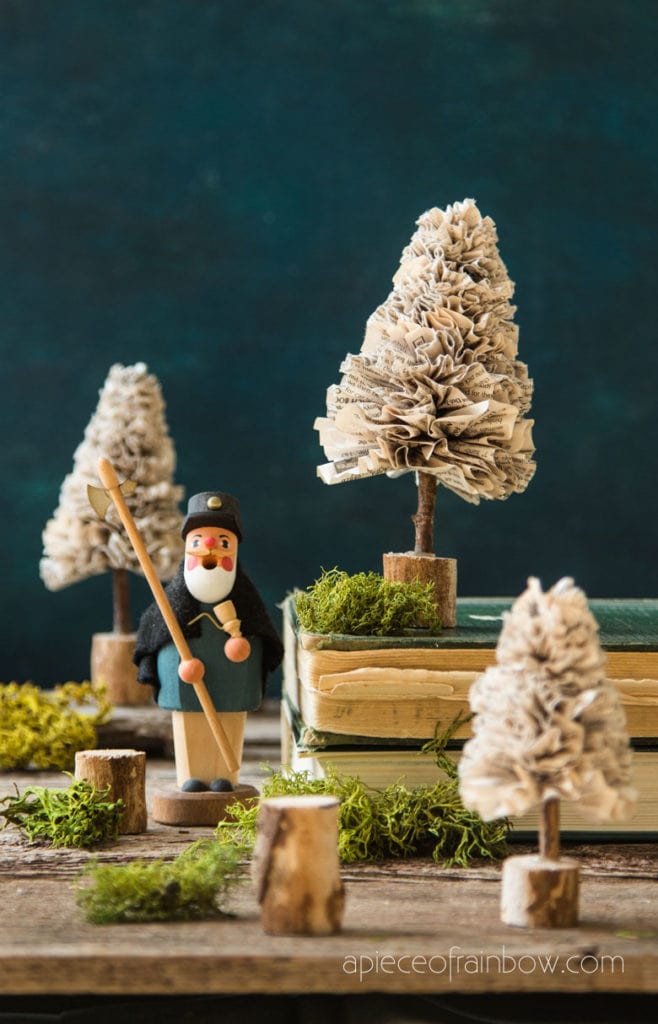
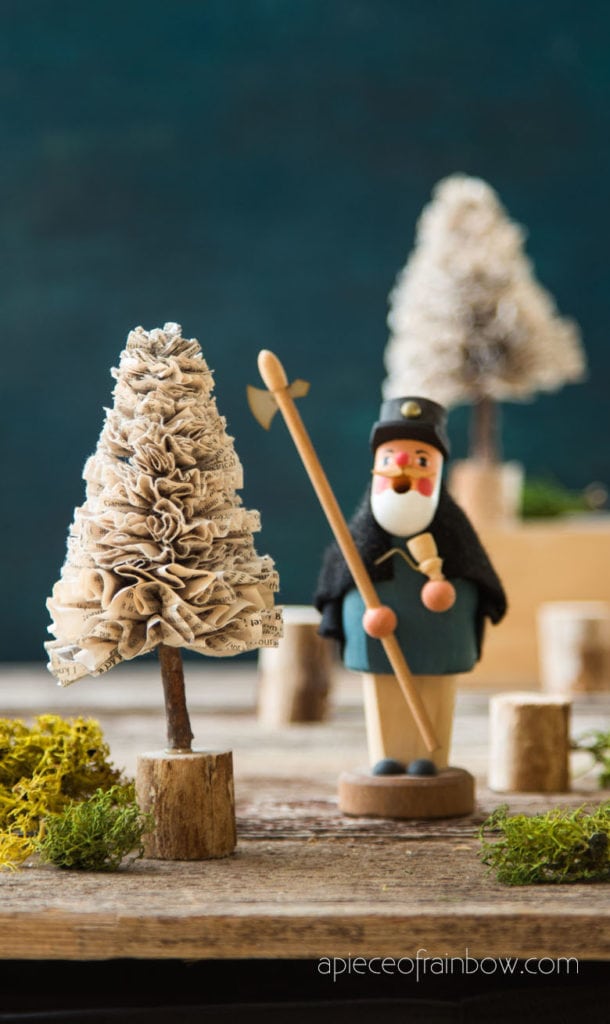
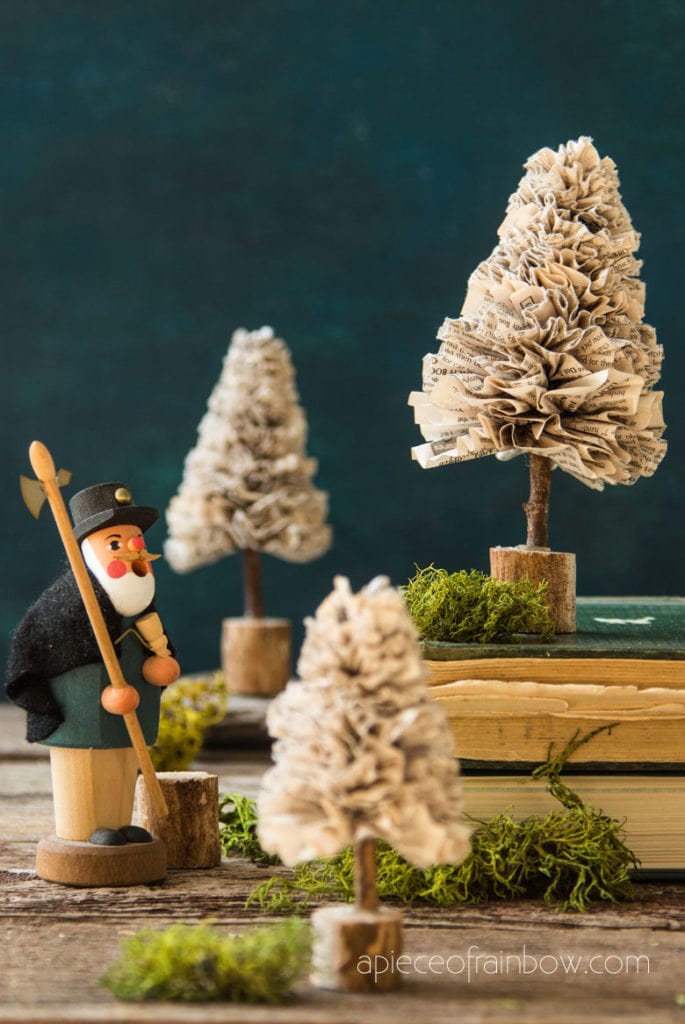
Make paper Christmas trees easily from up-cycled book pages, newspaper or magazines. Perfect Christmas decorations and easy paper crafts! They look great in so many styles from Scandinavian modern to vintage and farmhouse!
To celebrate the most wonderful time of the year, let’s make some paper Christmas trees from recycled magazines, newspapers, or old book pages!
If you love to create magical little Christmas villages or mini winter wonderland, you will love these these DIY paper Christmas trees!
You can use these paper Christmas trees with our DIY mini paper houses, tutorial and free templates here.
 DIY mini paper houses: tutorial and free templates here!
*Some resources in article are affiliate links. Full disclosure here.
More easy Christmas crafts and modern farmhouse decorating ideas:

DIY Tabletop Snow Flocked Christmas Tree: $1 in 10 Minutes

5 Minute DIY 3D Paper Star For Christmas & All Year

The Fastest & Easiest DIY Gift Bags from Gift Wrap or Any Paper {in 2 Minutes!}
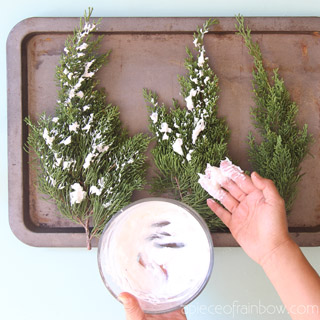
5 Minute DIY Snow Flocking: Best Easy $1 Recipe

DIY Christmas Candles: 3 Easy Decorations!

DIY $1 Farmhouse Decor Pine Cone Topiary

30-Minute DIY Christmas Candy Cane Wreath {with Free Material!}
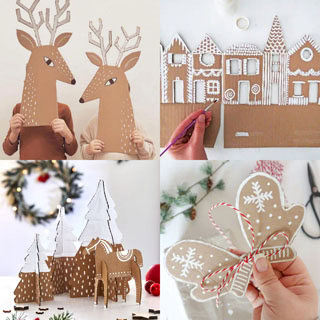
25 Amazing Cardboard Christmas Decorations & Crafts

Easy $1 DIY Snow Flocked Christmas Wreath

100+ Favorite Christmas Decorating Ideas For Every Room in Your Home : Part 2

18 Ingenious DIY Christmas Trees For Any Space

$1 Farmhouse DIY Tabletop Christmas Tree
Table of Contents
- Materials and tools to make Paper Christmas trees
- Make it portable
- Step 1: Cut paper strips to size
- Step 2: make ruffled paper discs / rosettes
- Step 3: glue and trim rosettes into paper Christmas trees
- Step 4: attach trunk and base to DIY paper Christmas trees
- Additional tips:
Materials and tools to make Paper Christmas trees
- paper: any kinds such as recycled paper, colored paper, scrapbook paper, etc
- tree base: small twigs, slices of bigger branches (cut with a hand saw or miter saw), you can also buy wood mini logs or wood discs
- scissors and glue: craft glue, and hot glue gun to attach the base
Make it portable
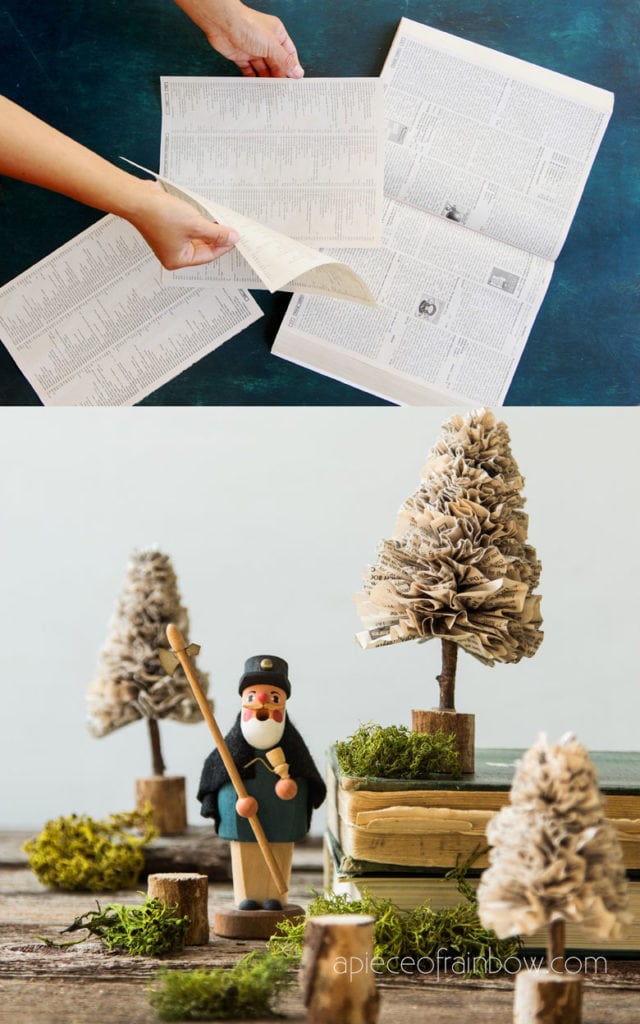
Step 1: Cut paper strips to size
Our DIY paper Christmas trees (not including tree trunks and base, which adds 2″ in height) are about 2″ to 3″ diameter at the base, and 3″ to 4.5″ tall.
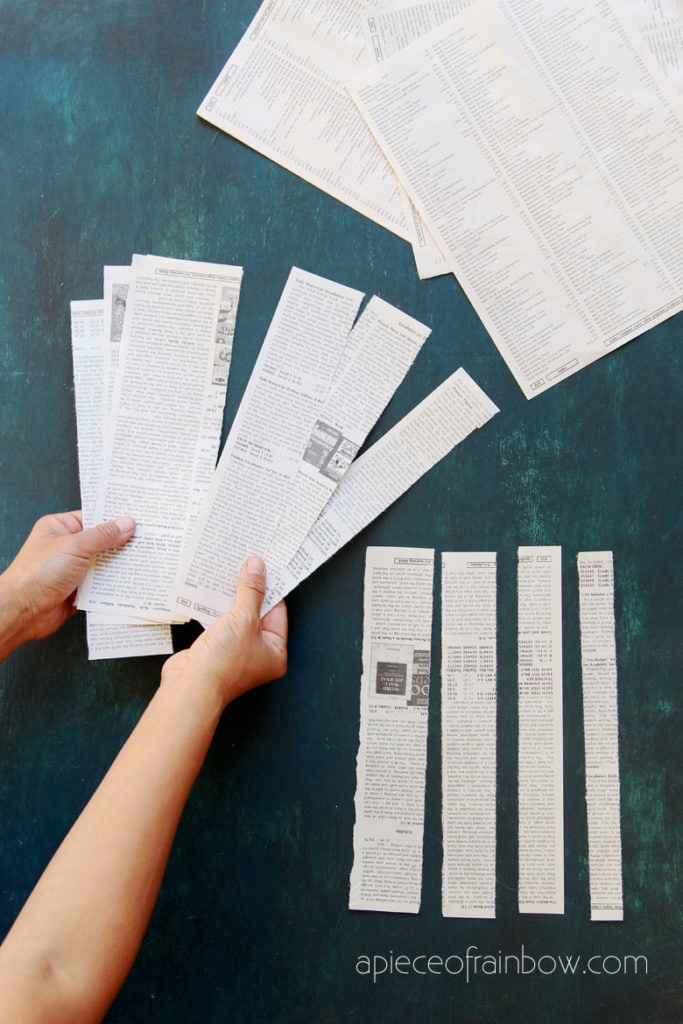
The following measurements are based on a 3″ wide and 4.5″ tall paper tree. You can adjust them to your paper tree size.
Cut 7 paper strips, each at 11″ long, starting at 3″ wide, decreasing every 0.25″ to 1.5″ wide. Then cut another 4 or 5 pieces of paper strips at 1.5″ wide by 11″ long. This is because it is much easier to fold wider paper strips then cut them, than to fold really narrow paper strips, as you will see in next step.

You may also love: 5-minute DIY paper Christmas ornaments with free patterns!
 5-minute DIY paper Christmas ornaments with free patterns!
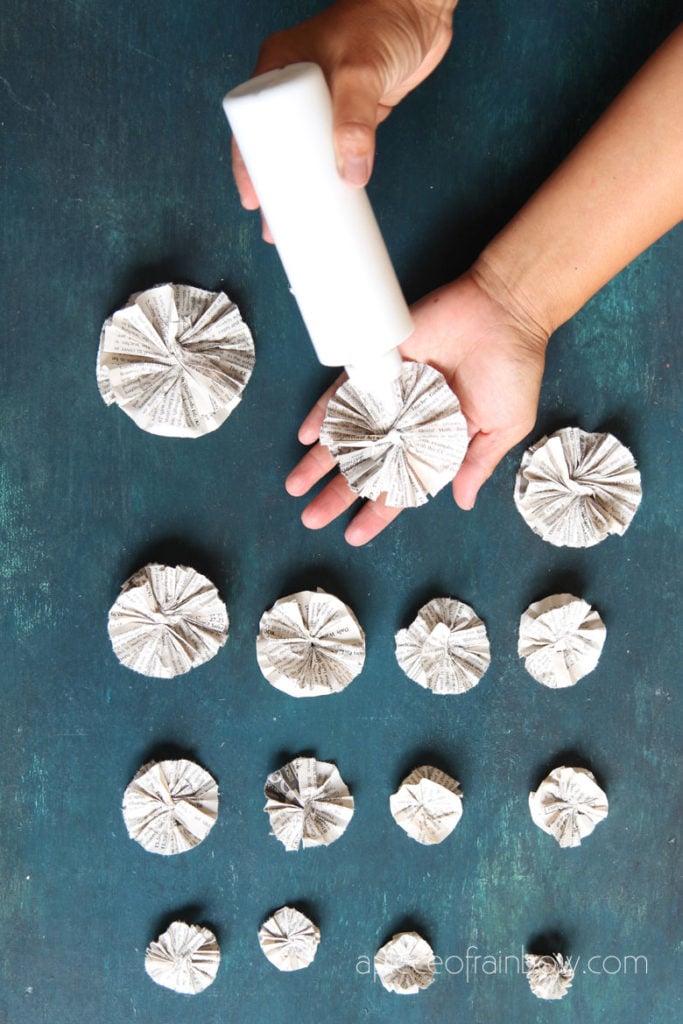
Step 2: make ruffled paper discs / rosettes
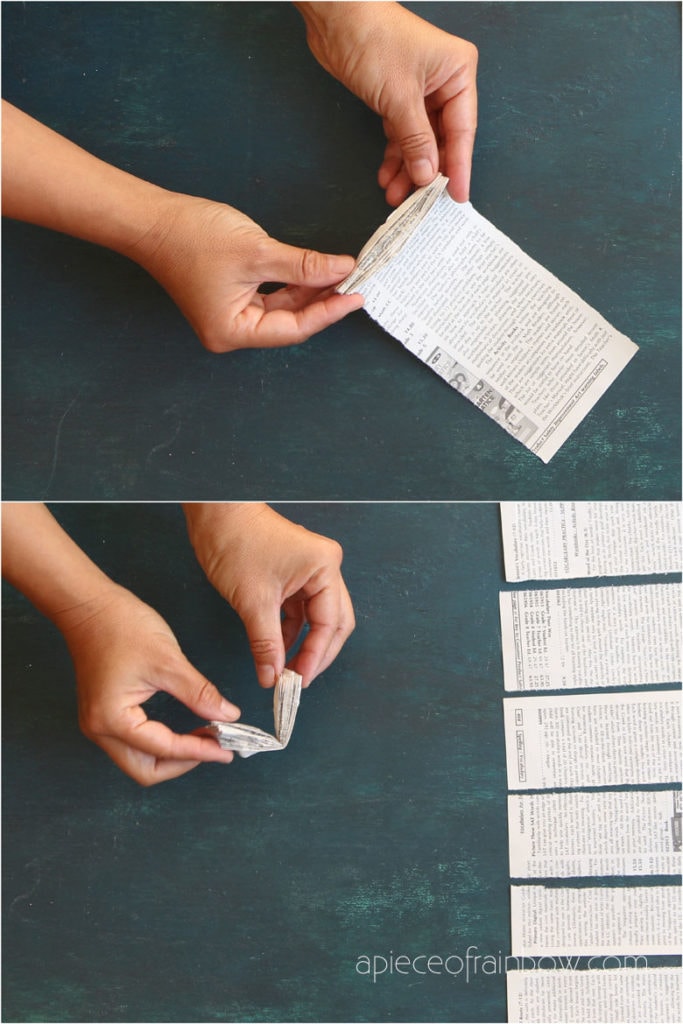
Take a paper strip and Create small accordion folds. It does not have to be perfect can also layer two three paper strips together when folding, and separate them after to make this step faster.
Next find the mid point of the folded paper strip by folding it in half, put some glue in this area, and twist once to make a butterfly shape. The glue will help hold the shape together.

Pinch the middle as you open the folds to form a rosette. See video tutorial above Step 1 if you are not sure about this step.
As the paper strips get narrower, it becomes harder to fold and twist, which is why we are making several 1.5 inch wide strips into rosettes first, and trim the paper discs / rosettes later into smaller ones towards the paper Christmas tree top.
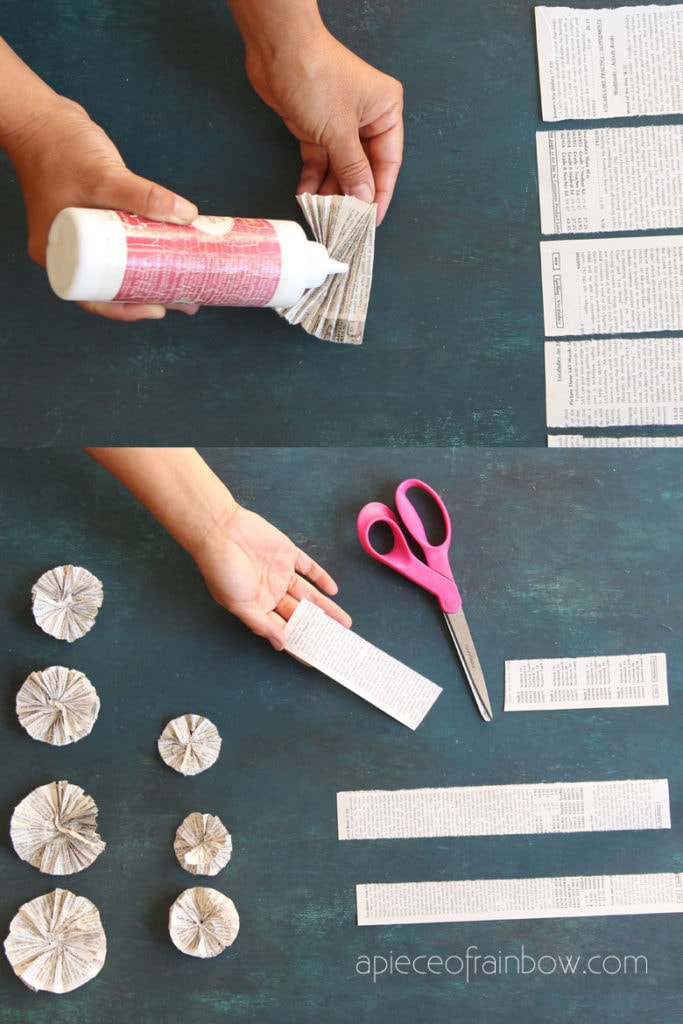
It is also helpful to cut the narrower paper strips into half length and make two rosettes instead of a really thick one.
Step 3: glue and trim rosettes into paper Christmas trees
Stack the paper discs / rosettes to form a Christmas tree shape, starting at the base with the largest rosette. Add a dab of glue or hot glue at the center of each ruffled paper disc as you stack them, and push it down to attach to the previous one.

Once you finish stacking and gluing, trim the tops of the paper Christmas trees to a pointy shape.

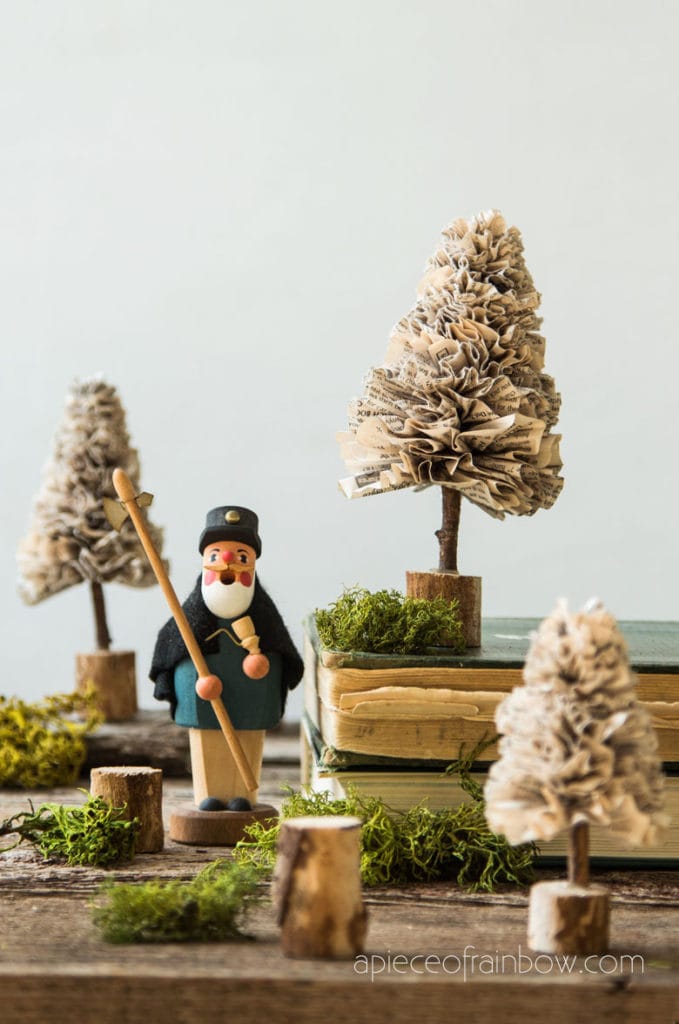
Step 4: attach trunk and base to DIY paper Christmas trees
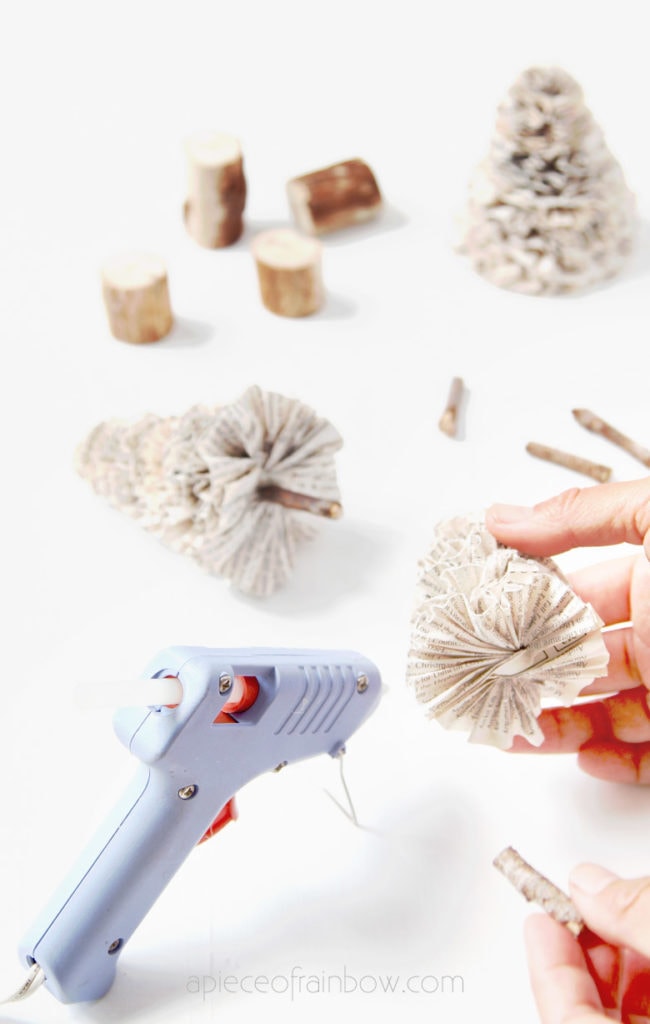
Cut some twigs or small branches into pieces that are 1″ to 2″ long, and use hot glue to glue the to the bottom center of the paper trees as tree trunks.
Next, hot glue the base of the tree trunks to larger wood discs or cubes to give each tree a stable base.
Additional tips:

You can play with how many paper rosettes of each size to stack. This will change the tree shape and height.
As mentioned in Step 2, because it harder to fold and twist very small rosettes, we made several 1.5 inch wide strips into rosettes first, and trim the paper discs / rosettes later into smaller ones later for the paper Christmas tree top.
 Easy & Free DIY Magnolia Wreath
  The Easiest DIY Christmas Swag Ever
  Make 3D Paper Snowflakes: 3 Free Templates!
  DIY Tabletop Snow Flocked Christmas Tree: $1 in 10 Minutes
  Easiest 5 Minute “Bleached Pinecones” {without Bleach}
  5 Minute DIY Snow Frosted Mason Jar Decorations {Magical!}
Happy creating! See you soon!