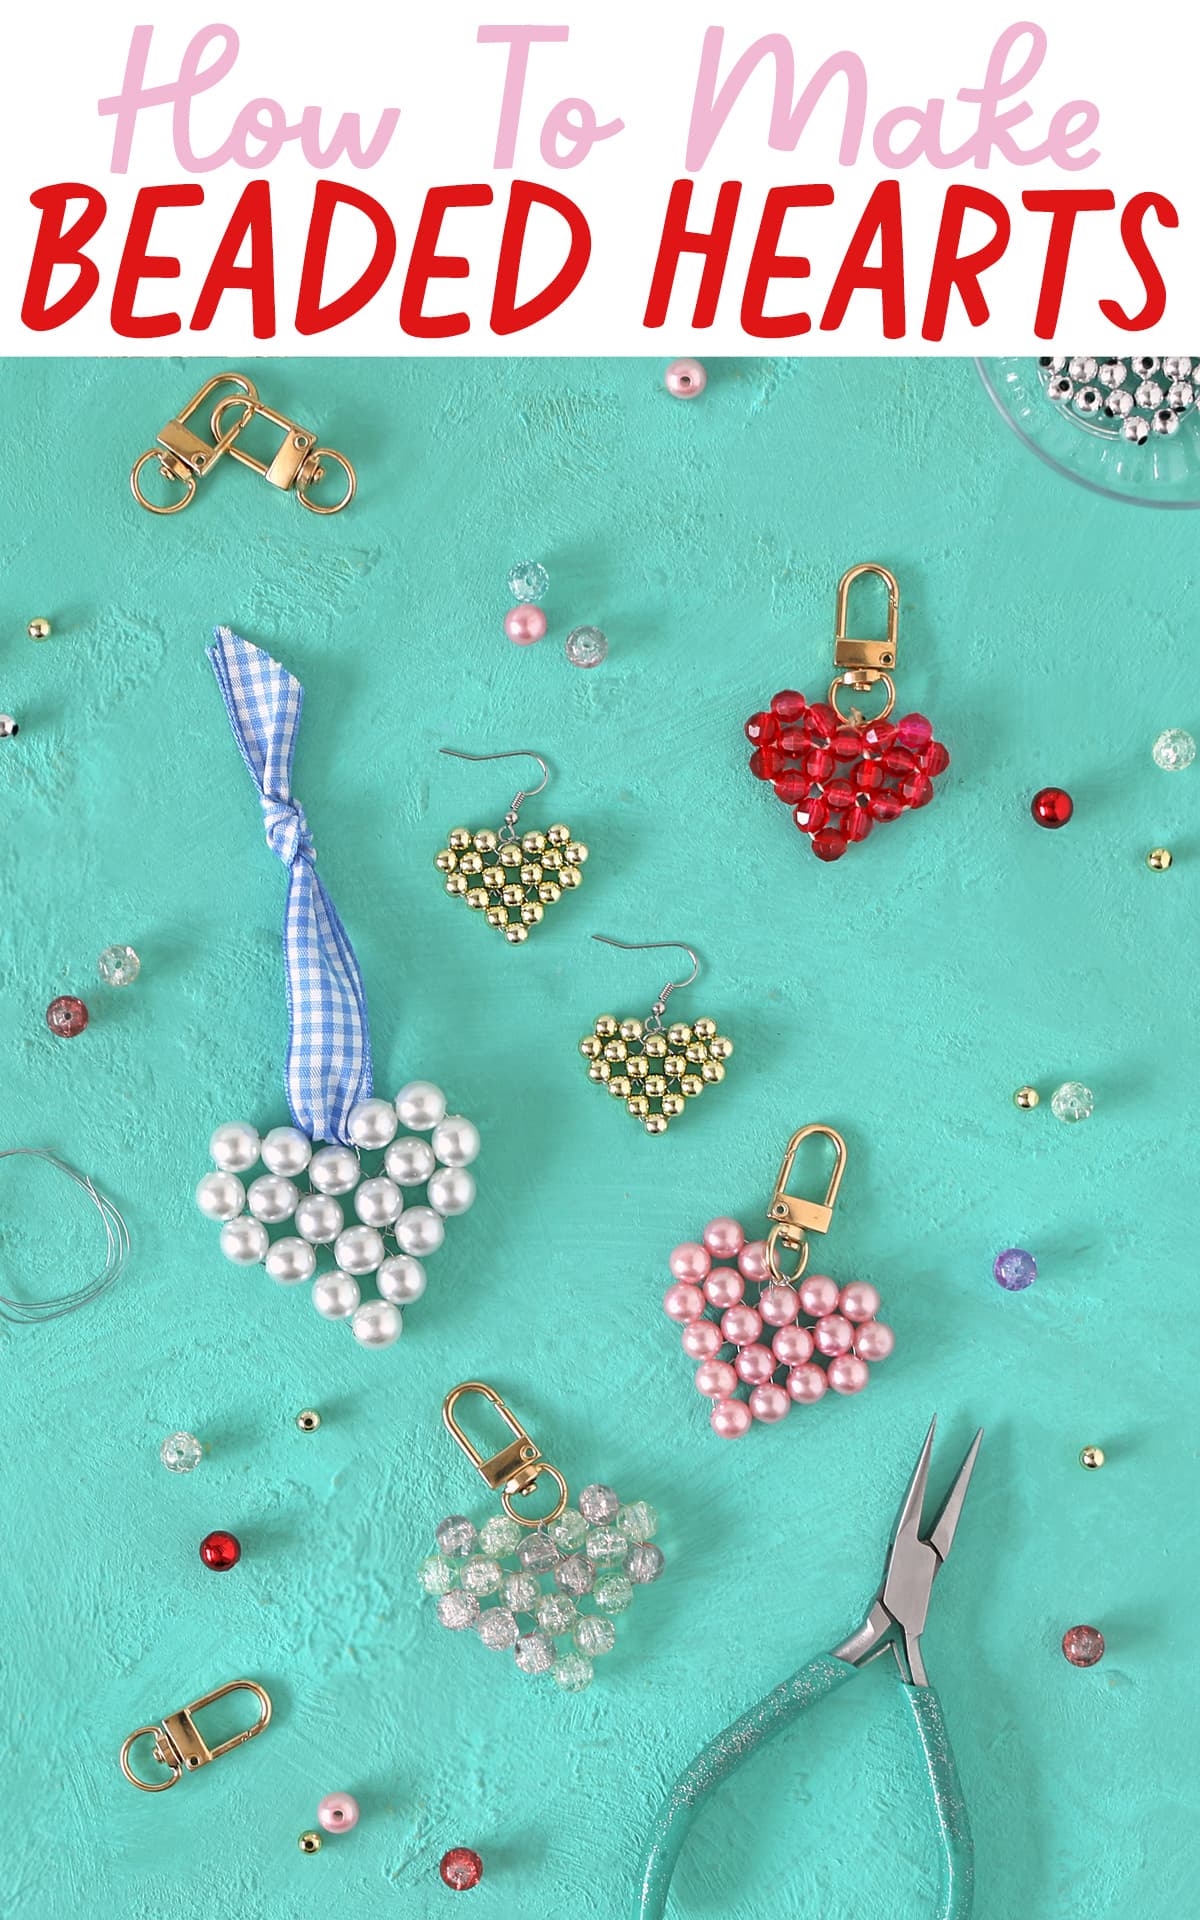
Learn how to make heart-shaped beaded charms with the help of this step-by-step photo and video tutorial.
Hello crafty friends! I’ve got a fun and simple bead craft to share with you today. I’m going to show you how to turn any kind of round beads into the cutest heart shaped charms.
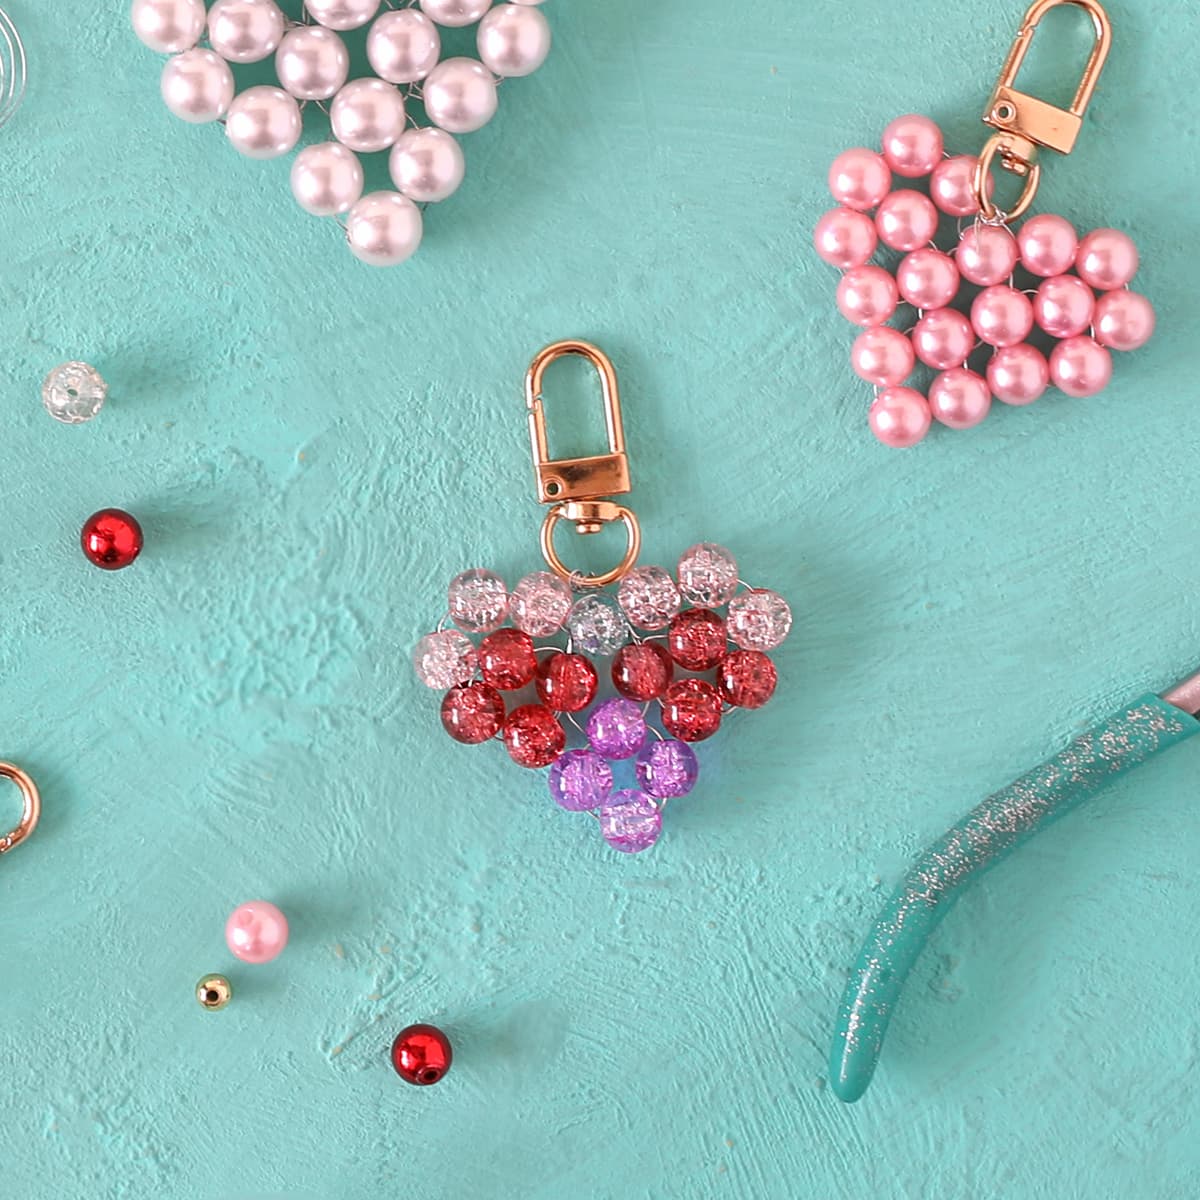
You can use these darling little hearts to make cute earrings, keychains, pendants or anything else you can dream up. You only need a few supplies and once you learn how to do it, you can whip these cutie pies up in less than 30 minutes.
Let me walk you through exactly how to make them. Here are the supplies you will need:
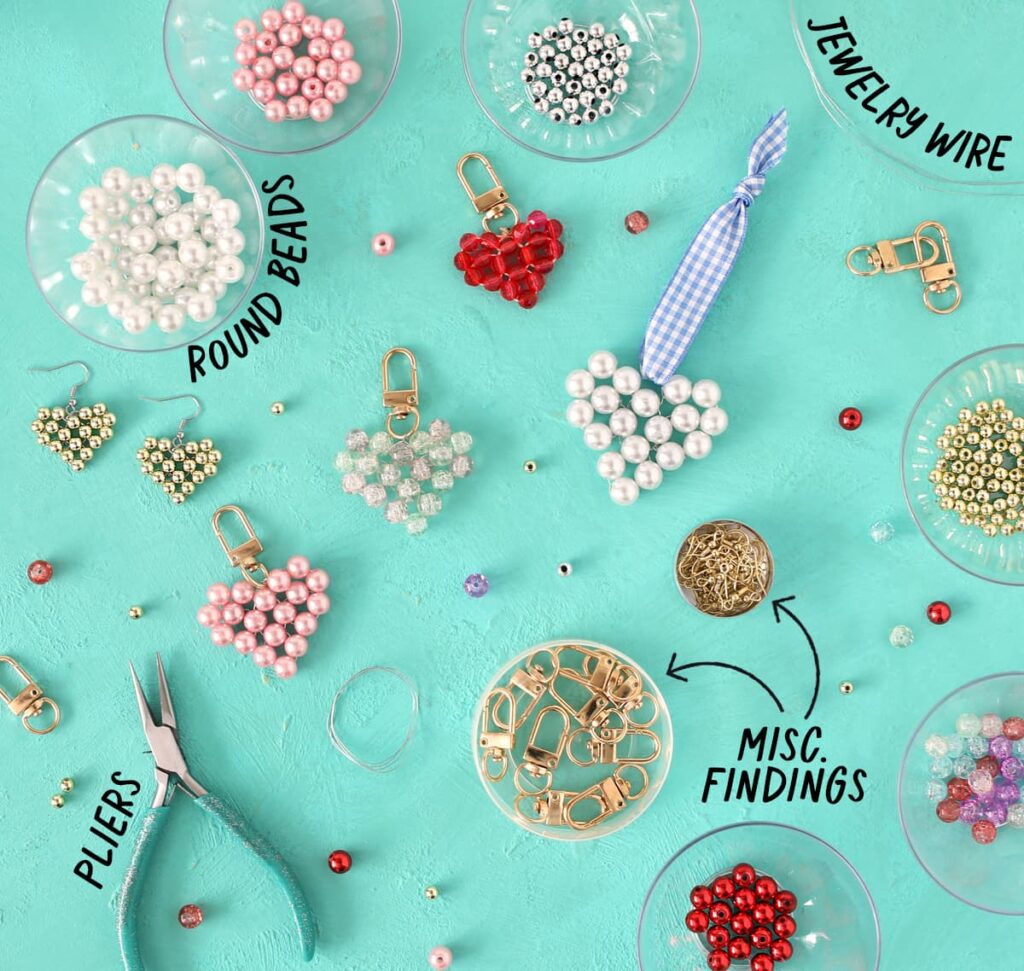
Materials Needed
- Round Beads
- Jewelry Wire – 26 gauge
- Jewelry Pliers
- Keychain Clasps, Earring Hooks or Other Jewelry Findings
You can use any size or style of round bead for this craft, but I do recommend pretty thin jewelry wire because you will need to be able to run the wire through the bead holes several times to be able to complete the design.
The bigger the bead you use, the larger your finished heart will be.
Instructions
This is definitely one of those projects that are hard to describe but easy to understand once you see someone do it, so I recommend scrolling down to watch the video tutorial.
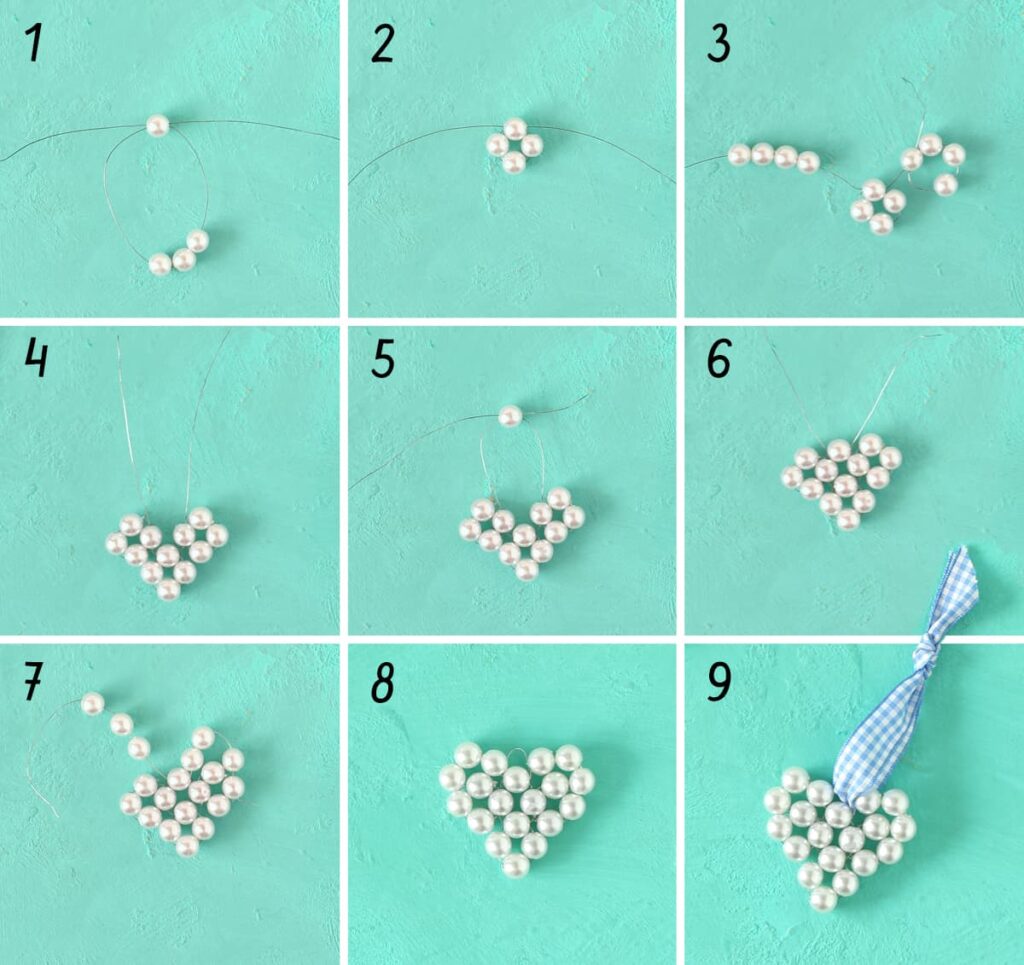
I will do my best to give written instructions too though! Here is an overview photo of each step.
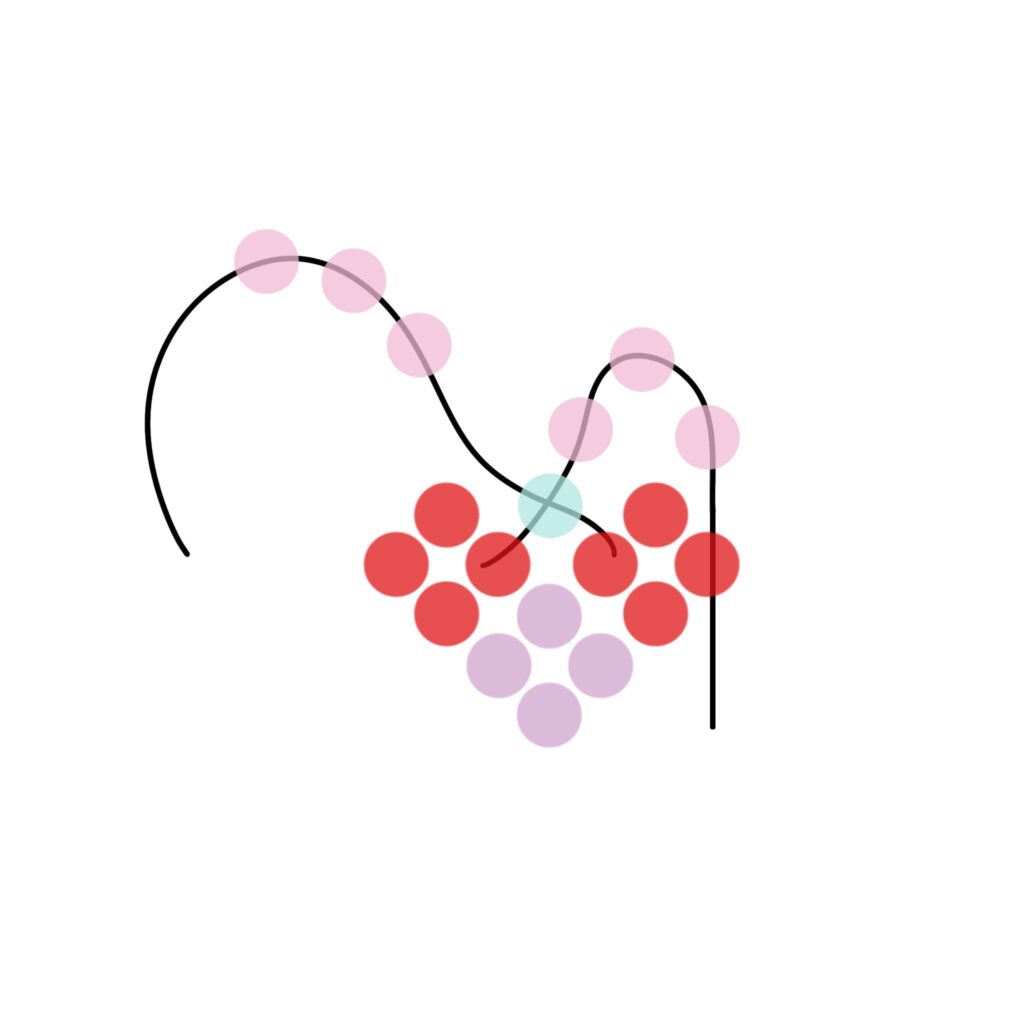
I drew a diagram for each step as well because I think it makes it easier to see what’s happening. The different parts of the heart are illustrated in different colors to help you understand the different steps.
Step 1: Cut an 18- 24 inch length of jewelry wire. If you are using extra large beads, you may need more. If you’re using small beads, you may need less. Always better to have extra length than it is to run out before you’re done.
String 4 beads onto the wire. String the wire back through the last bead going the opposite direction.
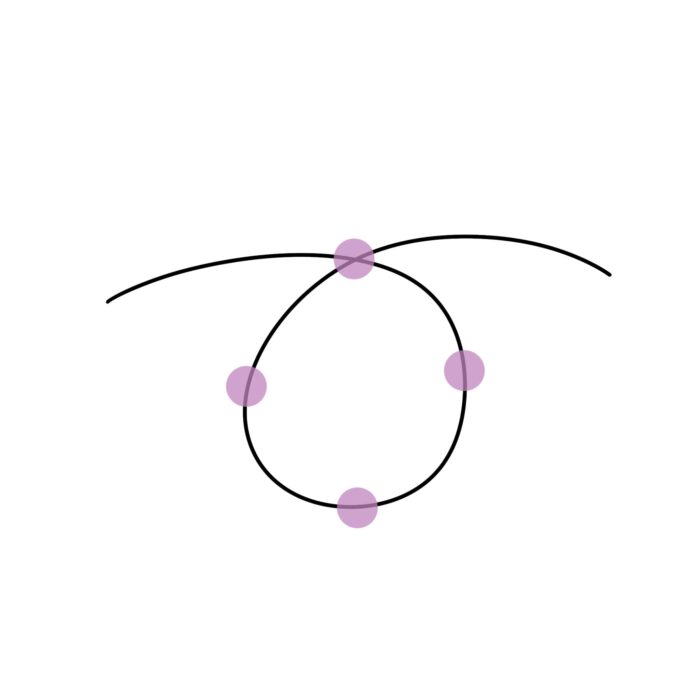
Step 2: Pull the beads tight, keeping the two wire tails even on both sides.
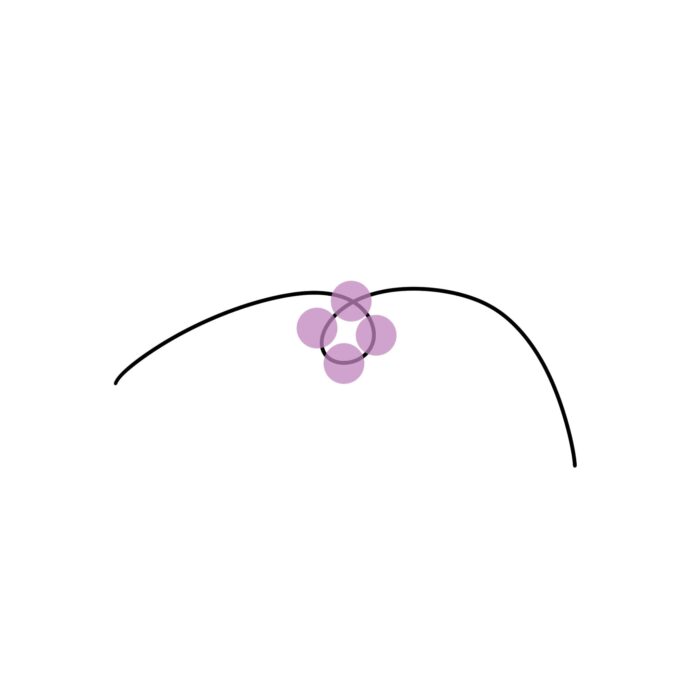
Step 3: String four new beads onto one wire. Loop the wire back through the first bead and pull until the beads sit flush and all the wire slack is taken up.
Repeat on the other side.

Step 4: This is what your heart should look like at this point with three different groupings of four beads each.
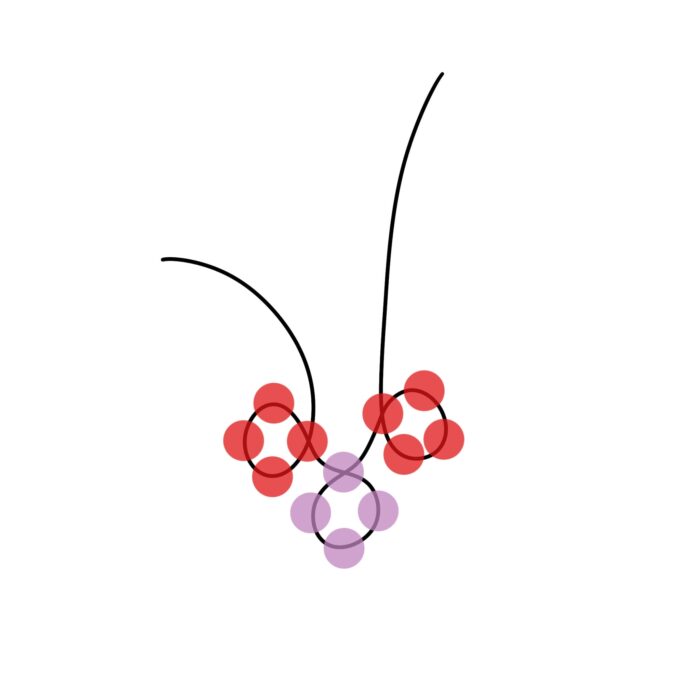
Step 5: String one bead on one side of the wire, then insert the other wire going through the bead in the opposite direction.
Step 6: Pull on both wires until everything sits smoothly.
Step 7: String three new beads onto one wire, then loop the wire end down through the outermost bead. This will form the curved top part of the heart. Repeat on the other side.
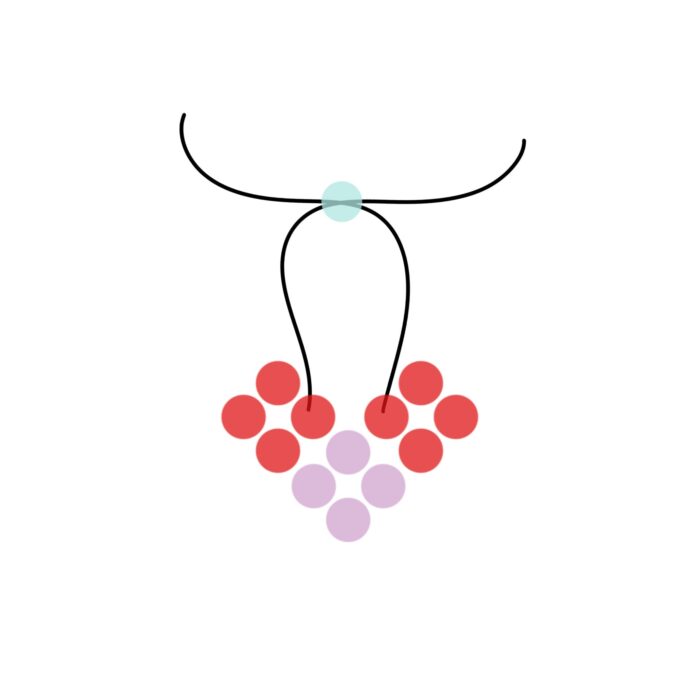
Step 8: Your heart shape is now complete and you just have one last thing to do. Weave the remaining wire ends back through the beads until you get to the top center of the heart. This is where you need both wires to end so that you can attach your keychain or earring or whatever.
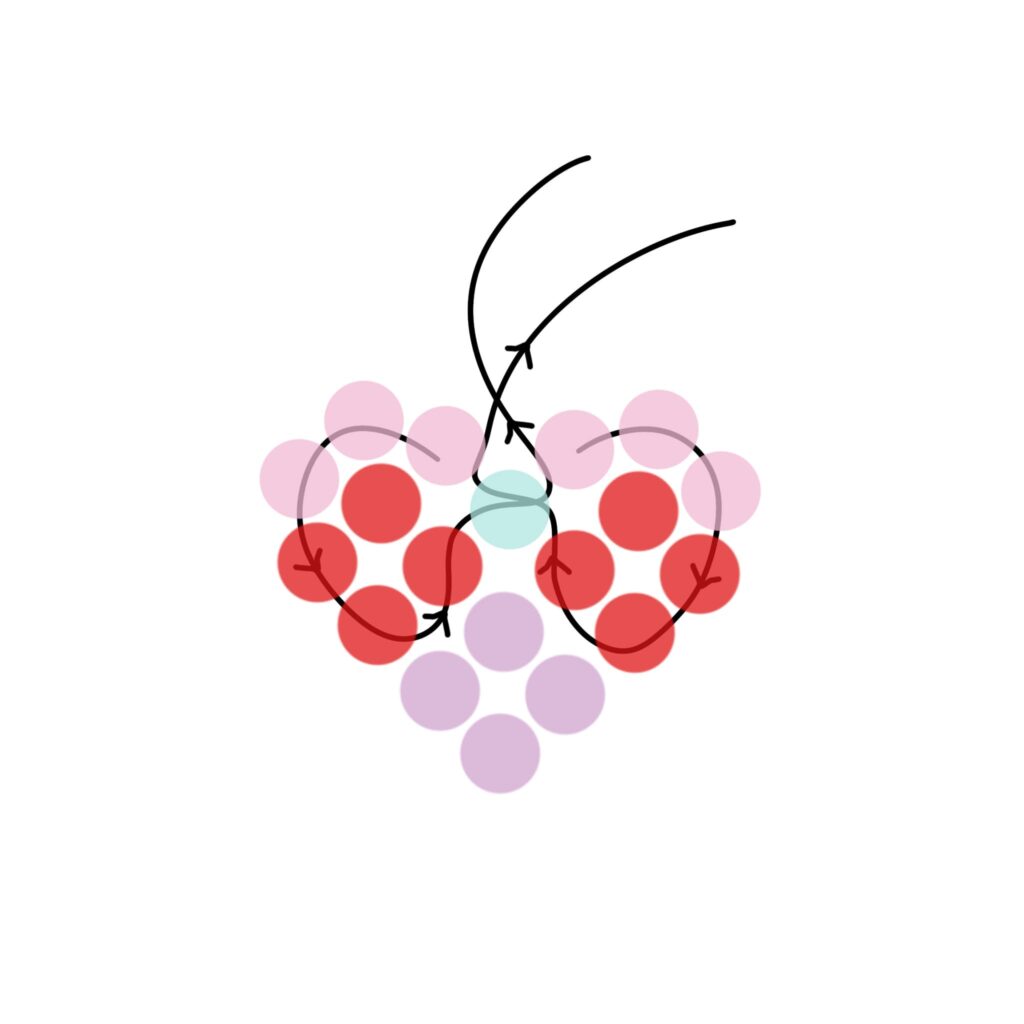
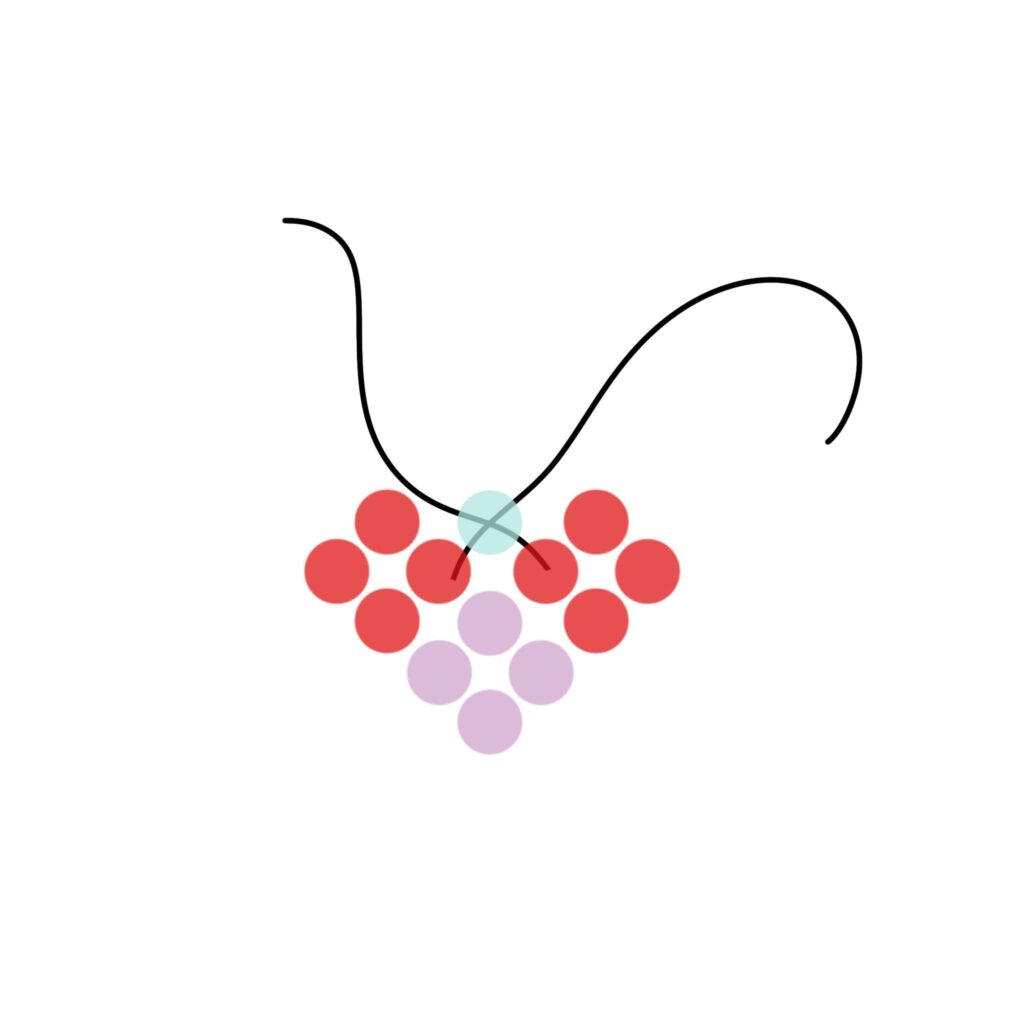
Step 9: Attach your jewelry hardware onto the wire until it’s secure and trim off any remaining wire ends.
Beaded Heart Charm Video Tutorial
So what do you think? Is this a project you would try? I had a lot of fun making the samples and seeing how different bead sizes and styles turned out. And now I have a cute pair of heart earrings to wear for Valentine’s Day! Yay!
If you love making beaded crafts, check out my tutorial for making beaded bows!