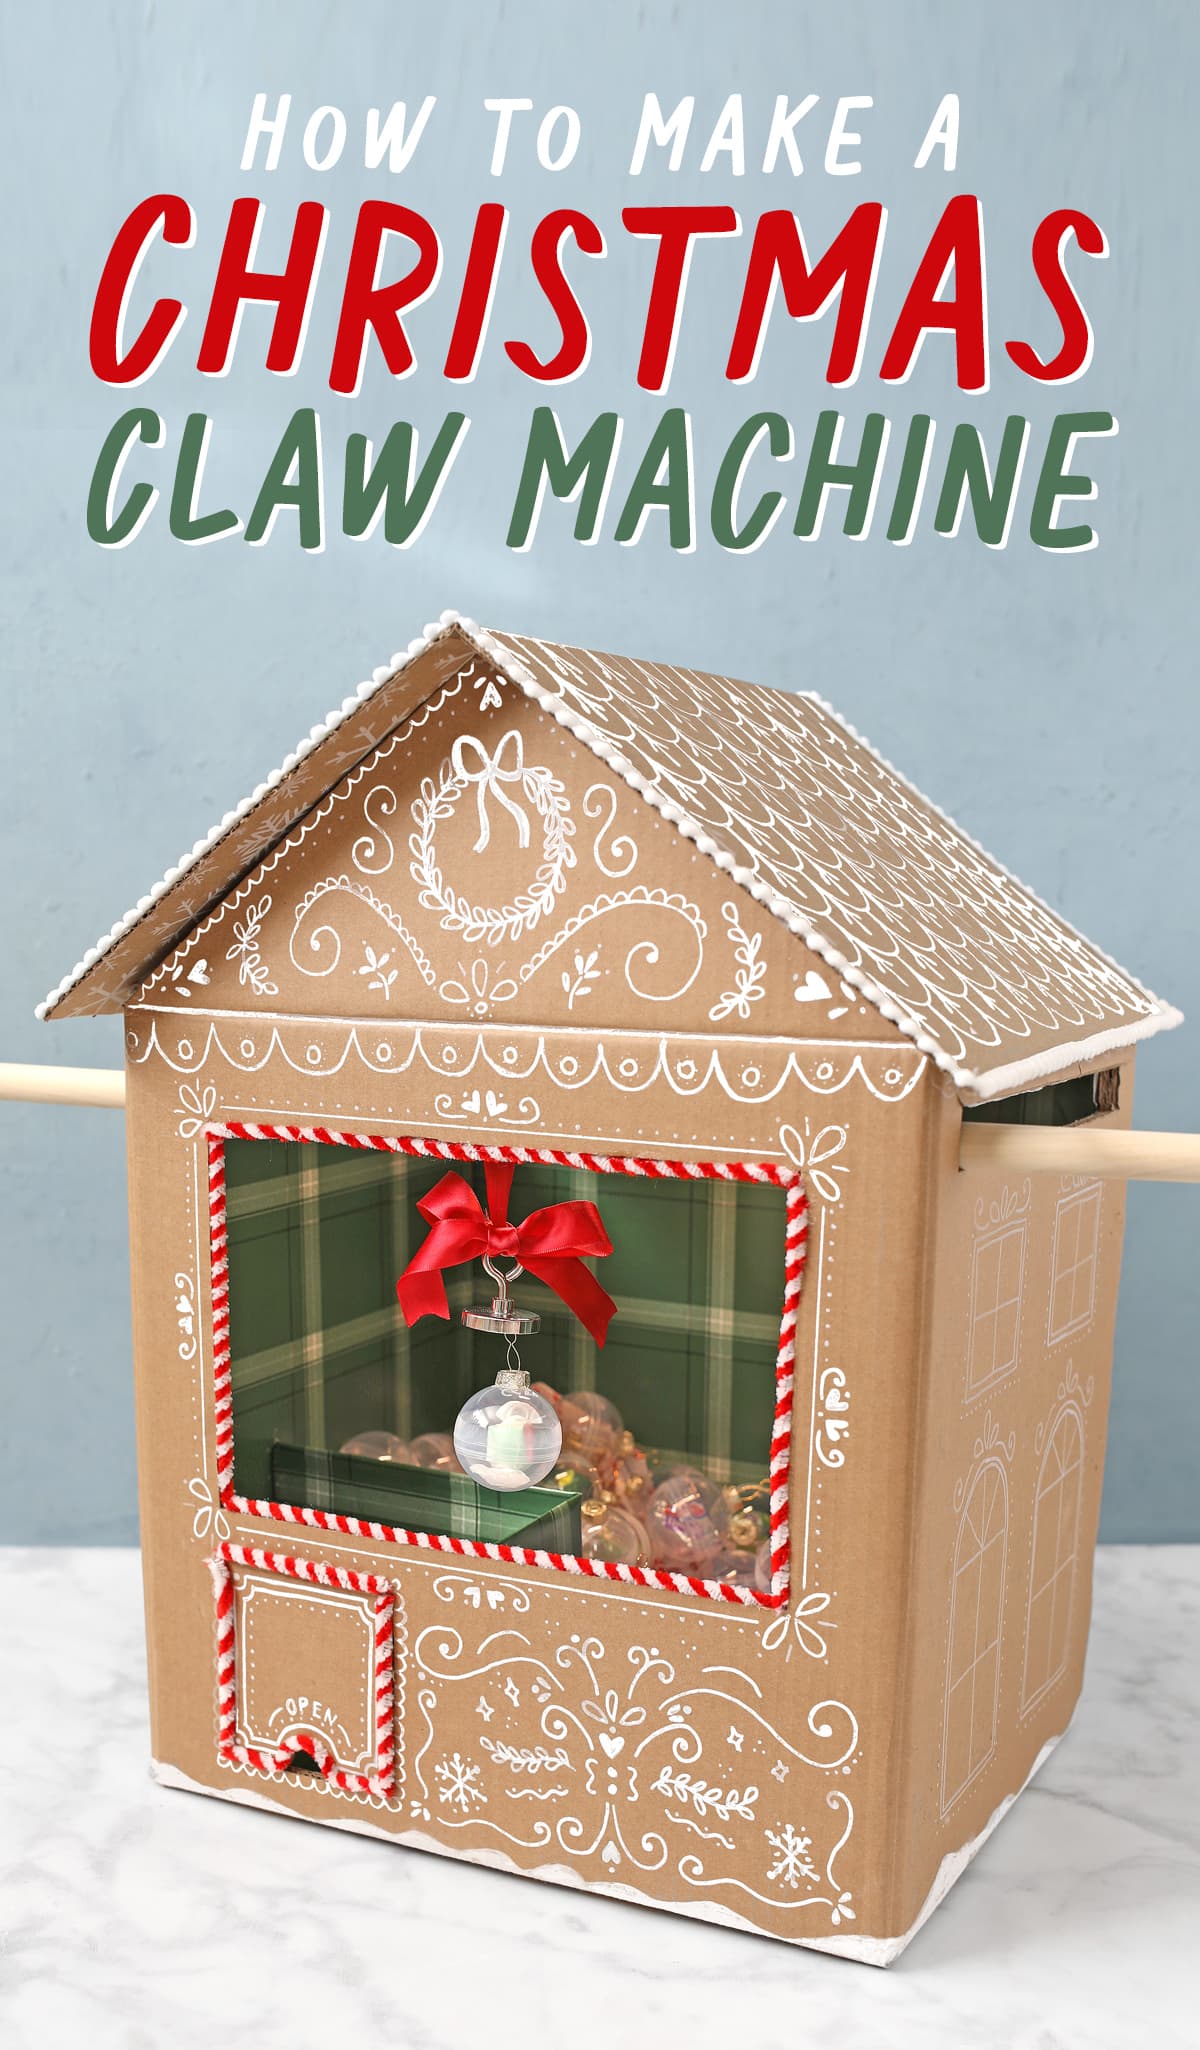
Make a working arcade claw machine that looks like a gingerbread house and is filled with prizes. Use it as a party game or as an advent calendar to count down the days to Christmas.
I’ve made a lot of wacky crafts over the years but this one takes the cake for me. I’m going to show you how to make an actual WORKING claw machine just like they have at the arcade. But make it a gingerbread house so it can be a Christmas countdown for my kids.
What?! Yep! We’re doing it. Buckle up, friends. Let’s get crafting!
Here are the supplies you’ll need to make your own gingerbread house claw machine for Christmas.
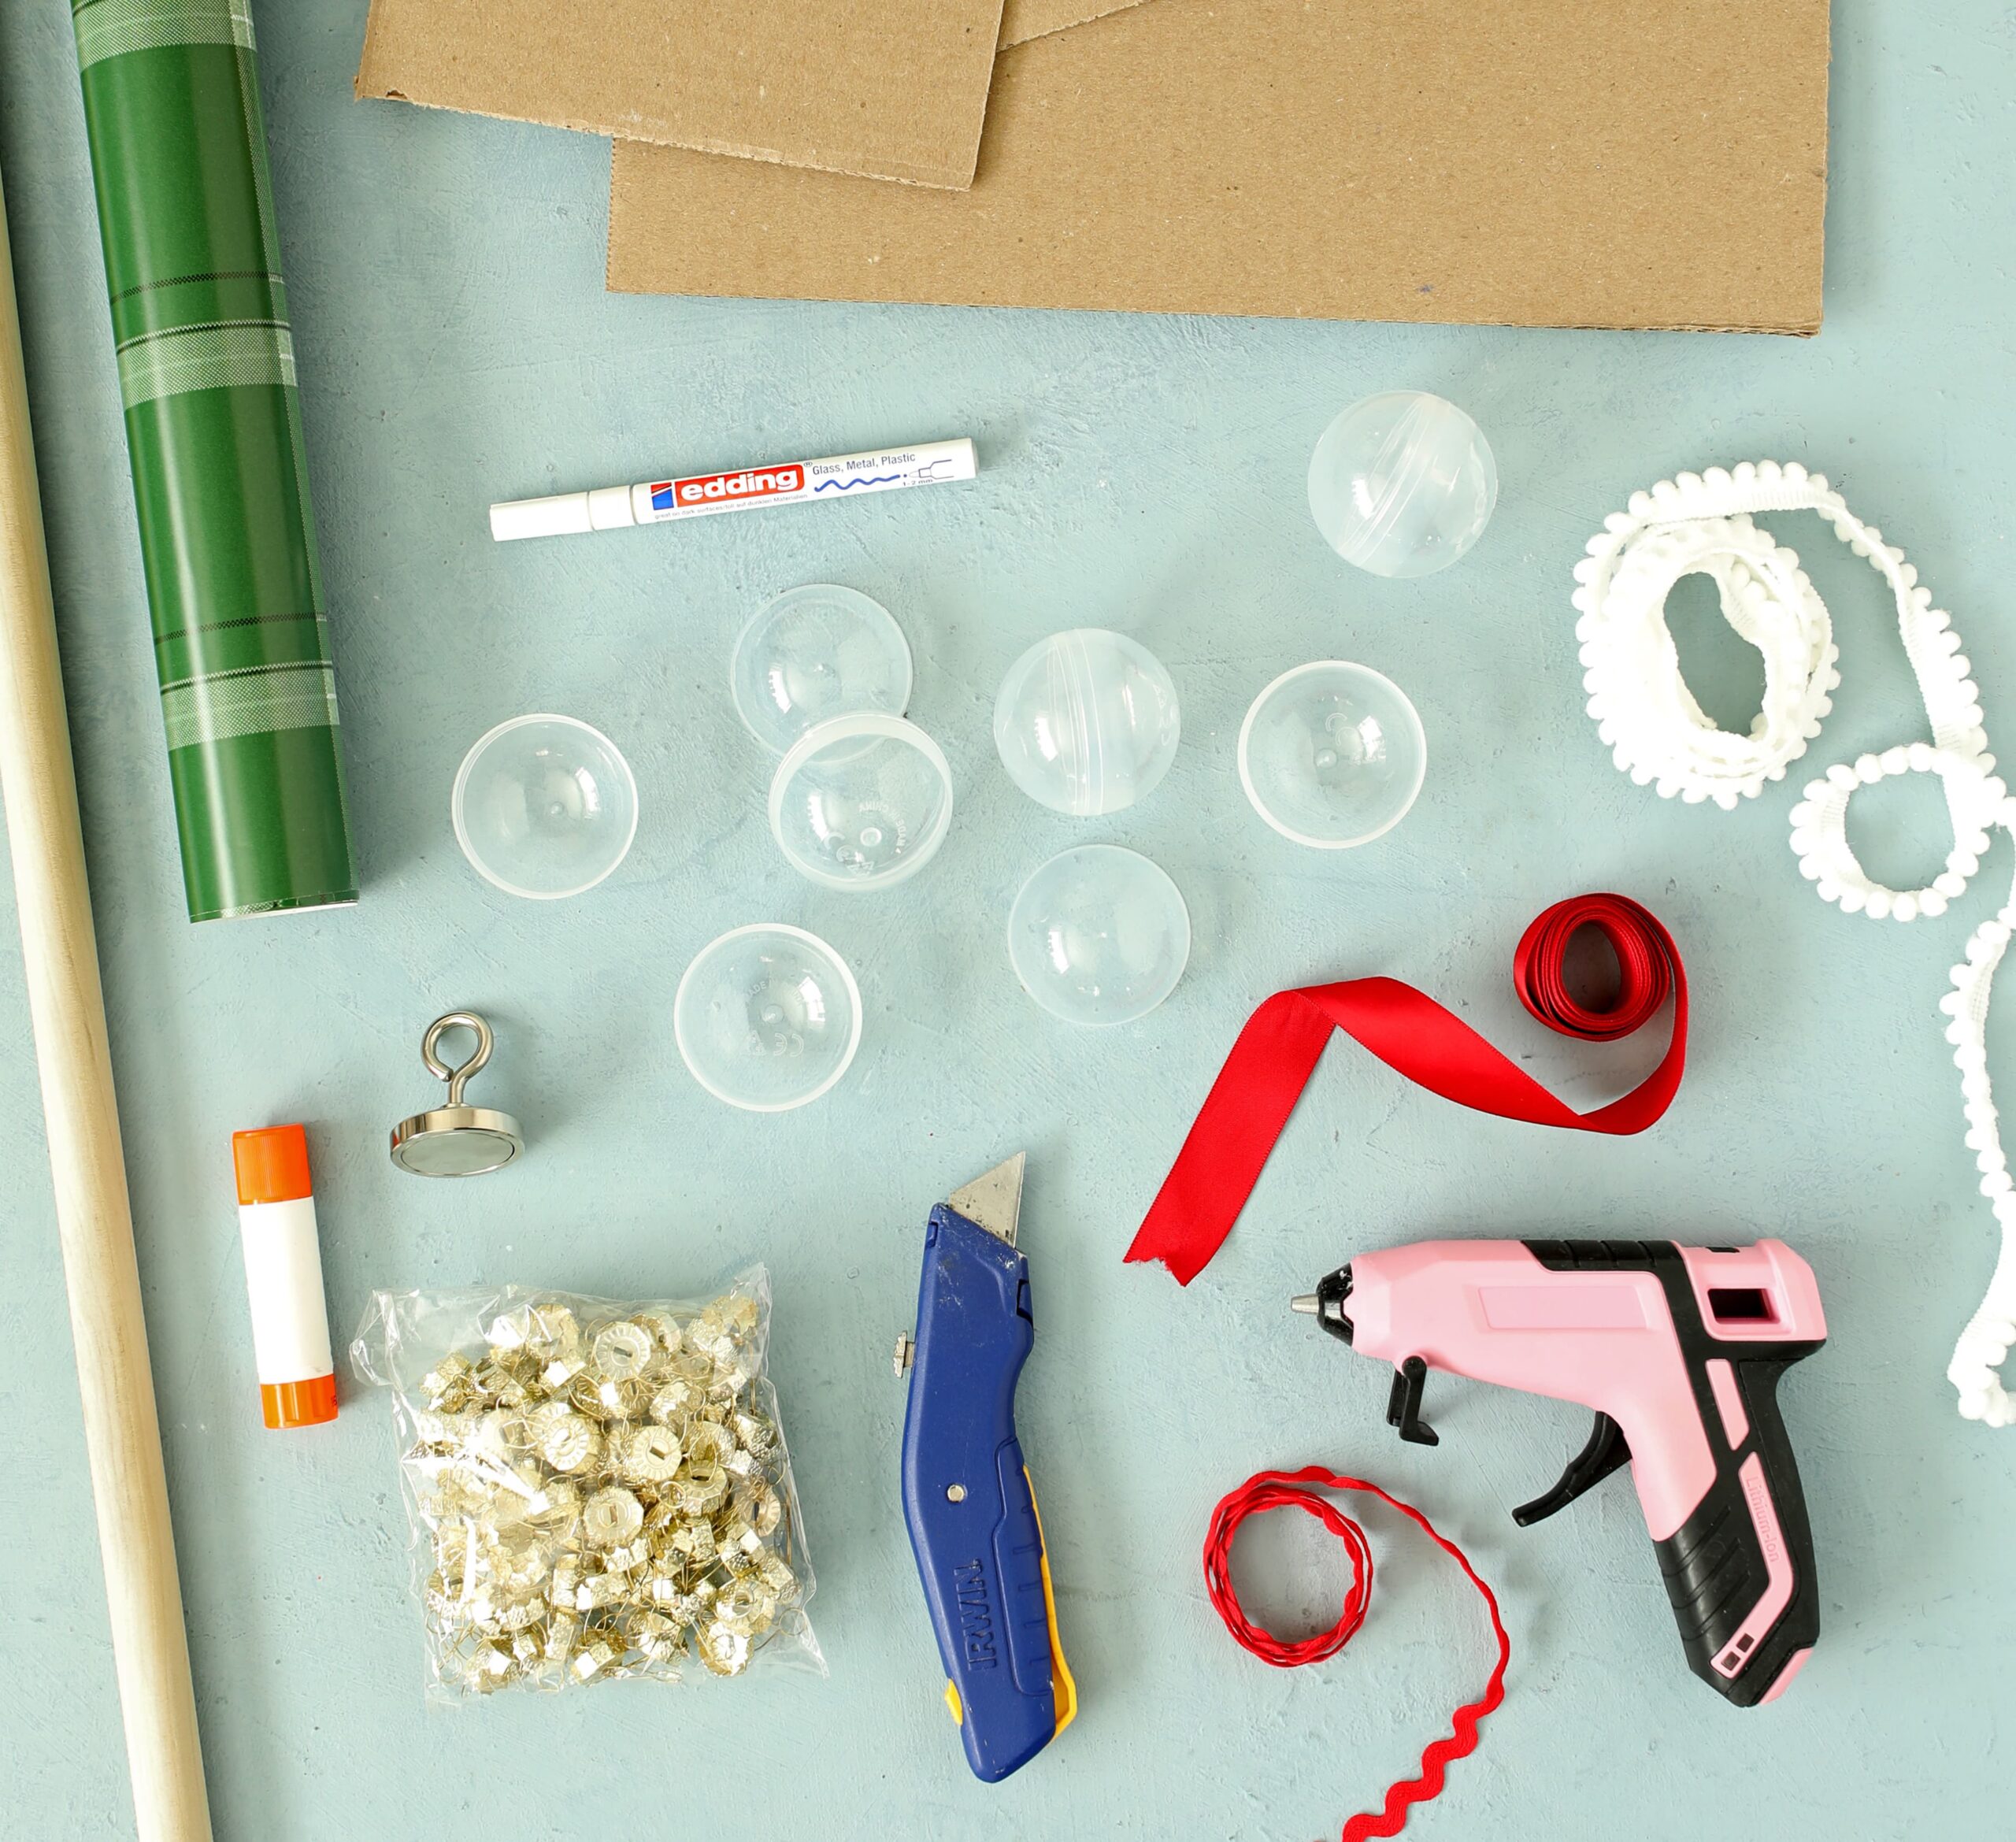
Materials Needed
- Cardboard Boxes (one for the machine and one to cut into pieces)
- Utility Blade
- Ruler
- White Paint Pen
- Vending Machine Prize Capsules
- Metal Ornament Caps
- Wooden Dowel (3/4 Inch)
- Ribbon
- Wrapping Paper
- Fishing Magnet
- Trim – optional
- Pom Pom Trim
- Candy Cane Chenille Stems
- Hot Glue Gun + Glue Sticks
- Small Magnets
- Printable Prize Tickets and Tags (download at the bottom of this post)
Instructions
I’m going to walk you through every step, but I suggest you also scroll down and watch the video below because it will really clear a lot of things up to see the claw machine in motion.
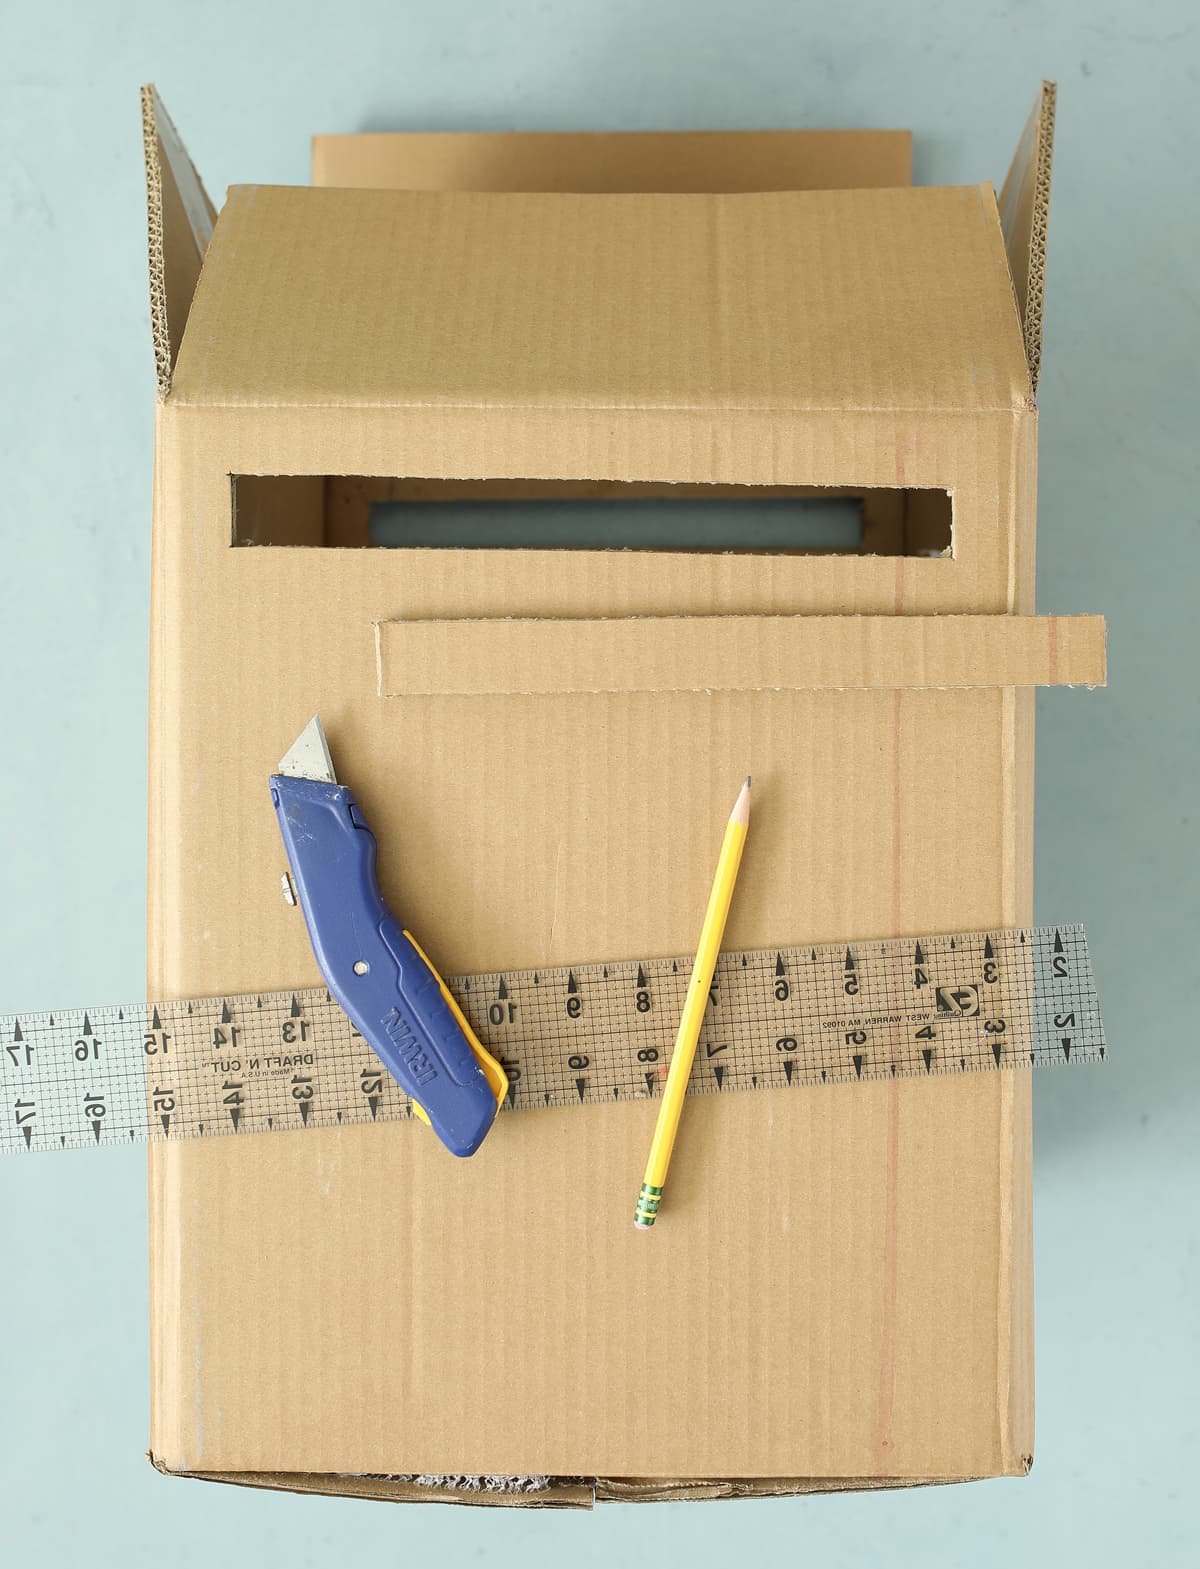
Step 1: Find a good cardboard box, you know what I mean? A GOOD box. Mine measured 16x16x12 inches but you can use whatever size you want. Carefully open the box along the seam line and flip it inside out so that all of the printed stuff is on the inside and you have clean cardboard on the outside. Glue the box back together, then cut two of the top flaps into triangle shapes so you can make it look like a house.
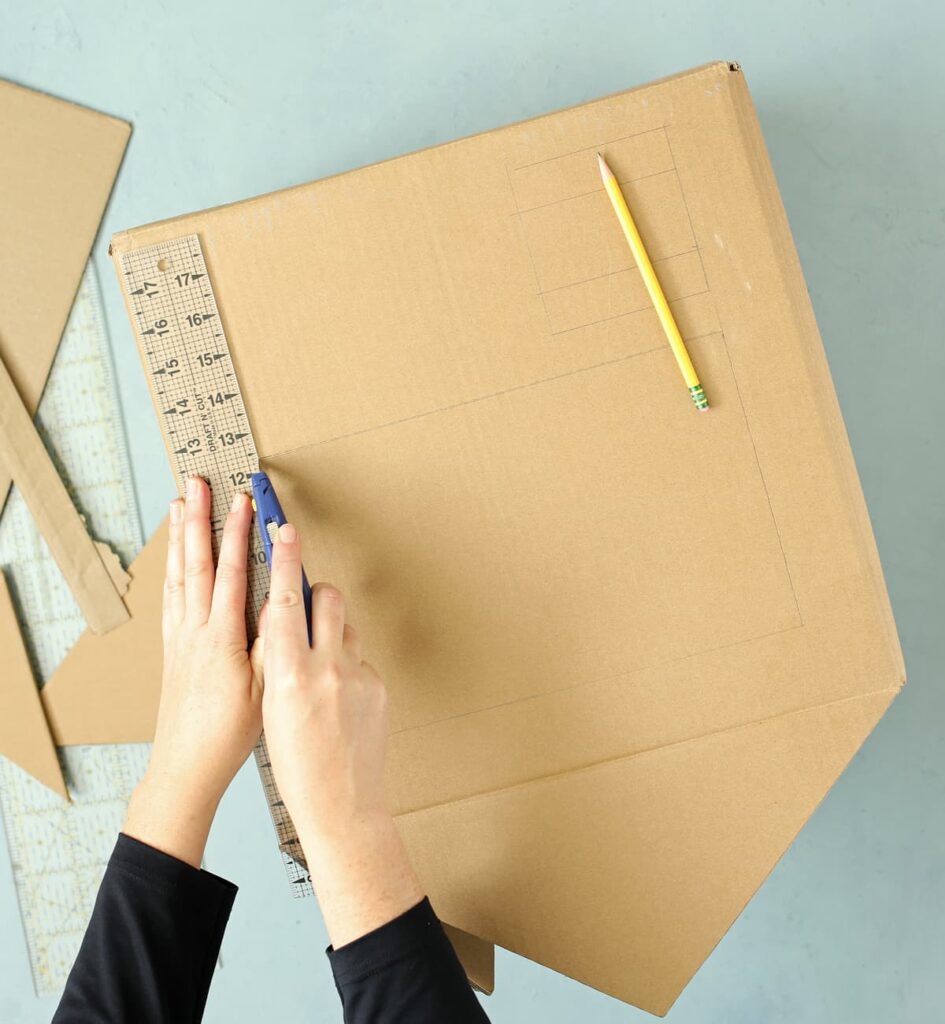
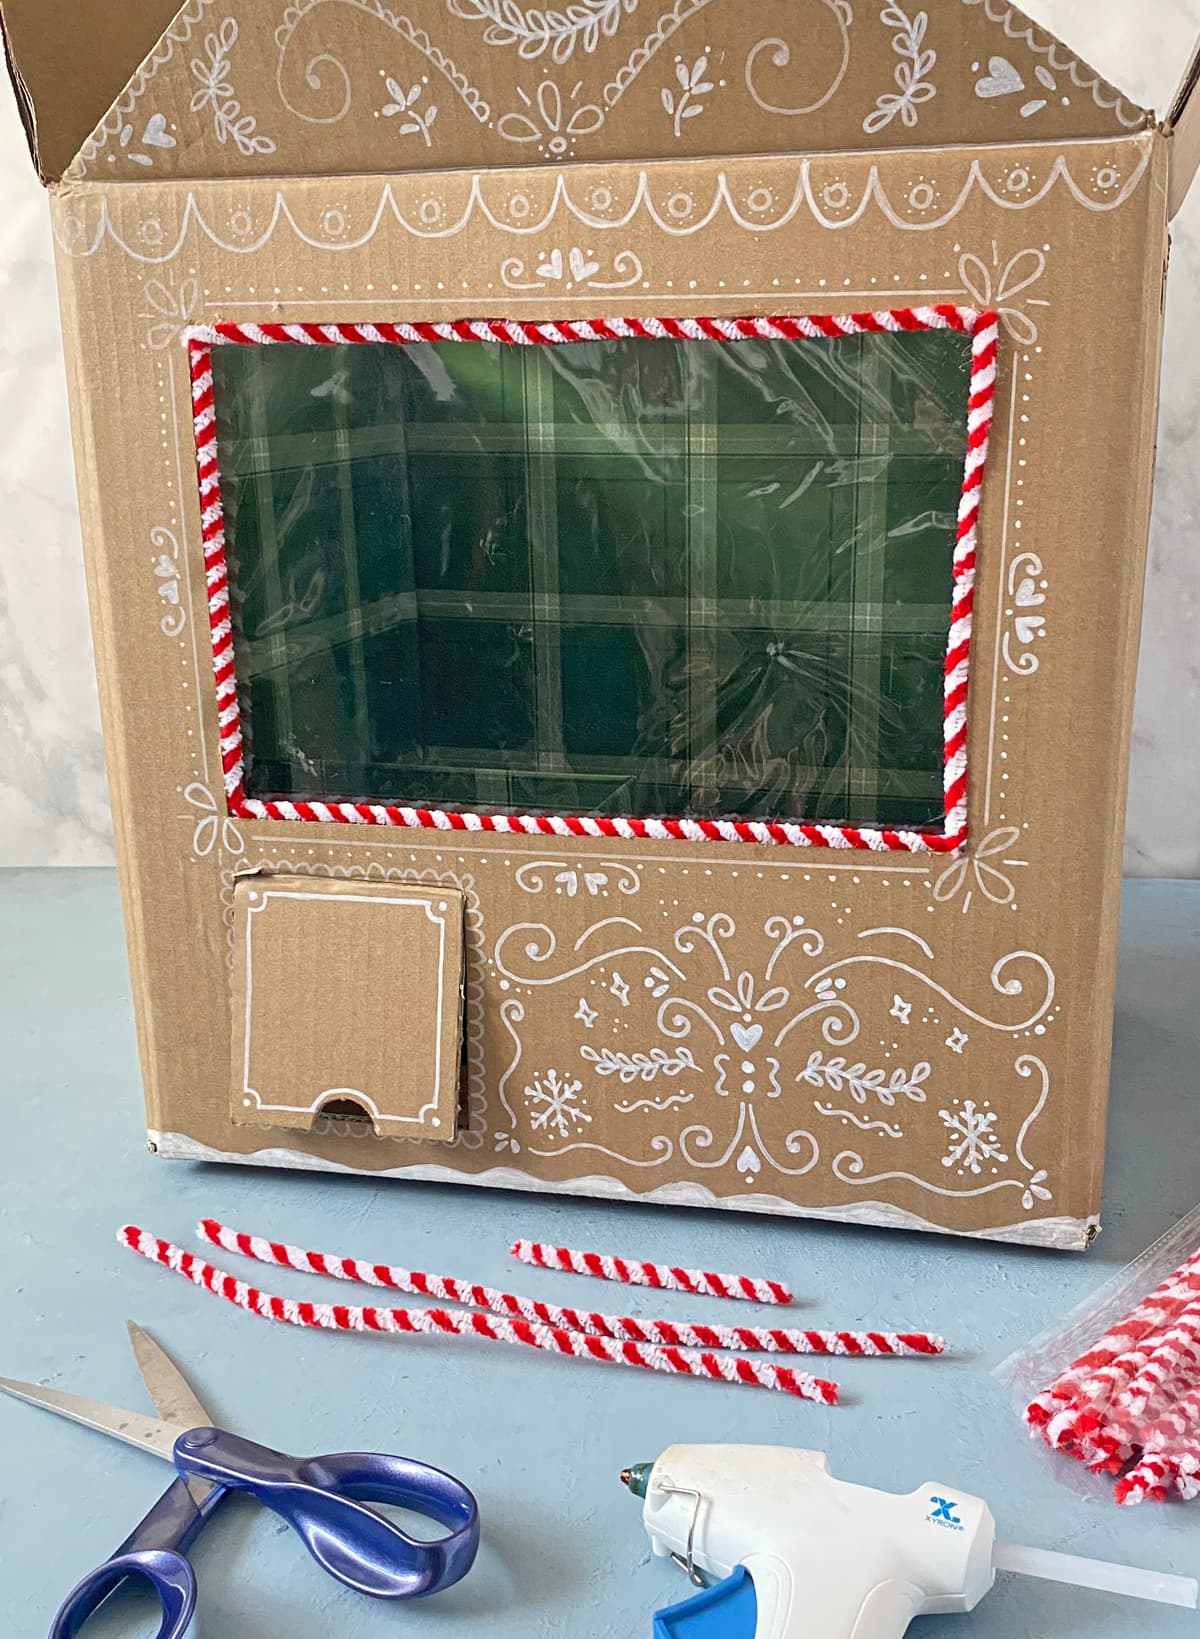
Step 2: Cut a window into the front of the box (12 x 7 inches) and you’ll also want to cut a flap piece (4 x 4 inches) below the window. Three of the sides are cut all the way through, but the top edge is just scored and NOT cut all the way through. This makes it so the flap can open and close.
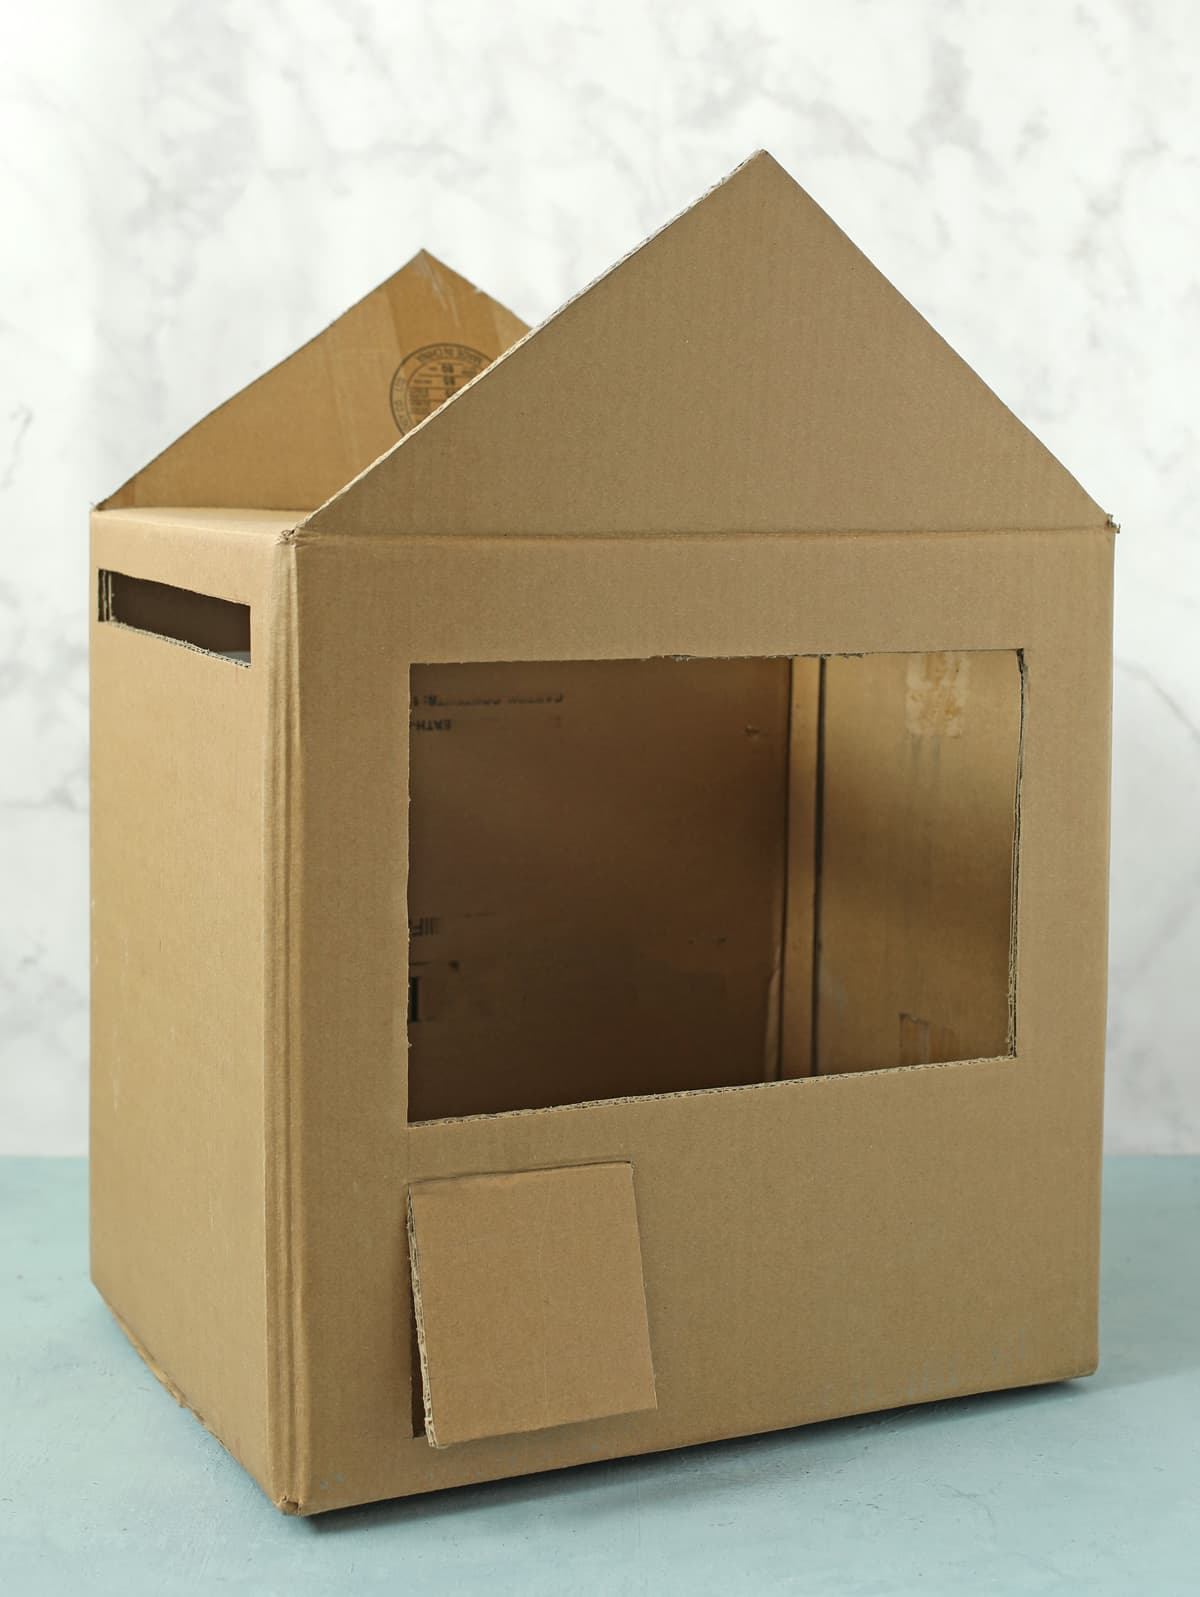
Step 3: Next, you’ll need to cut two long slits into both of the sides of the box. Make the slit about 1 inch tall, then go to within 1-2 inches of each side, like this:
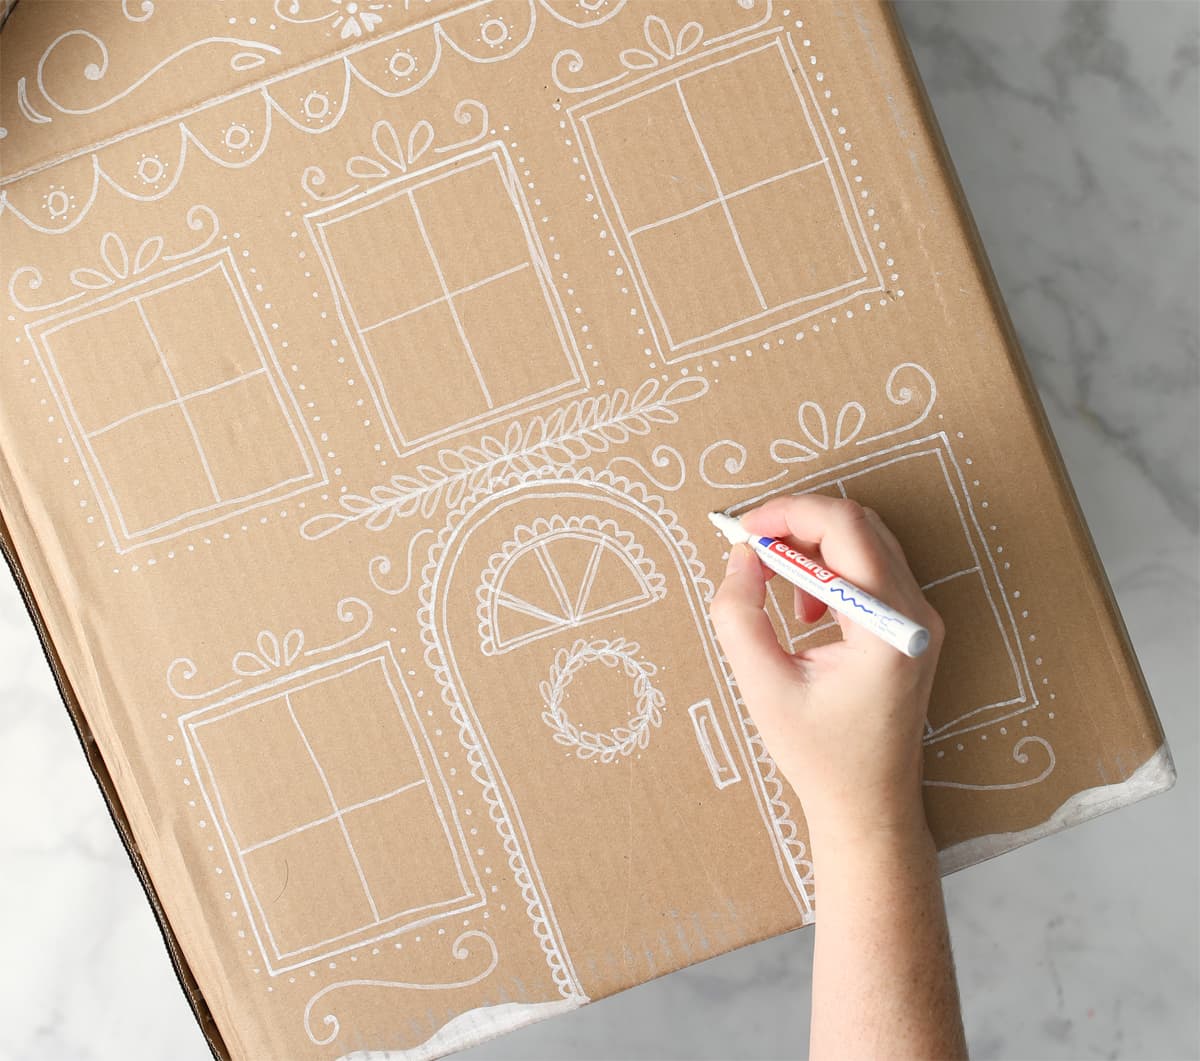
Step 4: Use a white paint pen to draw gingerbread house details onto the cardboard box. This was my first time using an Edding paint pen and I have to say I was so impressed! I drew A LOT with it and it just kept pumping out ink like a champ.
I put together a Pinterest board full of hand-drawn gingerbread houses to use as inspiration, so check it out. It might help you too.
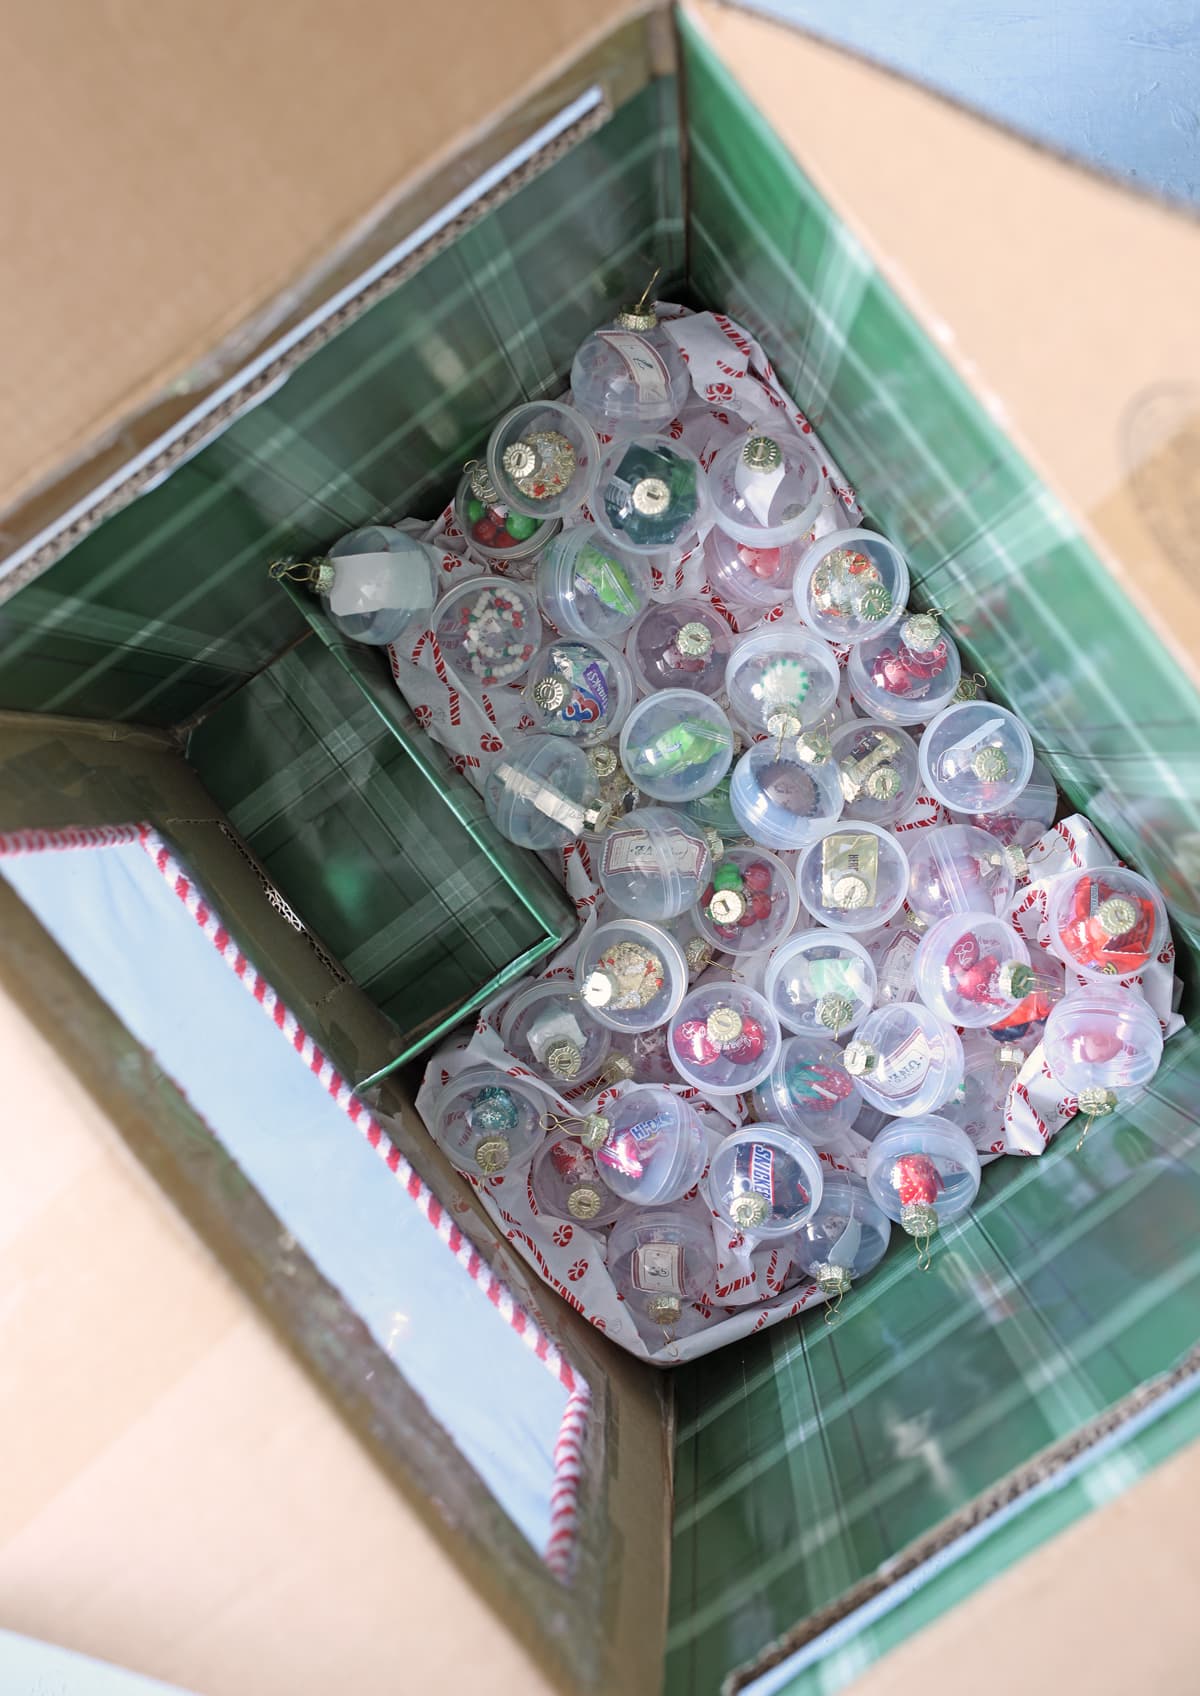
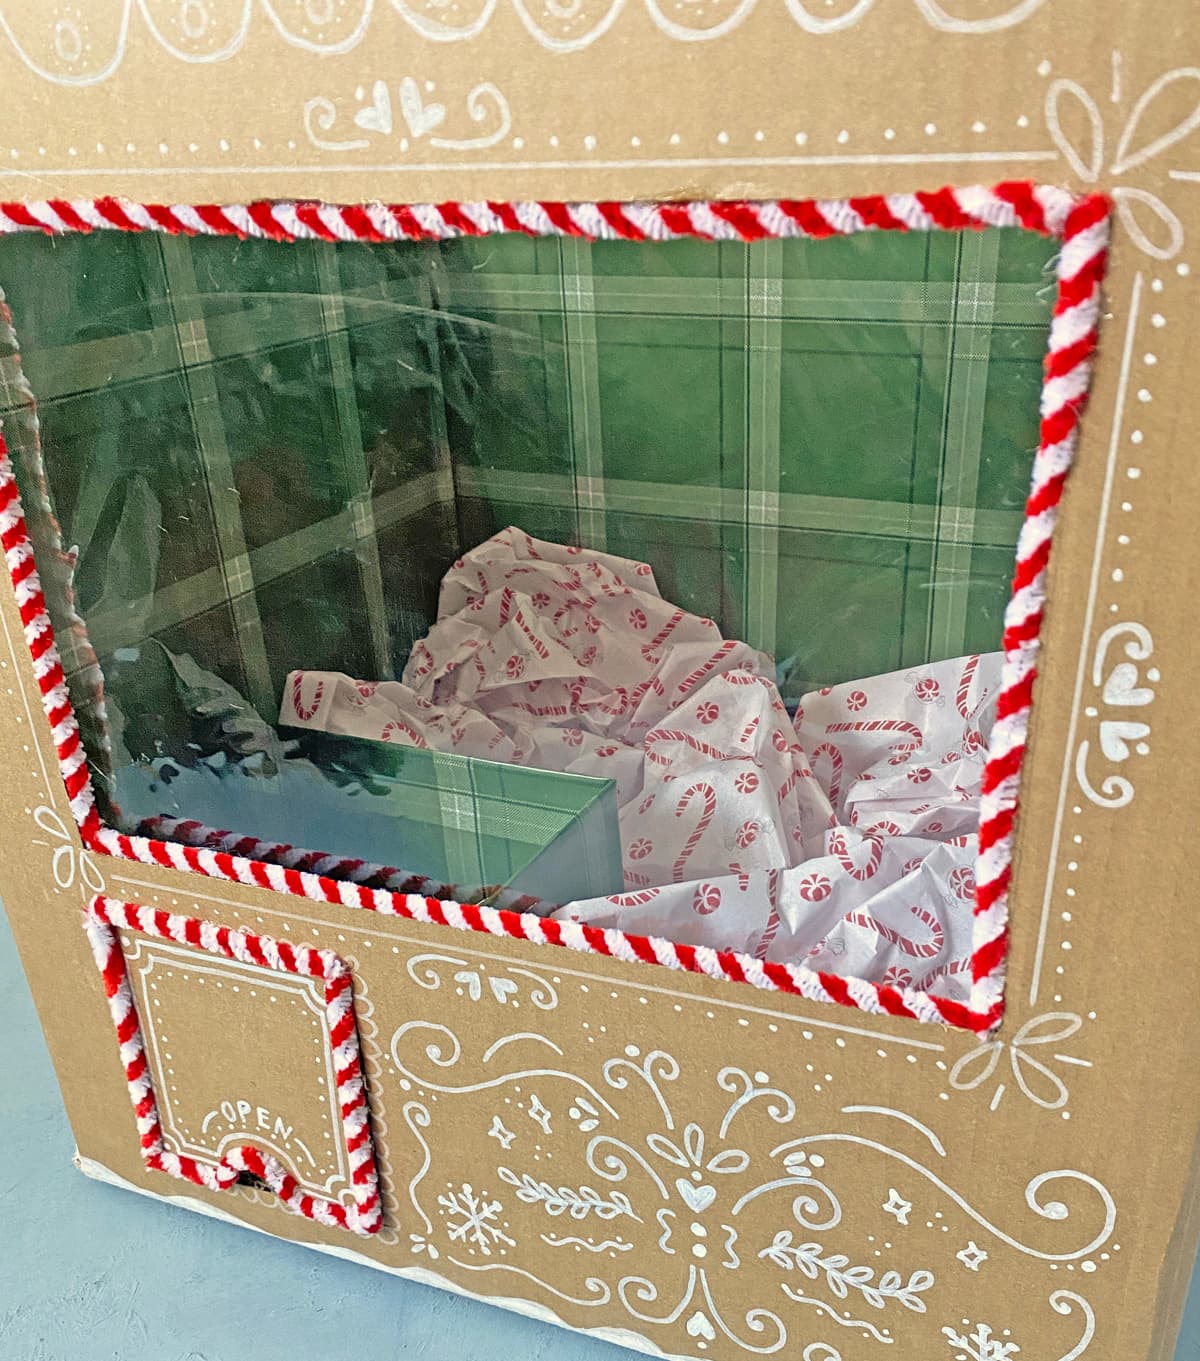
Step 5: Line the inside of the box with cute wrapping paper. Cut an L-shaped piece of cardboard and glue it inside the box to form a separate area where you drop any prizes you catch. I covered this with wrapping paper also.
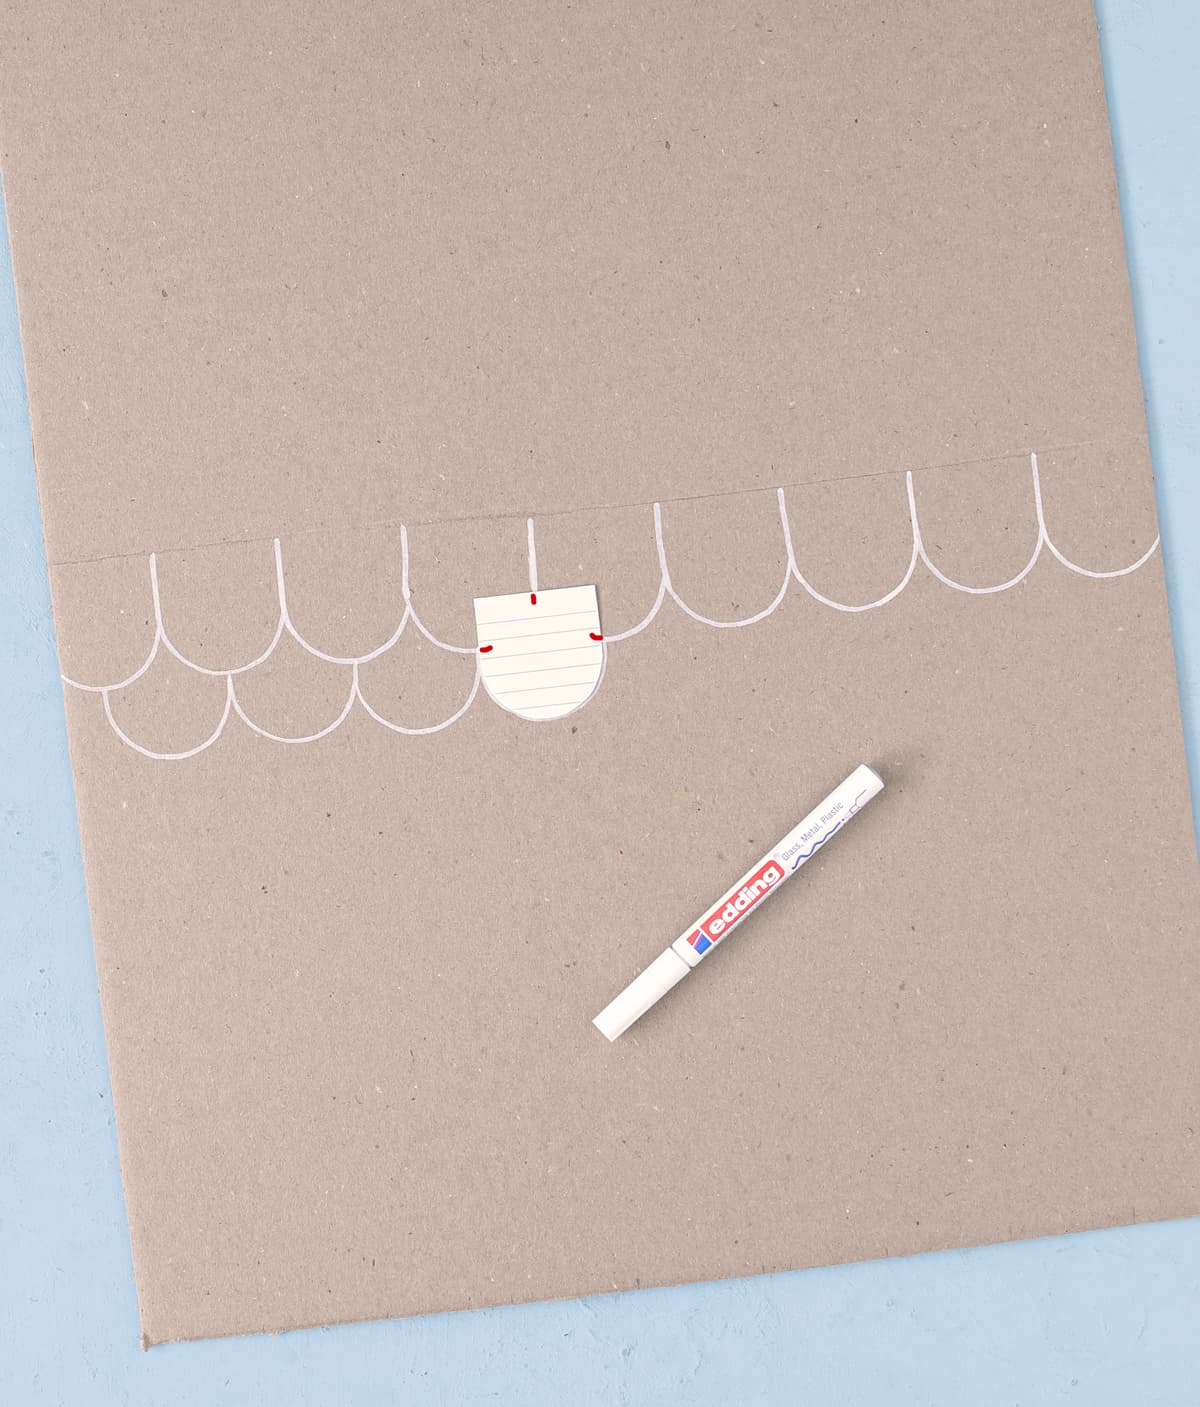
Step 6: Now we need to make a roof. This is where you’ll need a second piece of cardboard (bonus points if it doesn’t have any markings on it). The roof is going to be the size of your triangles plus a couple inches so it overhangs. Cut a score mark down the center so you can fold it and make the roof peak shape.
Then decorate it using the same white paint pen. I cut out a little cardstock template to use to help me line up the scallops. Def recommend. Saved me a ton of time!
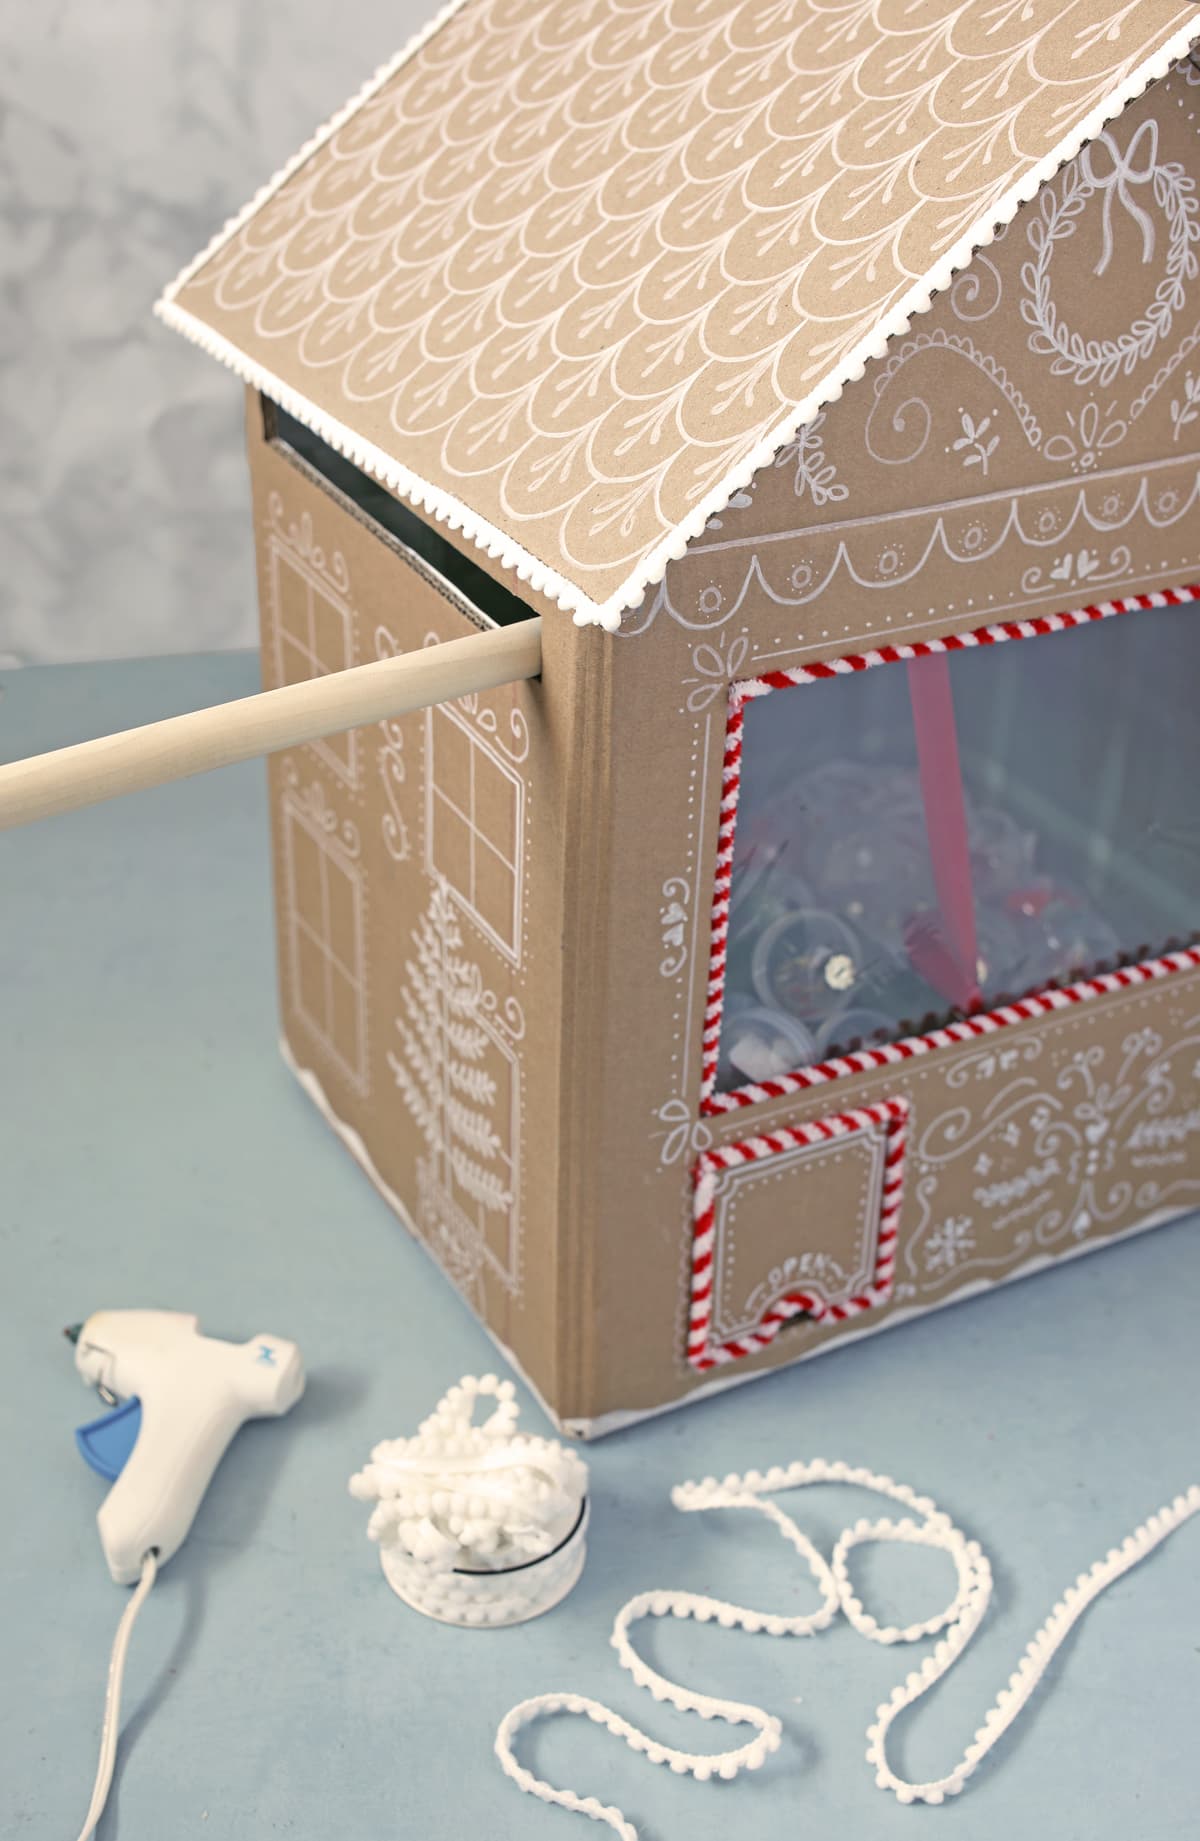
Step 7: Use hot glue to attach the candy cane pipe cleaner around the window and prize flap.
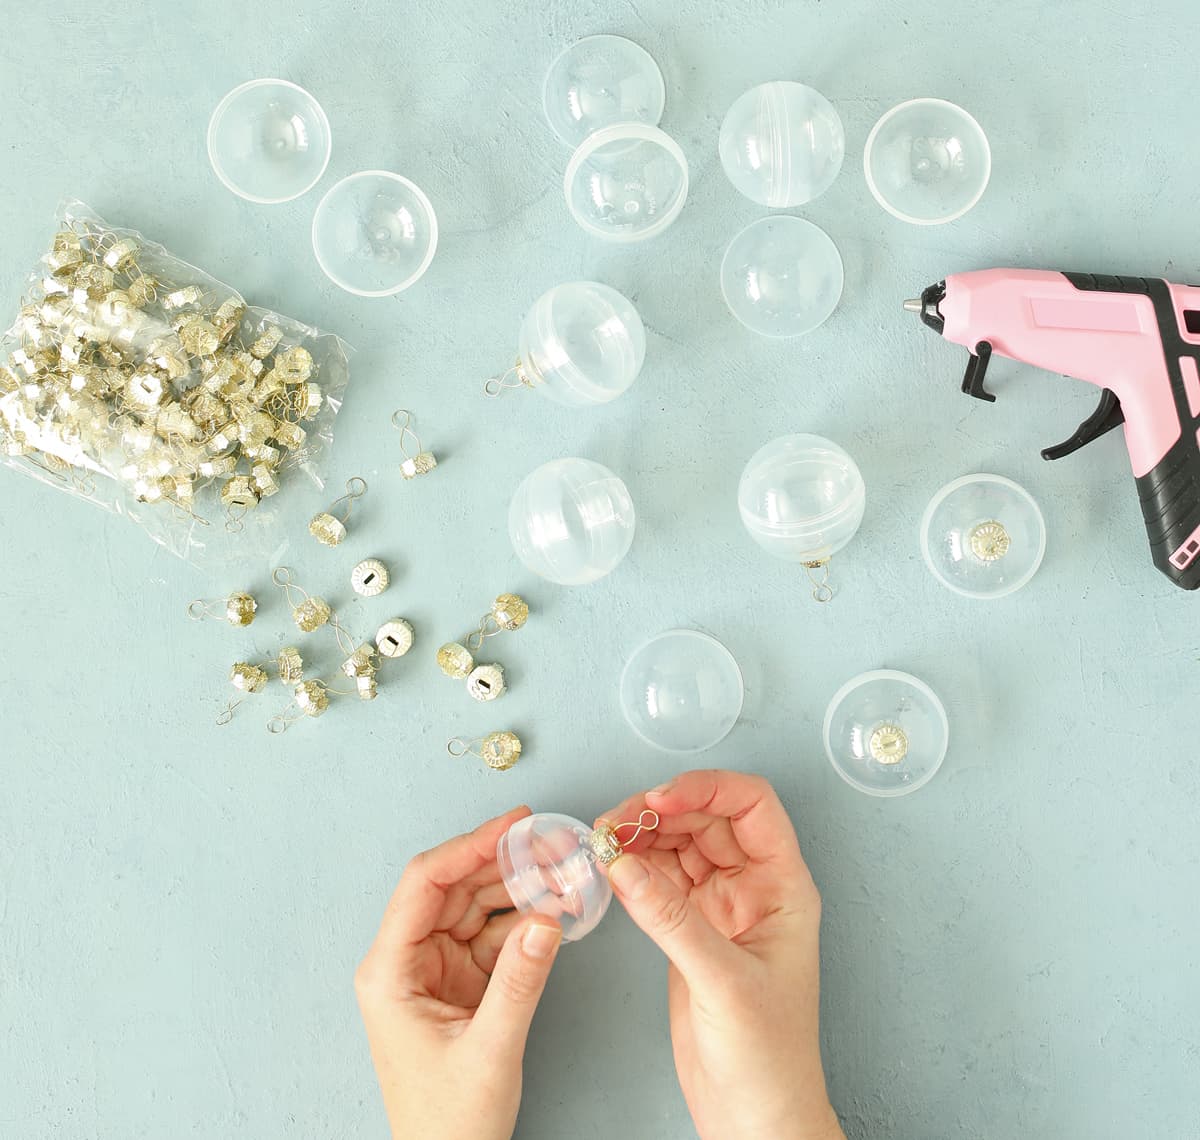
Step 8: Let’s get the prize balls ready! Each ball has an outie half and an innie half. Glue an ornament topper to the outie half of all of the balls you want to use. This seemed straightforward until I tried it. The ornament topper has a jagged edge and doesn’t want to stick to the curved surface of the plastic balls, so I found the thing that worked best was LOADING the entire ornament topper full of glue. It then becomes a burning hot piece of metal, so only hold it by the metal hanging piece, then use two popsicle sticks to press it down onto the plastic ball.
Another thing to note– only the hanging piece at the top of the ornament toppers is the right kind of metal to stick to the magnet, so make sure you include those pieces or the magnet won’t be able to pick the prize balls up!
Make tissue paper fluffs and add those to the bottom of the claw machine. This gives the prizes a nice place to nestle and helps the game look more full. Add all of your filled prize balls.
I experimented with adding clear plastic over the window into the machine and the plastic I use was a bit crunched, so it didn’t look as good as I wanted. You can see it in the photo above. I may still add some kind of clear covering, I haven’t decided. (Comment with any ideas you might have for me.)
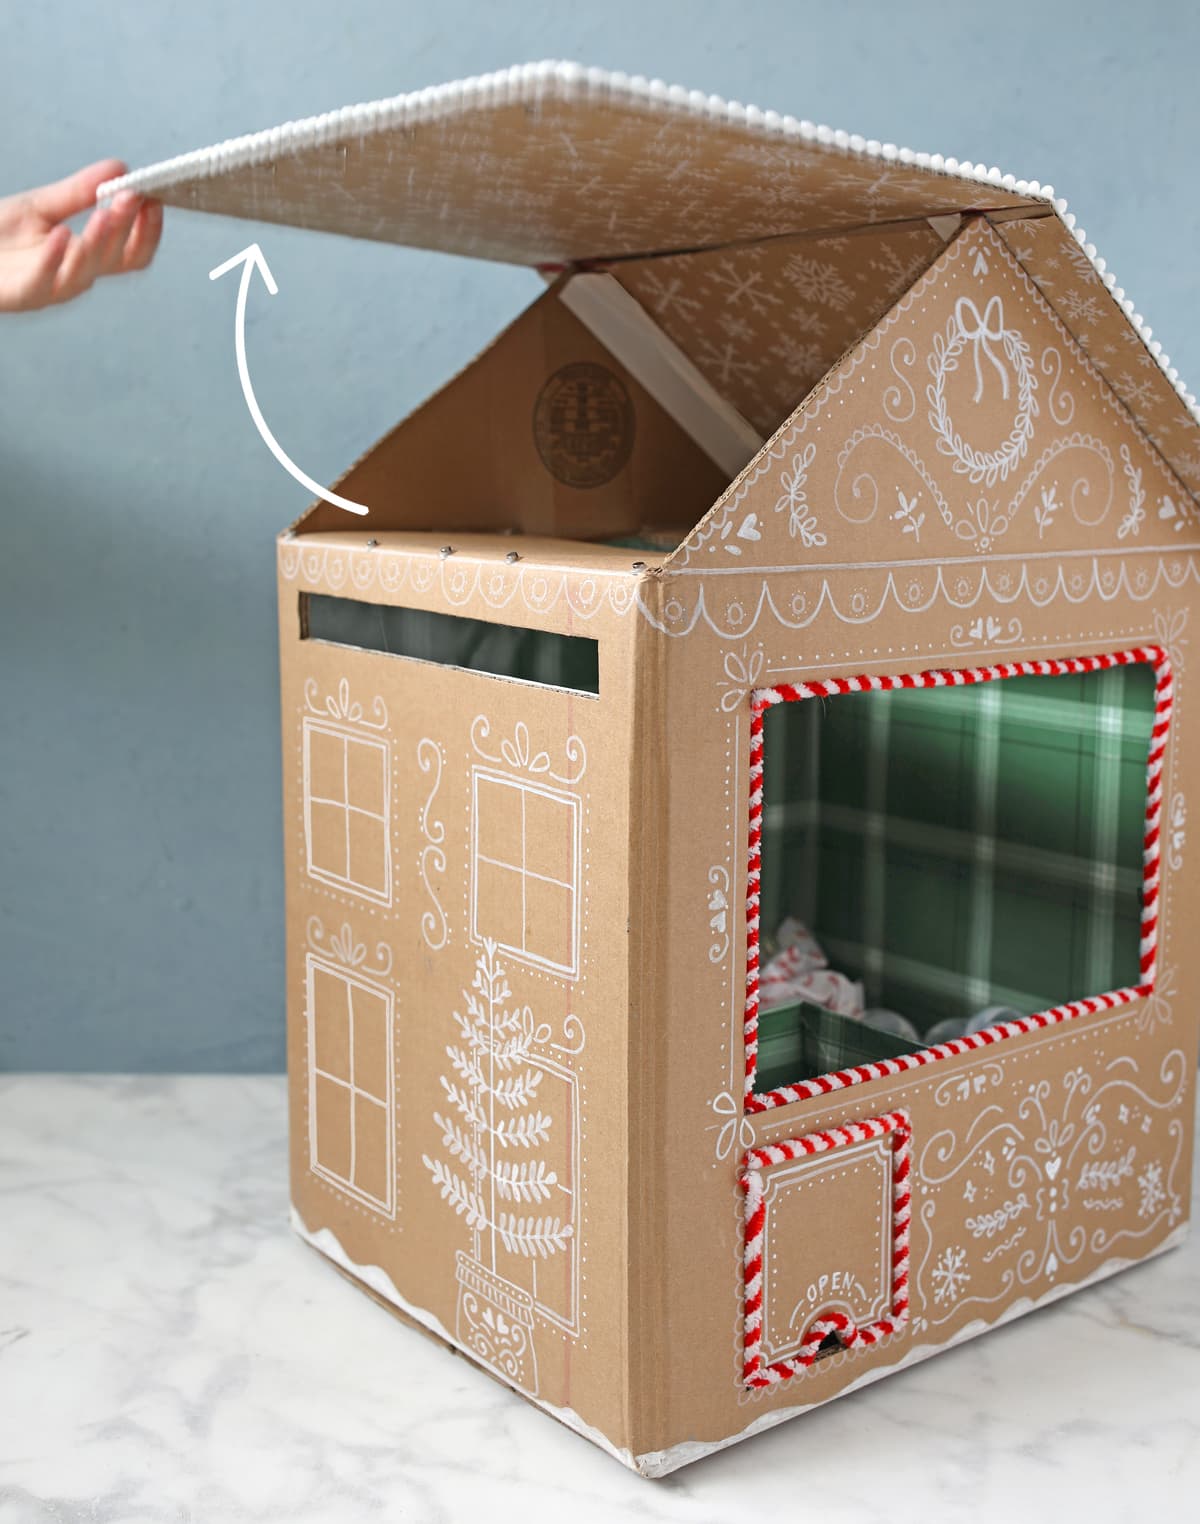
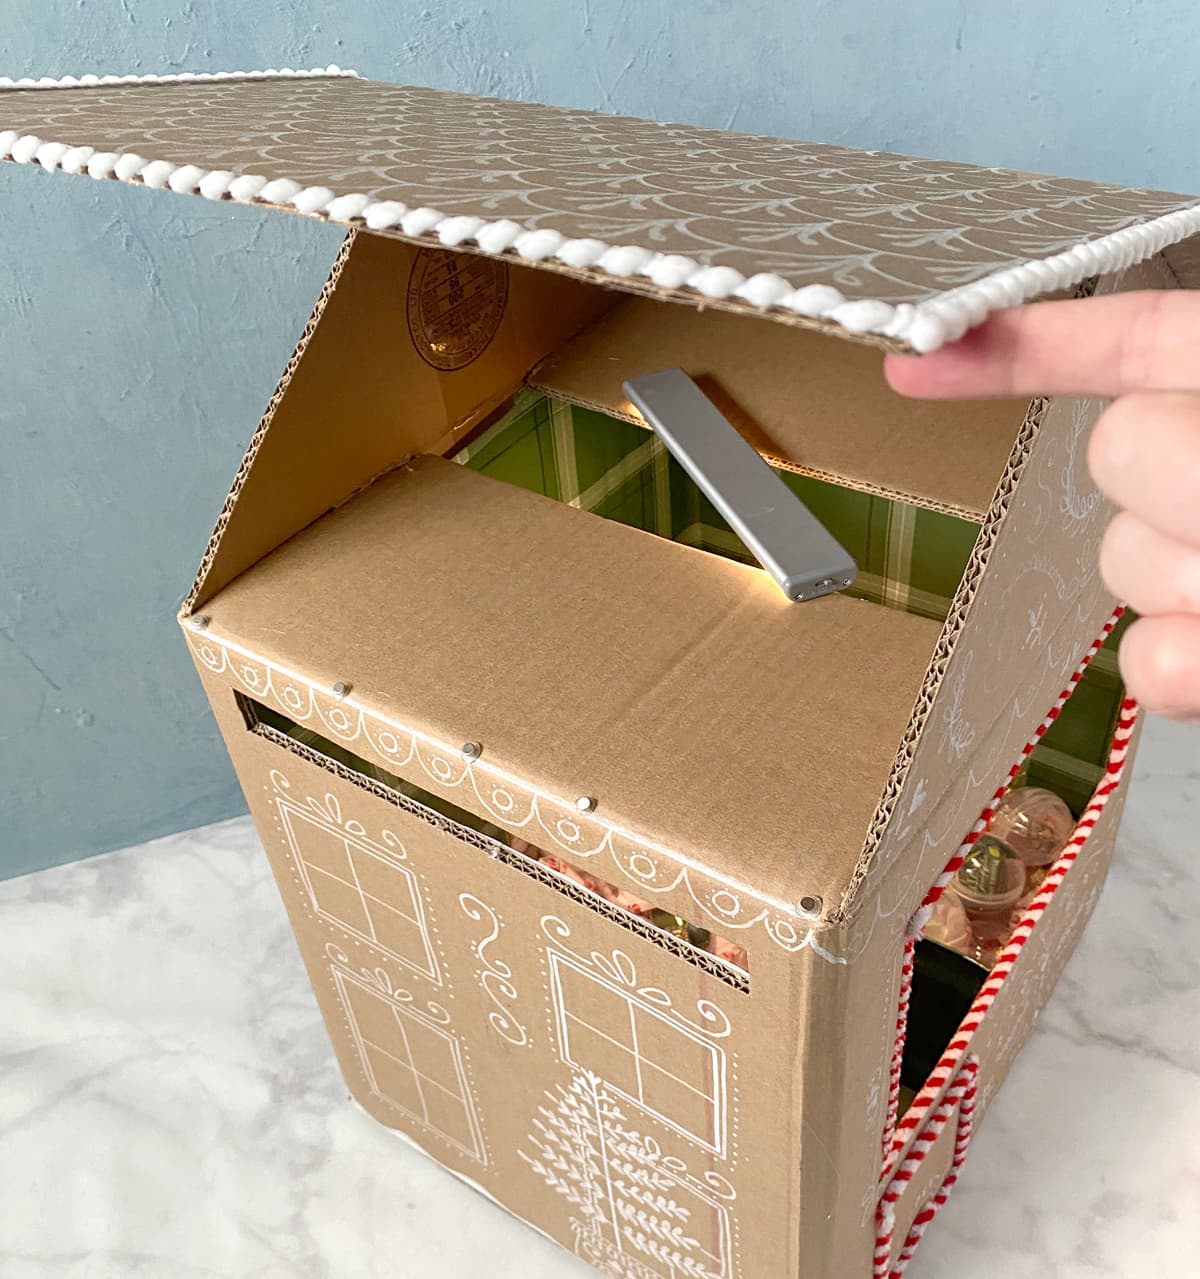
But here’s the thing… if you cover over the window, you need to leave a way to still access the inside of the machine. So my solution was to make one side of the roof hinged so I could open it and get inside. I added tiny little magnets along the edge to make the roof close tightly. You can skip this step if you leave the window open.
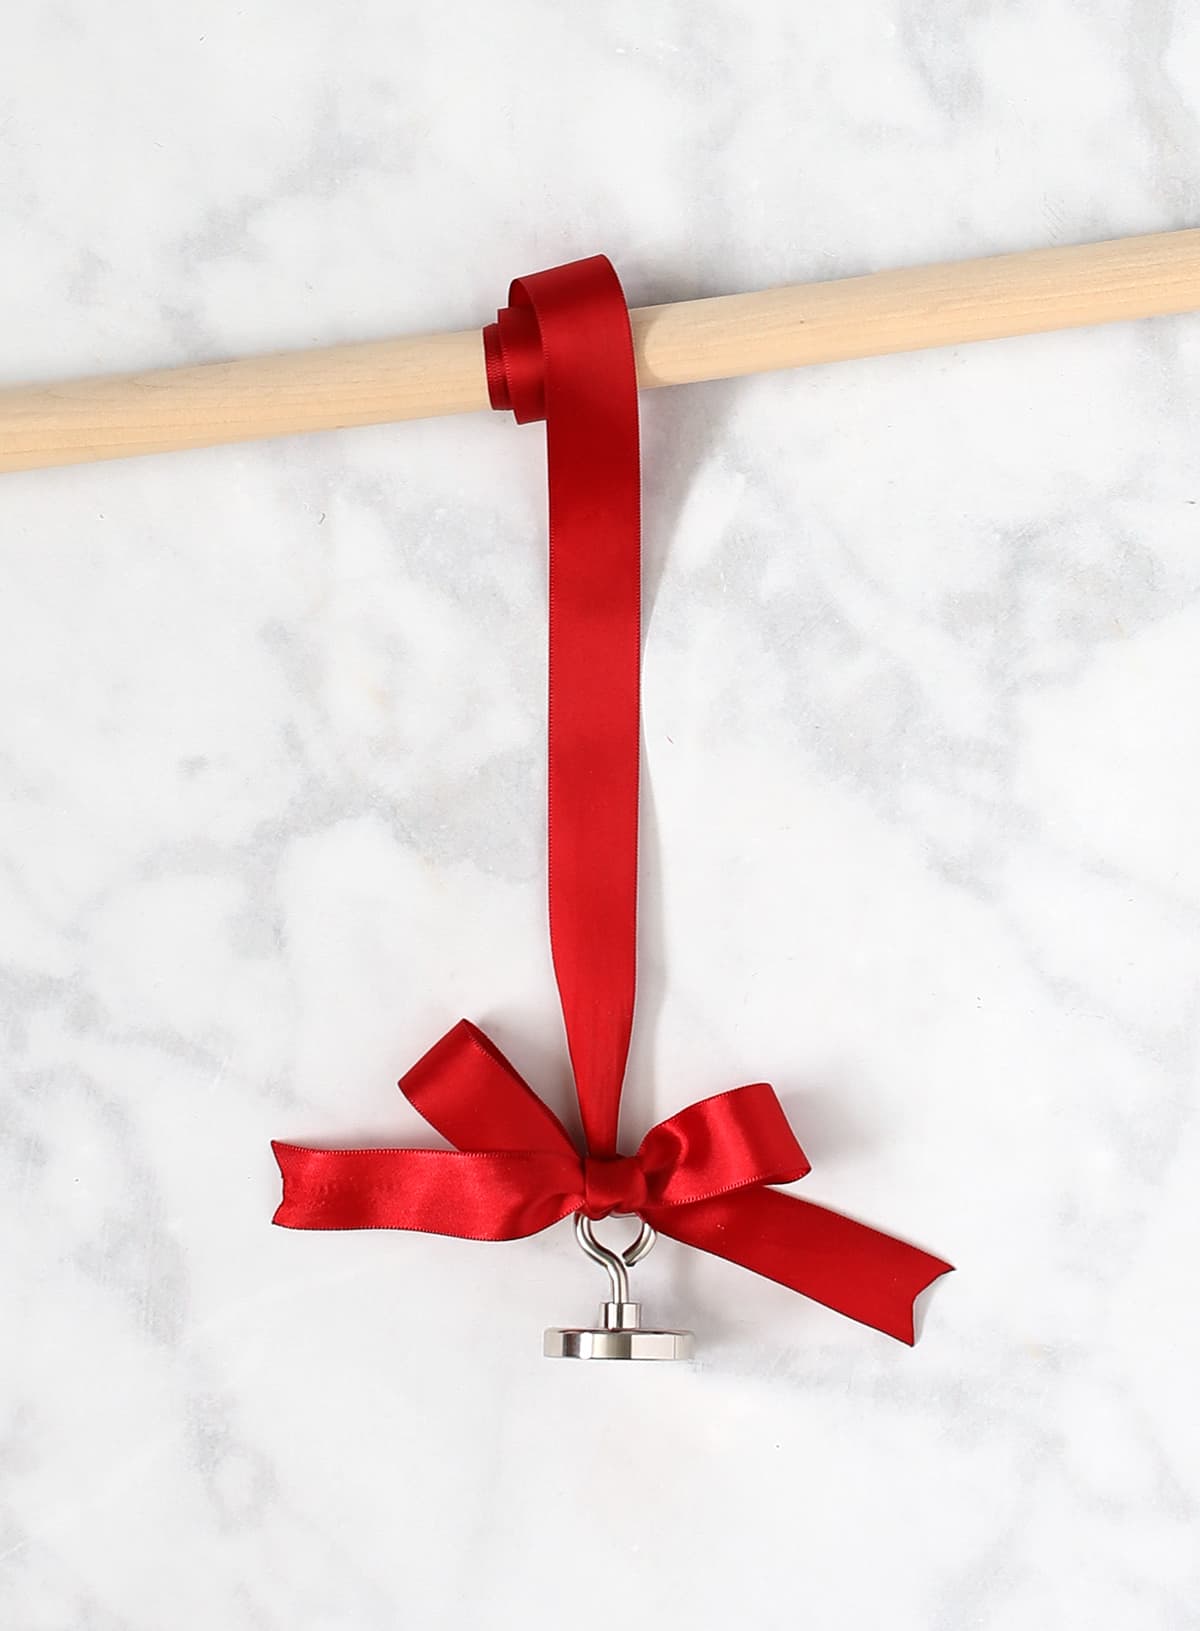
To make the claw mechanism, tie a ribbon to the loop on the fishing magnet, then glue the other end of the ribbon to the center of the wooden dowel. Add a bow for cuteness.
Slide the dowel through the slots you cut in both sides of the house and feed the magnet through so it’s inside the claw machine.
Then at the last minute I decided to line the roof with pom pom trim and I’m so glad I did. It’s darling!
And then just because this whole project is extra so why not… let’s add a light. I borrowed this light from my closet, but you could use any sort of battery operated light you have. Or not. Either way!
To operate the claw machine, slide the dowel from front to back in the side slots and up and down by rolling the ribbon around the dowel. Once you’ve caught a prize ball on the magnet, take it over to the prize bin, drop it in, then open the flap to retrieve your prize!
And to make this craft even more versatile, you could put tickets in some of the prize balls that lead to bigger, wrapped gifts.

I made the tickets and gift labels into printables for you. They’re numbered 1-25 so you could use them like an advent calendar or just print out a few and do a mix of small prizes and wrapped ones. It’s nice to have options!
Get The Printable Tickets Here
Okay, now you have to watch the video of this craft because it’s so fun to see the claw machine in action.
DIY Christmas Claw Machine
Isn’t that just too fun?! My kids absolutely LOVE it and I’m going to be keeping this bad boy forever. I can easily refill the prize balls every year to keep the good times rolling.
I built a flippin’ CLAW MACHINE ARCADE GAME! I am so proud of myself! LOL.
Share this delightful craft with everyone you know, because this is too cute to keep quiet about. Just hit the pin button below!