Learn how to make four different patriotic tie dye t-shirts that are perfect to wear on the Fourth of July.
It’s so fun to have a patriotic shirt to wear on the Fourth of July (and all summer long, honestly). Today I’m going to share four cute shirt ideas you can make using supplies from Hobby Lobby.
Here’s what you’ll need:
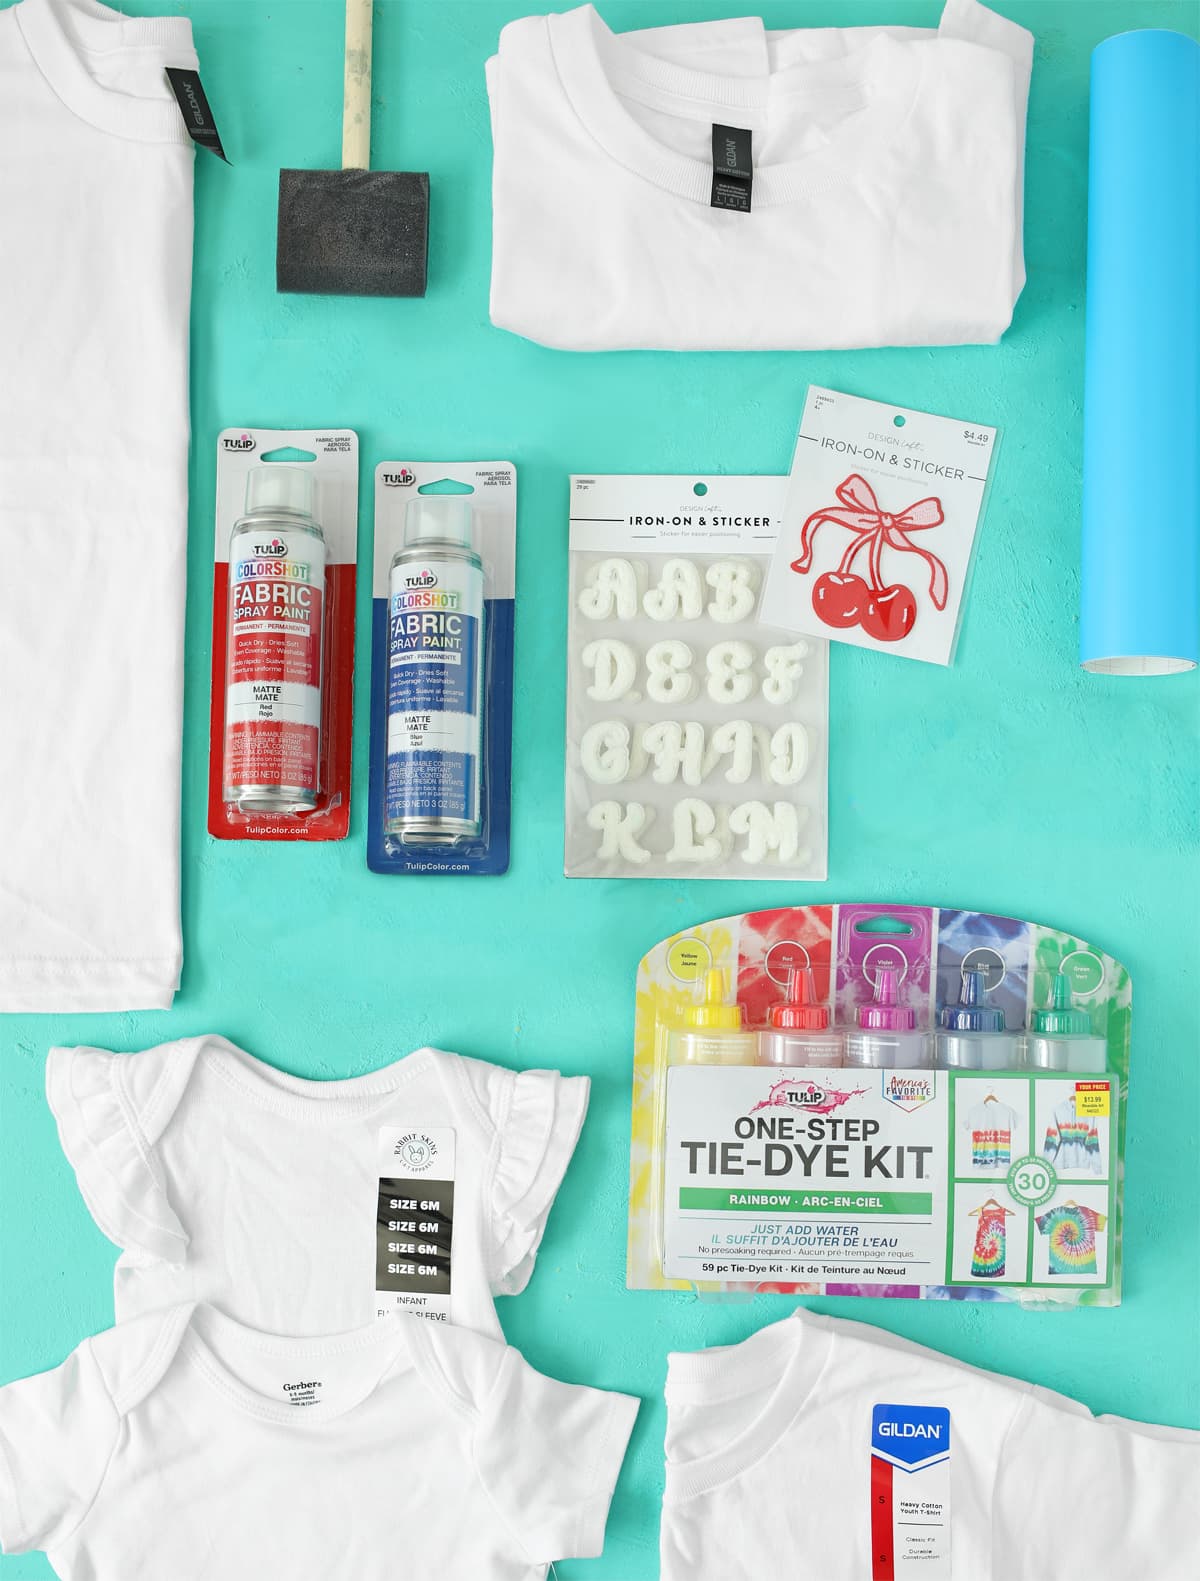
Materials Needed
- White Cotton Shirts
- Tie Dye Kit with red and blue dye
- Fabric Spray Paint Blue + Red
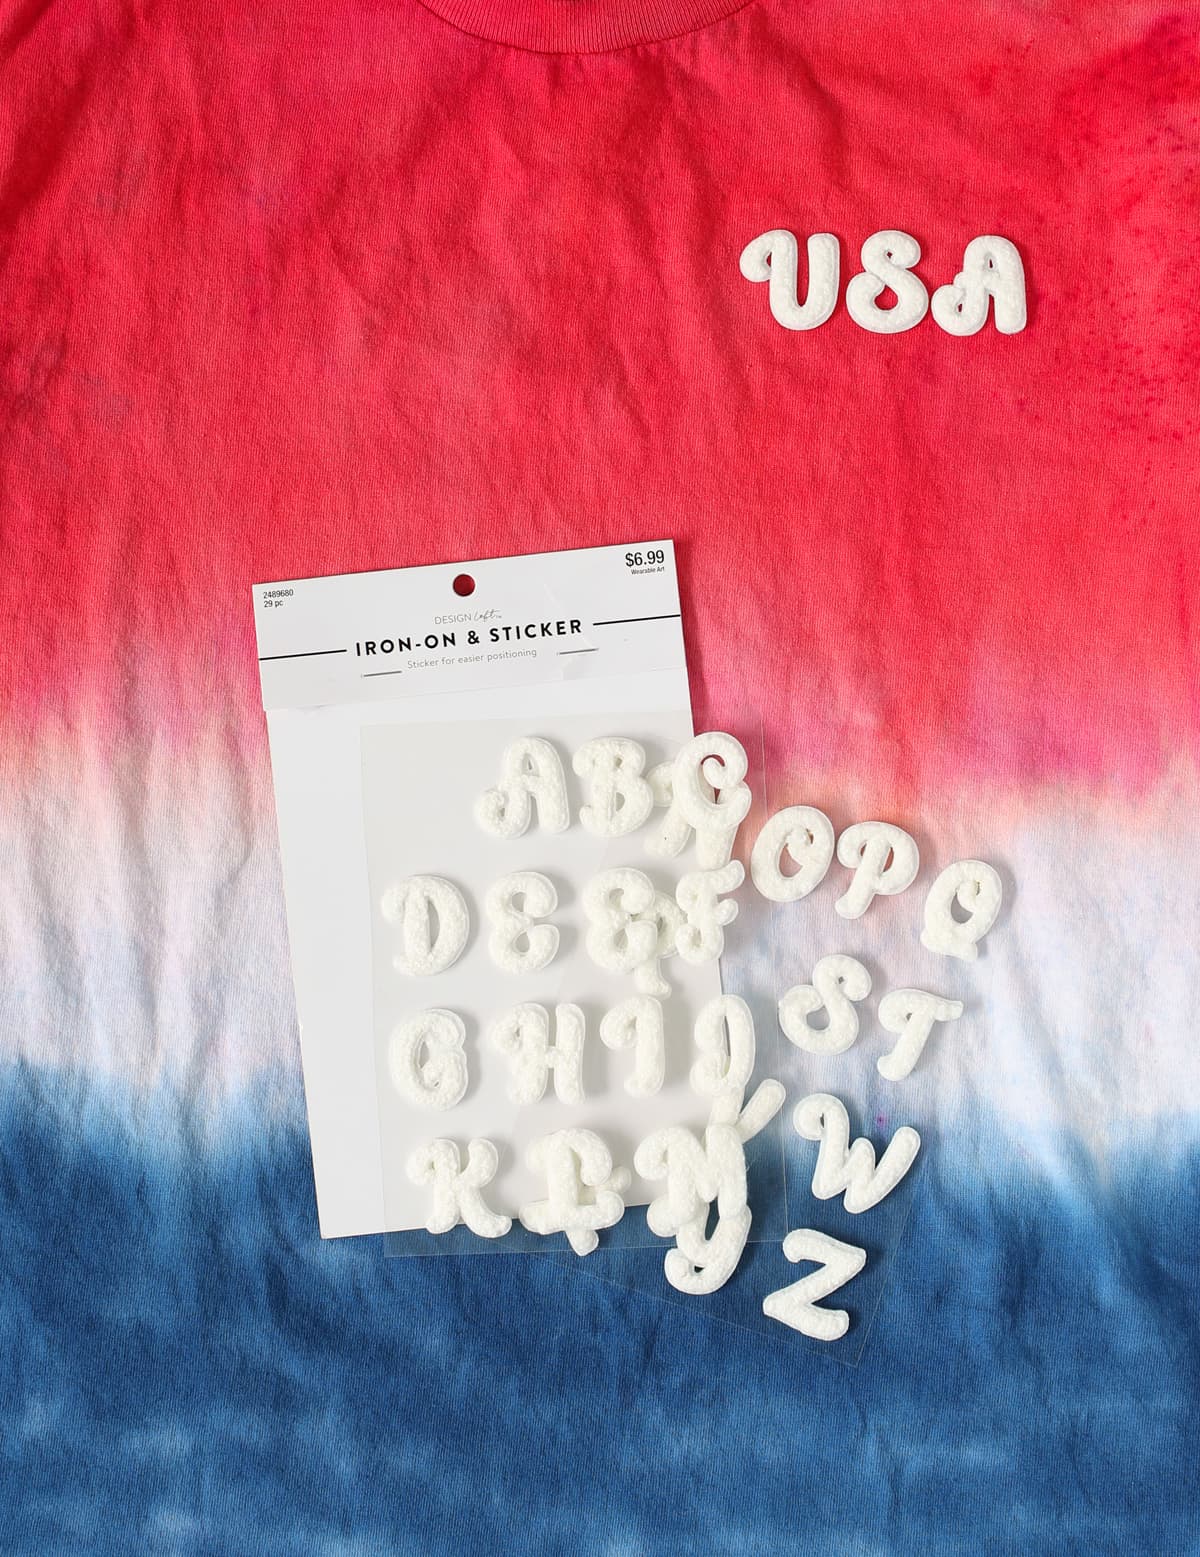
- Iron-On Letter Patches
- Iron-On Cherry + Bow Patch
- Adhesive Vinyl, Stencil Material or Contact Paper
Hobby Lobby has a huge selection of cotton shirts in sizes and styles for the whole family. Their prices are awesome and it’s so nice to be able to get the dye, the shirts and the cute embellishments all in the same store.
Instructions
I’ve written out the instructions for every shirt idea, but there’s also a video tutorial at the bottom of this post.
Tips for Success
- Tie dye can be messy! I suggest doing this project outside, especially if kids will be helping. Cut a plastic party tablecloth into four parts and use them to line your work surface. Then they can double as plastic wrap overnight while the dye sets.
- Don’t forget to wear gloves! The dye will stain your fingers and it’s not the cutest look.
- Zip ties are much easier to use than rubber bands, but the kits usually come with rubber bands and zip ties can be kind of expensive. It’s up to you to decide if you want convenience or savings.
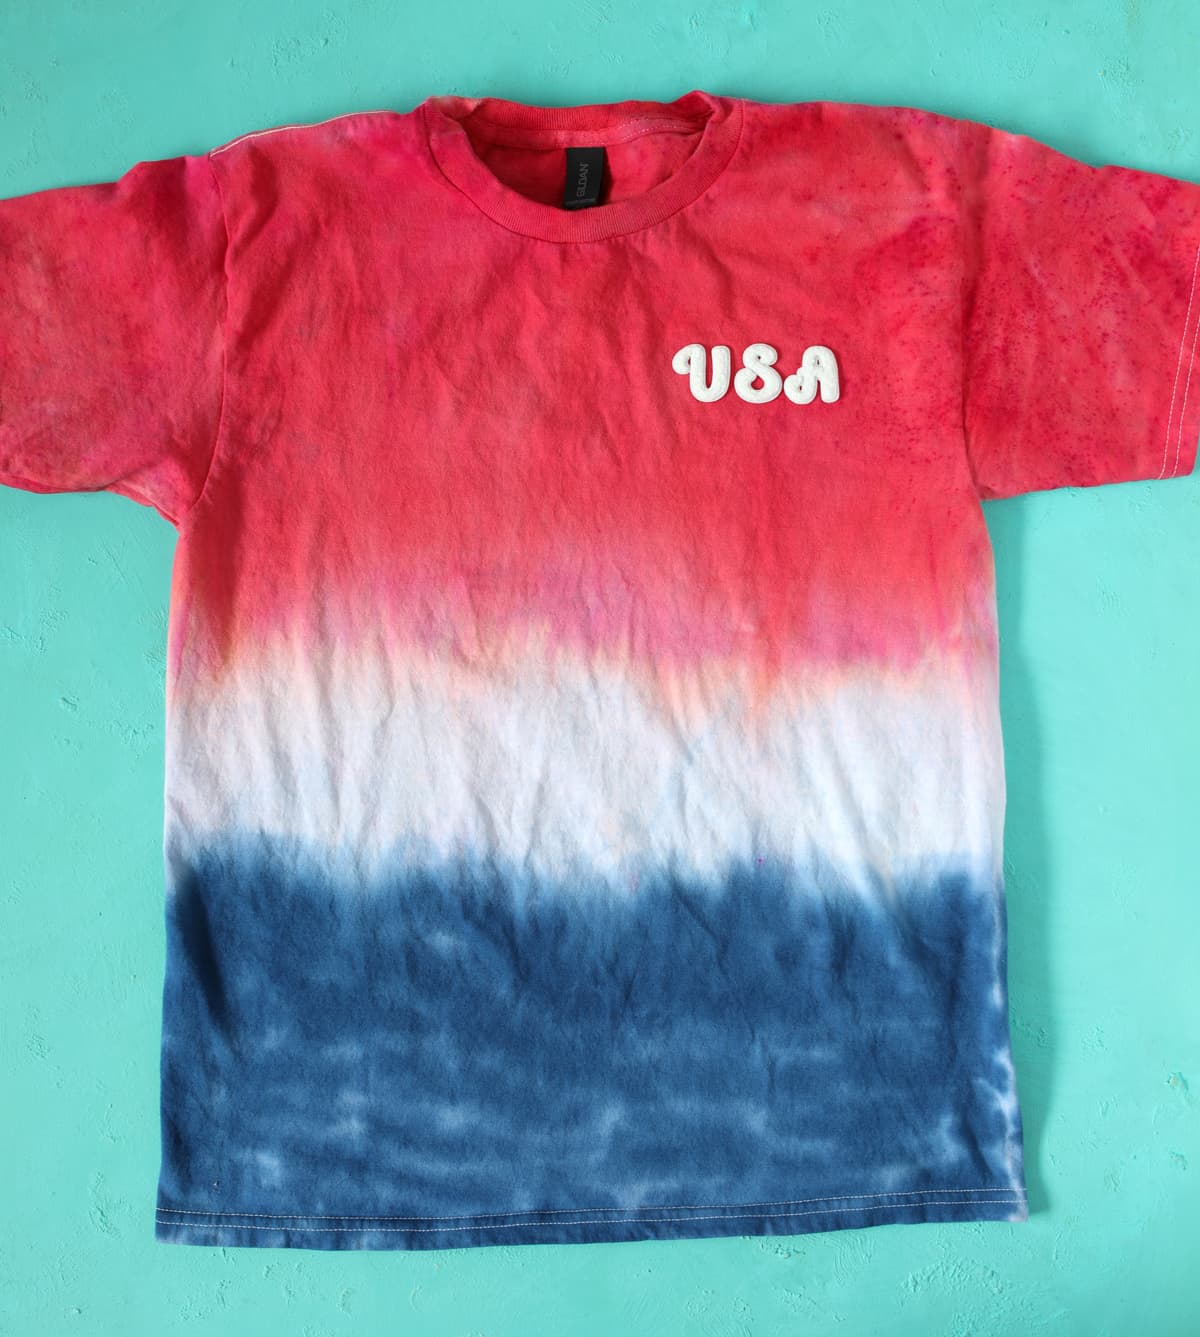
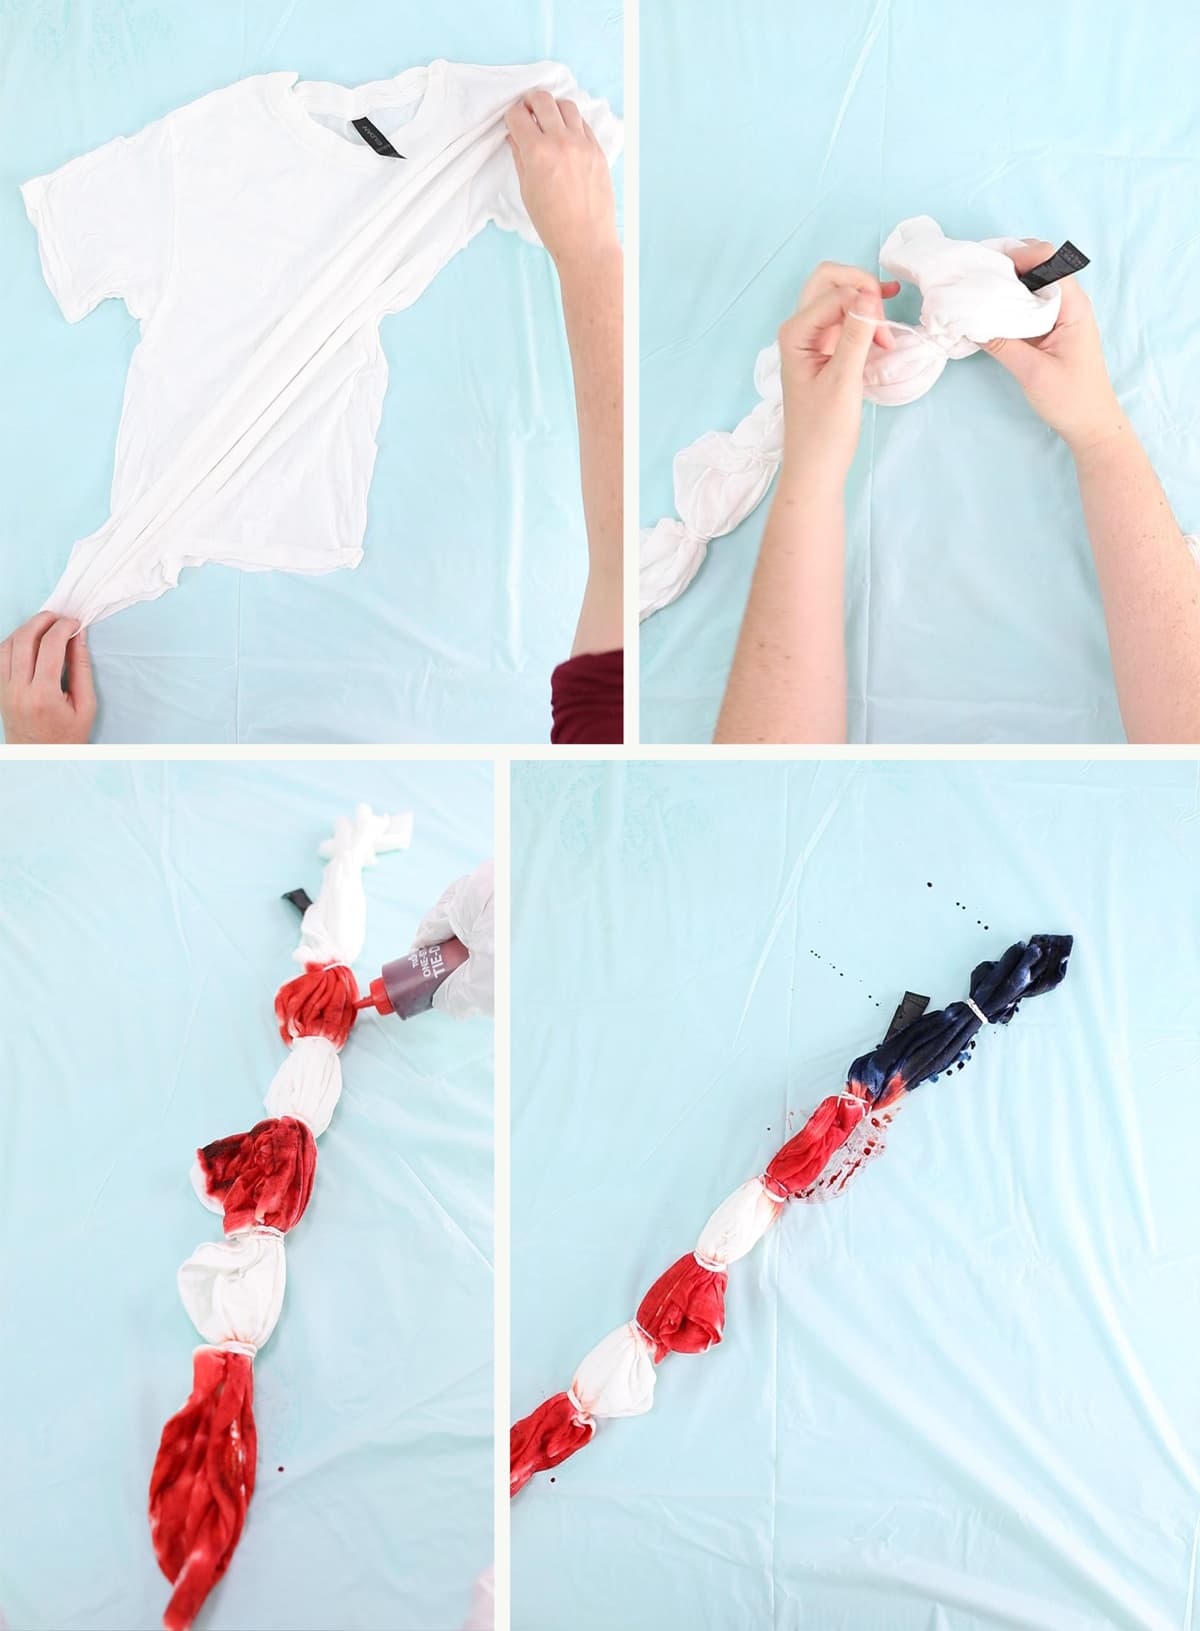
Idea Number One – Bomb Pop Ombre Fourth of July Shirt
- Get the shirt wet, then ring it out so it’s damp but not dripping.
- Add red dye to the top quarter of the shirt and blue dye to the bottom quarter of the shirt. The dye will spread and fade along the center, so be sure to leave enough room that it will still be white. Be super careful not to drip dye onto the white portion of the shirt. Use a foam brush to help the dye spread evenly if desired.
- Roll the wet dyed shirt up in plastic and be careful that the different colored sections don’t touch each other. Let dye sit for at least six hours or overnight.
- Rinse the excess dye out of the shirt with cold water. I hang mine on the clothesline outside and use the hose. Keep rinsing until the water runs clear.
- Wash and dry the shirt according to the instructions on the tie dye package.
- Once the shirt is dry, add iron-on letter patches. I chose these cute puffy letters and made a little USA design on the pocket area. It’s so darn cute and was so easy to do! You literally stick them down and iron them on. The patches have very clear instructions written on the back of the package.
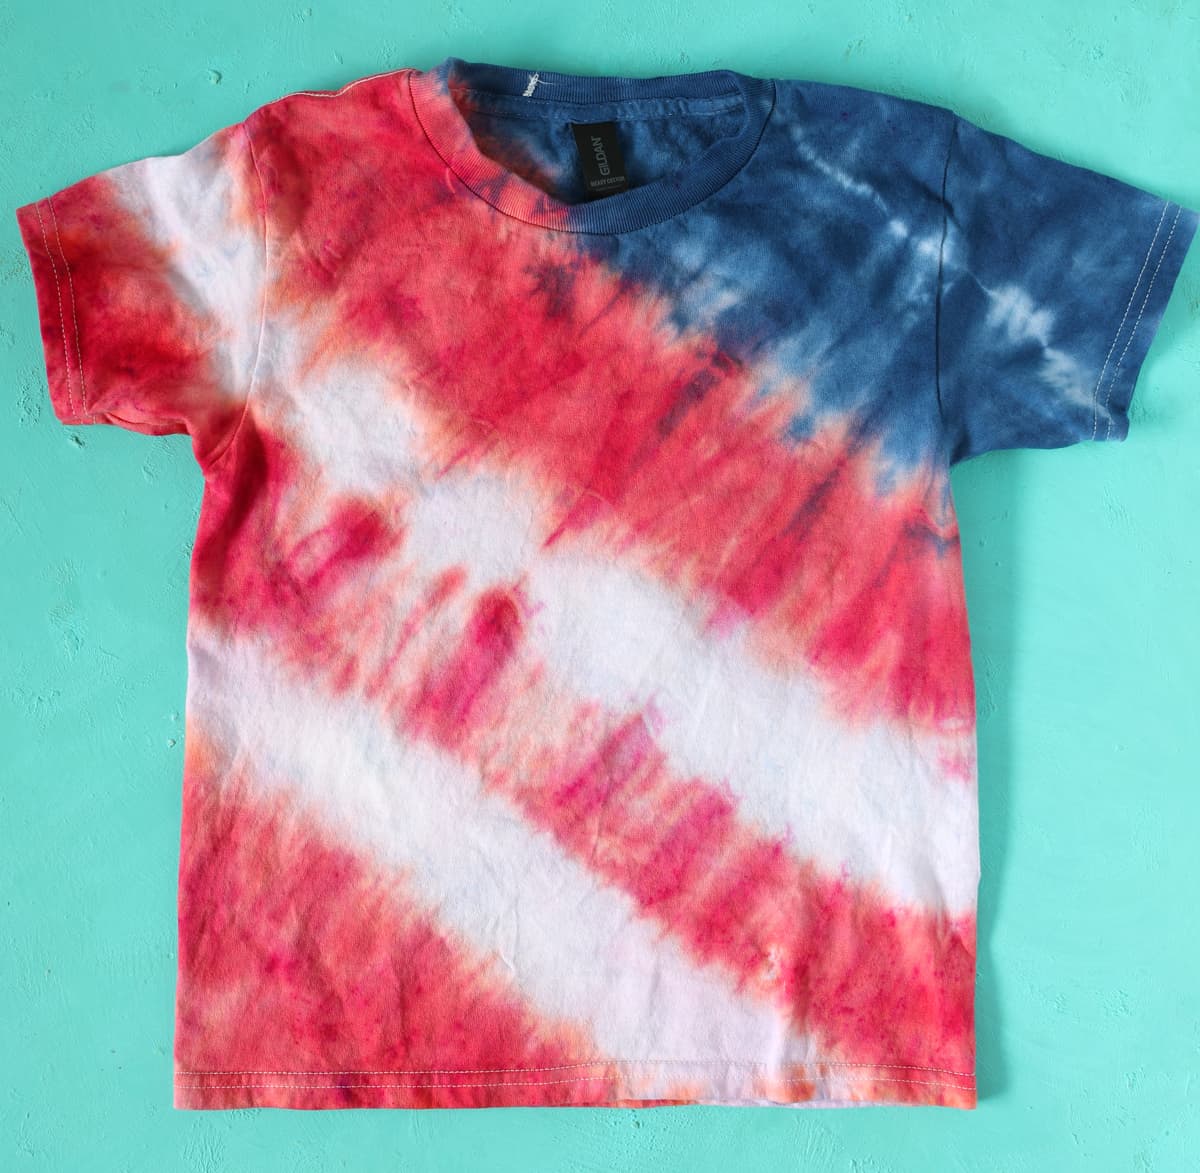
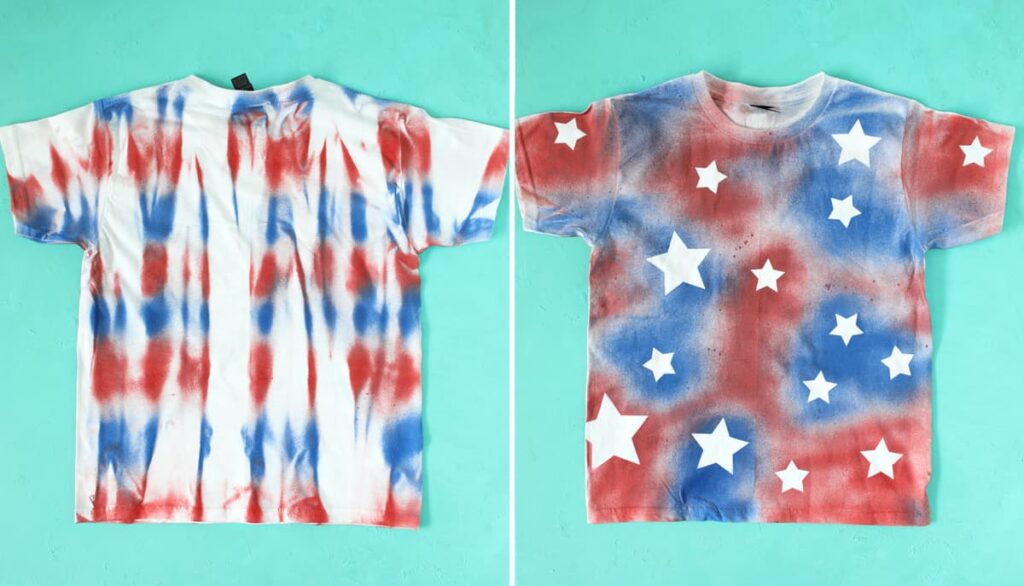
Idea Number Two – Patriotic Striped Tie Dye Shirt
- Get the shirt wet, then ring it out so it’s damp but not dripping.
- Lay the shirt out flat, then stretch a line diagonally across the shirt from the right shoulder to the bottom left hem. Fold the remaining areas of the shirt until they meet that center line. Use rubber bands to clamp the shirt together into seven equal sections.
- Use red dye to fill in sections one, three and five. Fill in sections six and seven with blue dye. Be sure to flip the shirt over to get both sides. And be careful not to get the wrong color of dye on the different parts of the shirt, especially when you flip it over.
- Roll the shirt up in the tablecloth so that the colors don’t touch. Let dye sit for at least six hours or overnight.
- Rinse the excess dye out of the shirt with cold water. I hang mine on the clothesline outside and use the hose. Keep rinsing until the water runs clear.
- Wash and dry the shirt according to the instructions on the tie dye package.
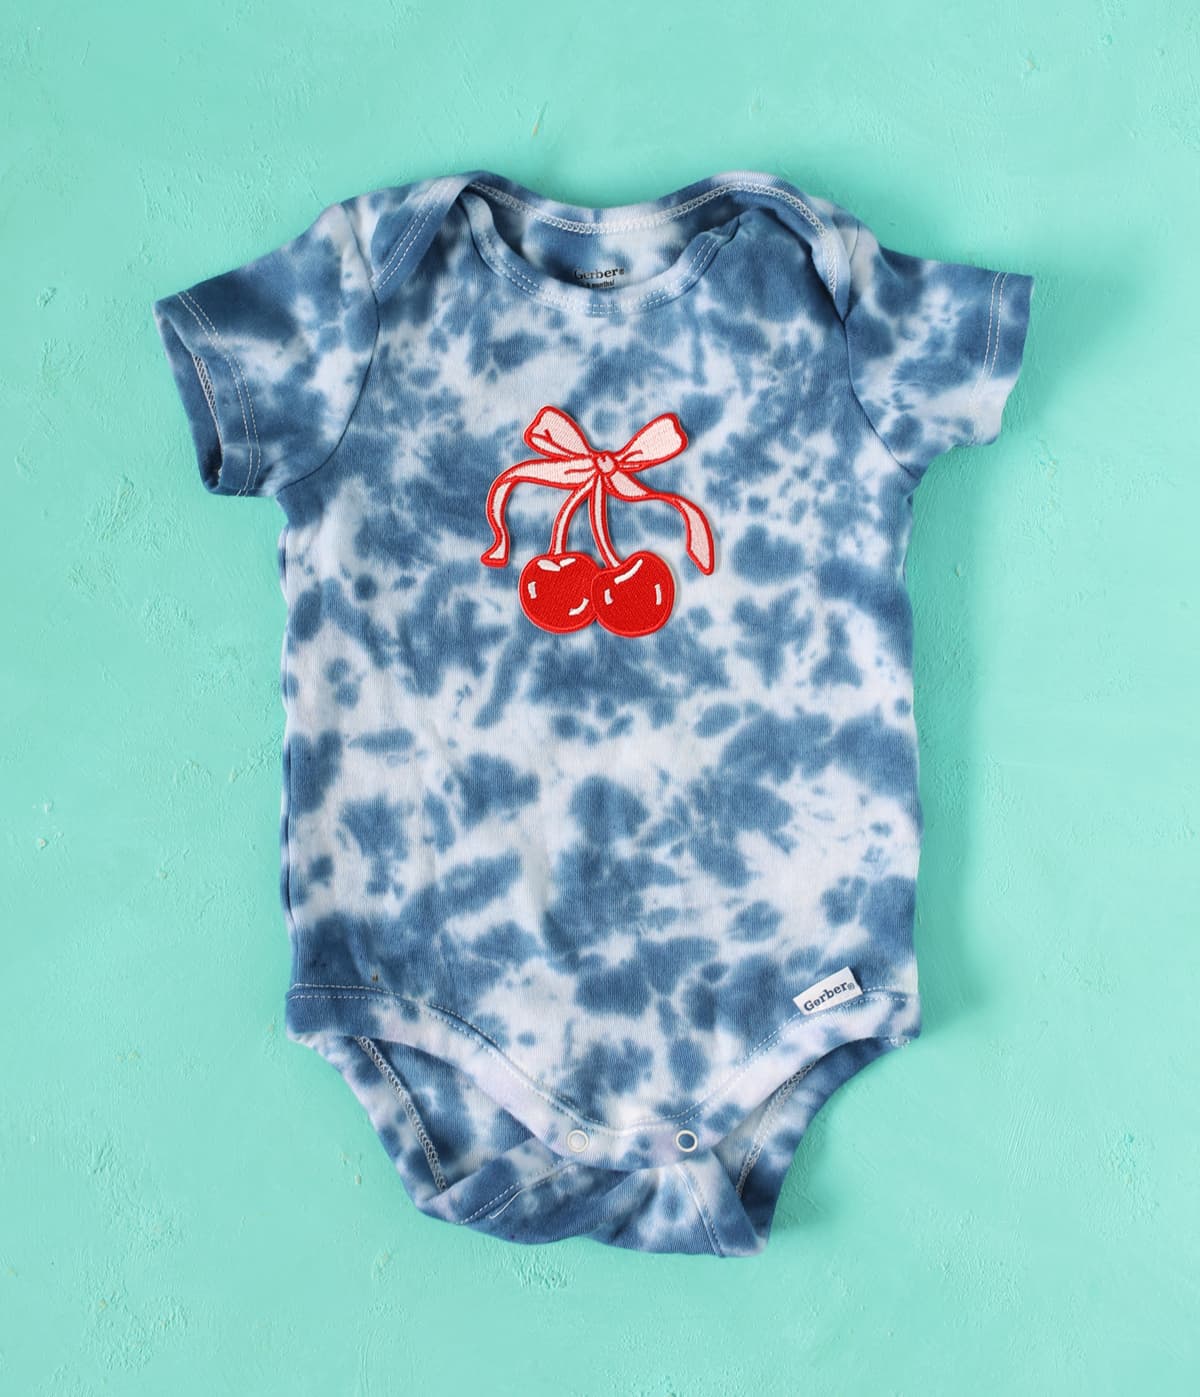
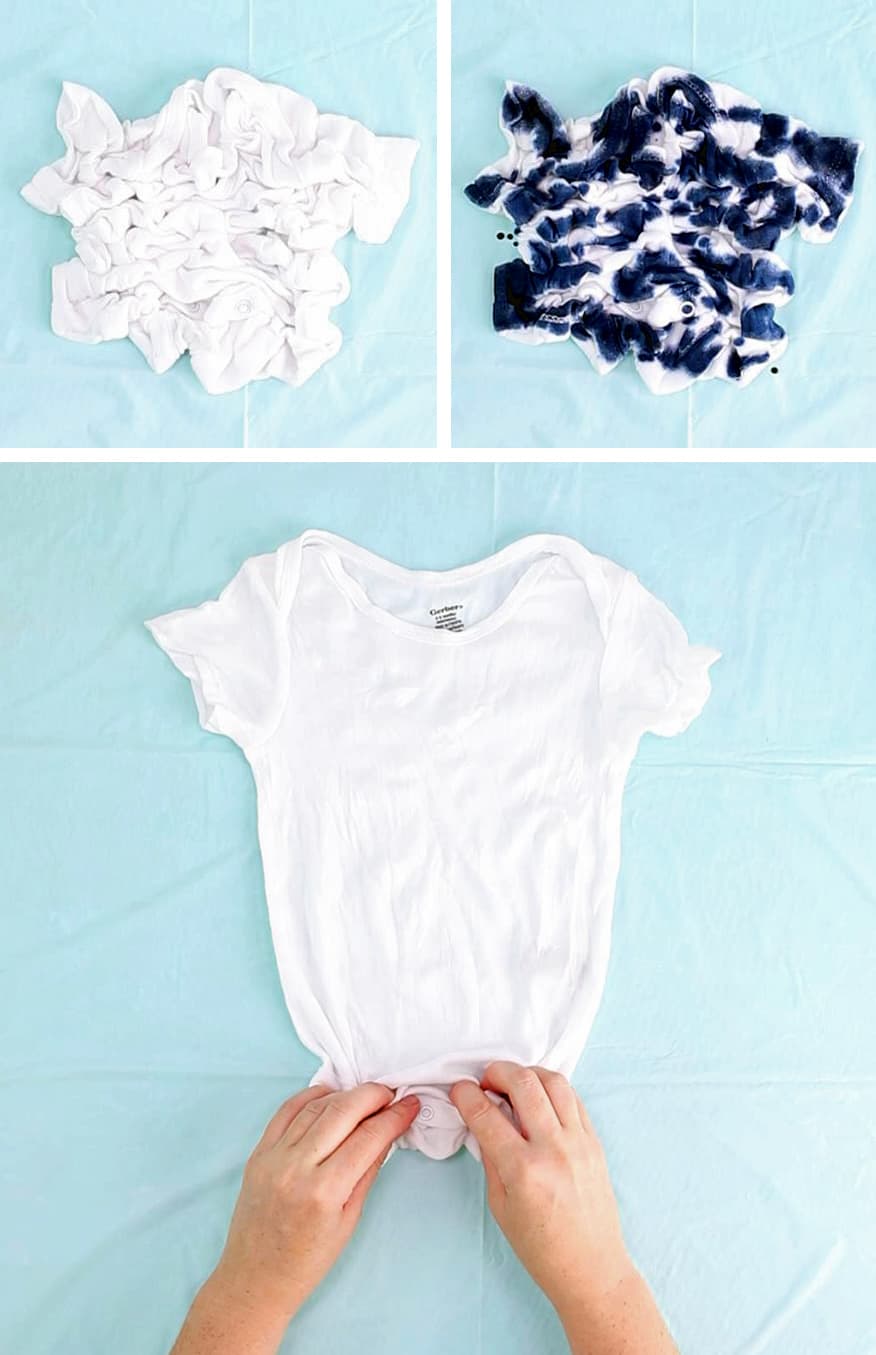
Idea Number 3 – Scrunch Dye and Iron-On Patch
- Get the shirt wet, then ring it out so it’s damp but not dripping.
- Lay the shirt out flat, then use your fingertips to scrunch the shirt together. It’s the same motion you use when dimpling the top of focaccia bread. LOL.
- Add blue dye to the “peaks” of the scrunched shirt and leave the “valleys” white. Carefully flip the shirt over, keeping the scrunched shape in tact and repeat the dying process. You have to be really careful with this tie dye design to not add too much dye or you’ll just have a plain blue shirt at the end.
- Keep the scrunched shape and fold the tablecloth around the shirt to block out air. Let the dye sit for at least six hours or overnight.
- Rinse the excess dye out of the shirt with cold water. I hang mine on the clothesline outside and use the hose. Keep rinsing until the water runs clear.
- Wash and dry the shirt according to the instructions on the tie dye package.
- Now comes the best part… adding a darling patch! It’s very straightforward to iron on. Just follow the instructions on the package. I adore this cherry patch, but there were tons of other cute designs that would work well for the Fourth of July too, so take a peek around. You’ll want to make a million shirts!
Idea Number 4 – Spray Dye and Reverse Stencil Stars
This last shirt idea is the most unique because we’re using spray dye instead of traditional liquid tie dye. The spray dye can be found right next to the other tie dye products and I was really excited to try using it.
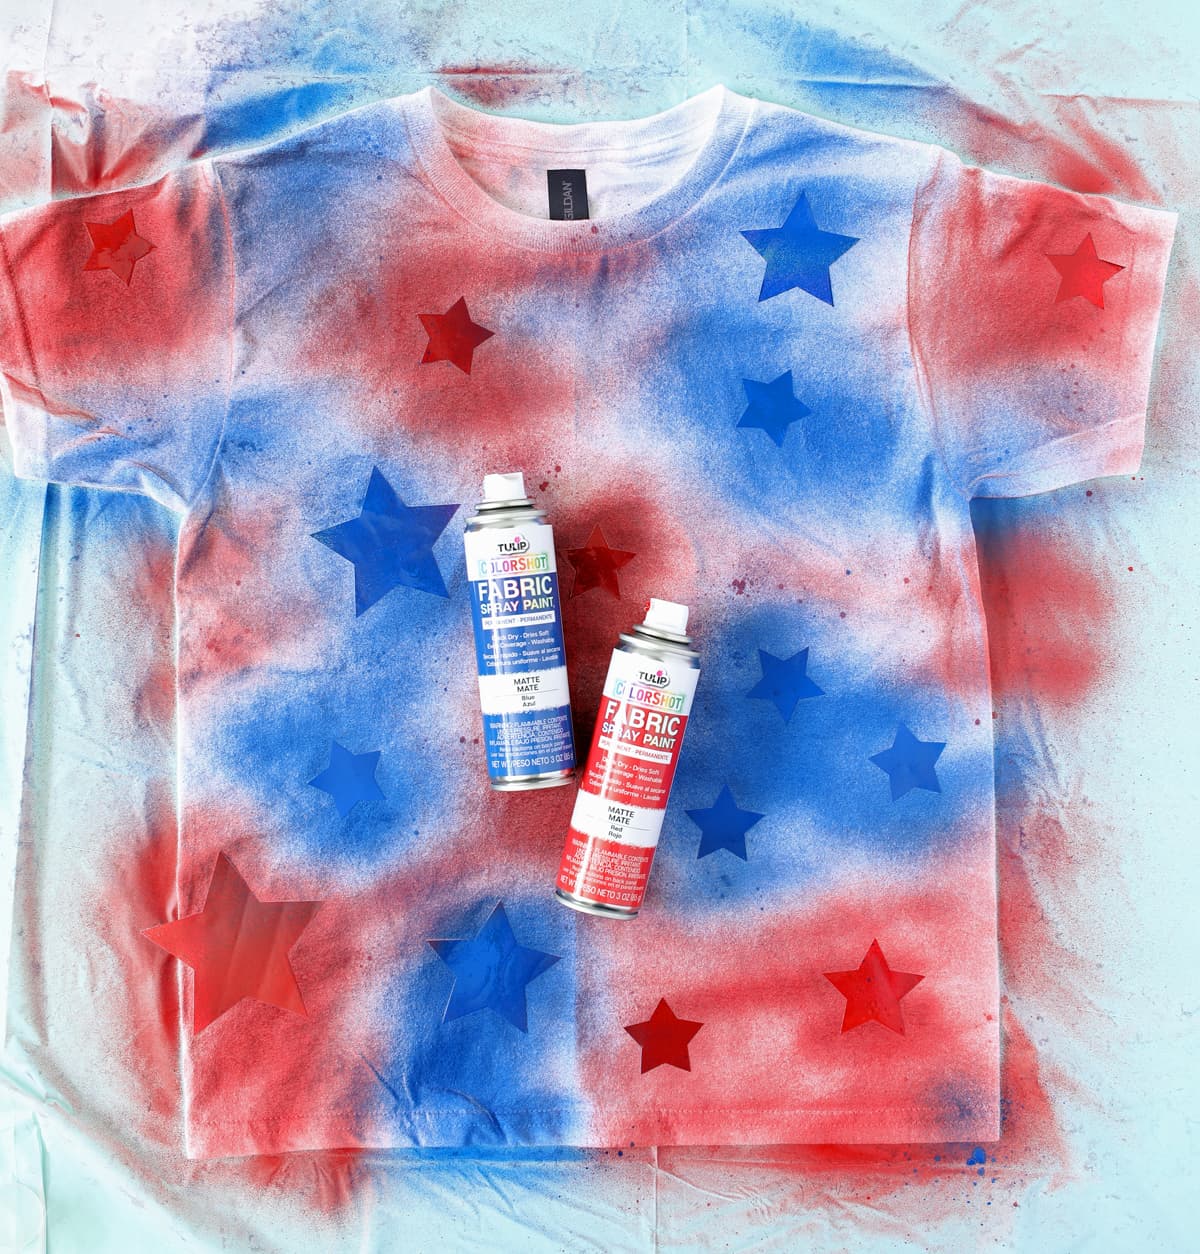
- This product is applied to a DRY shirt. Lay a completely DRY shirt out on a plastic tablecloth.
- I really wanted to add stars to my shirt, so I cut some out of adhesive vinyl and stuck them all over the shirt. I used a few different types of vinyl and all of them worked equally well, so I think you could use anything you have. I also think contact paper would work great.
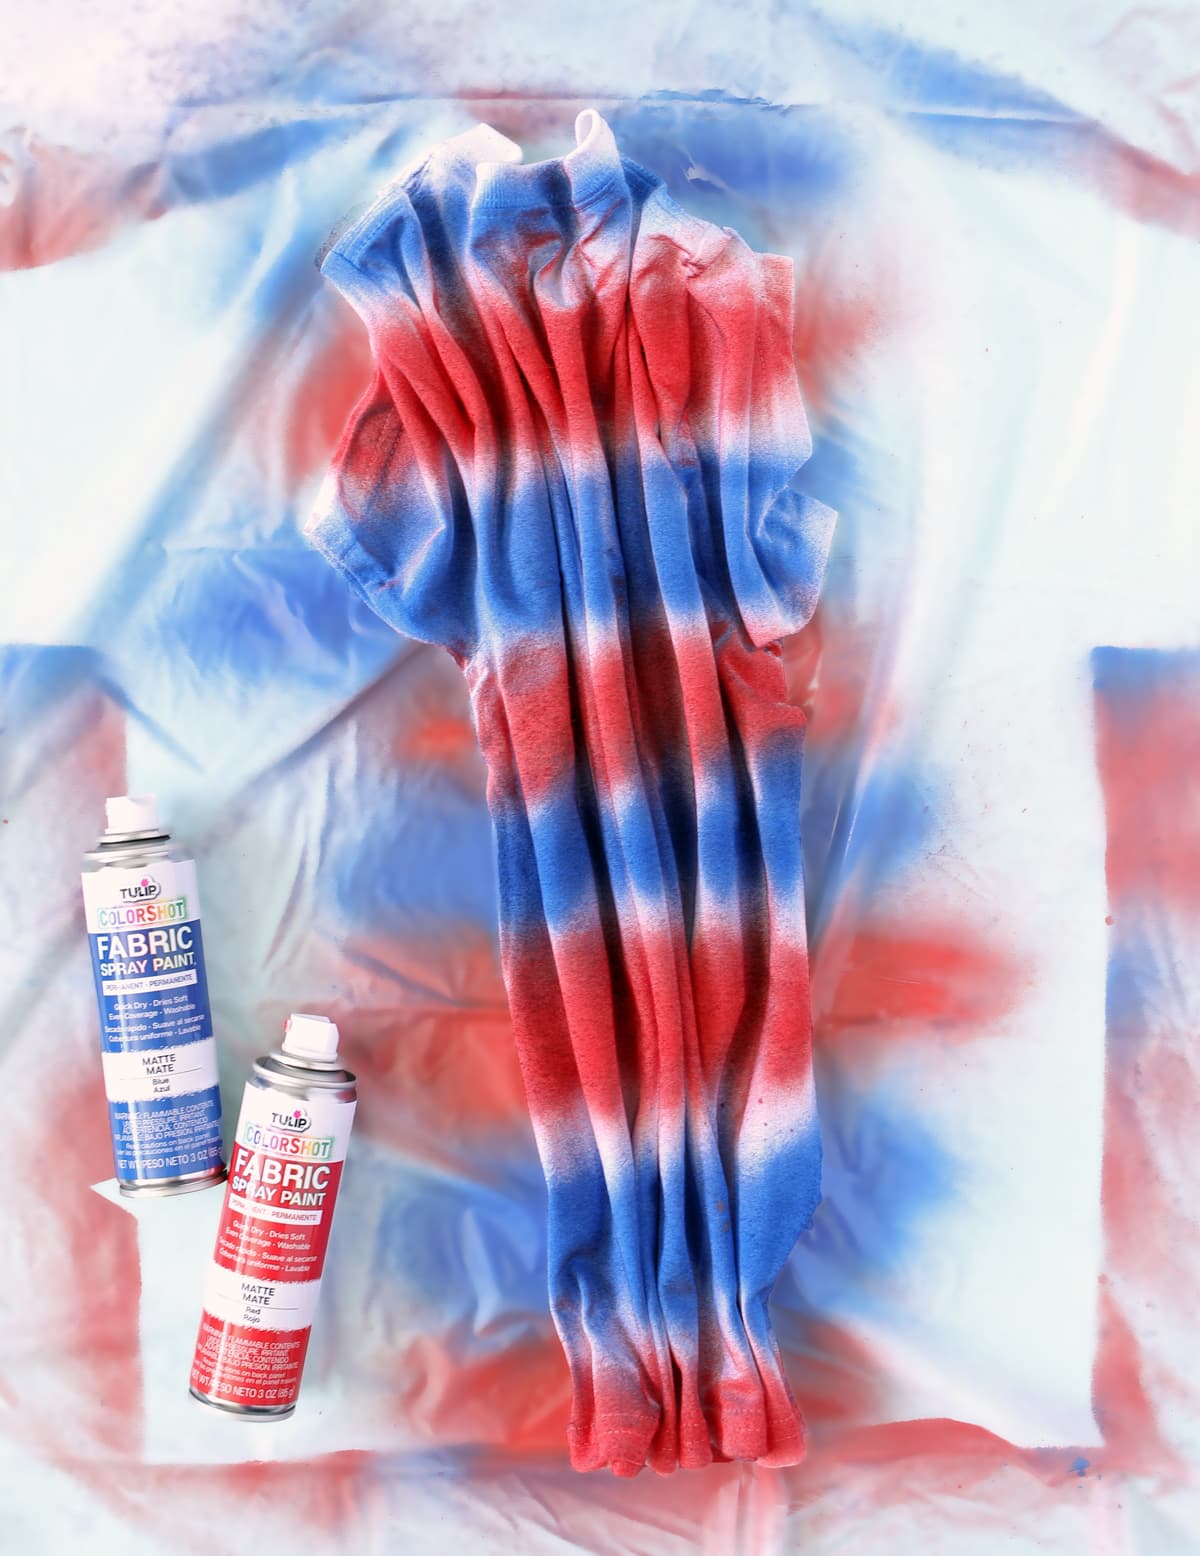
- Follow the instructions on the spray bottle, then start spraying all over the shirt! I did a random pattern on the front. Let the paint dry for 30 minutes, then flip the shirt over and do the other side. This time I scrunched the shirt up in vertical stripes and sprayed horizontal stripes across the folds. It turned out so cool!
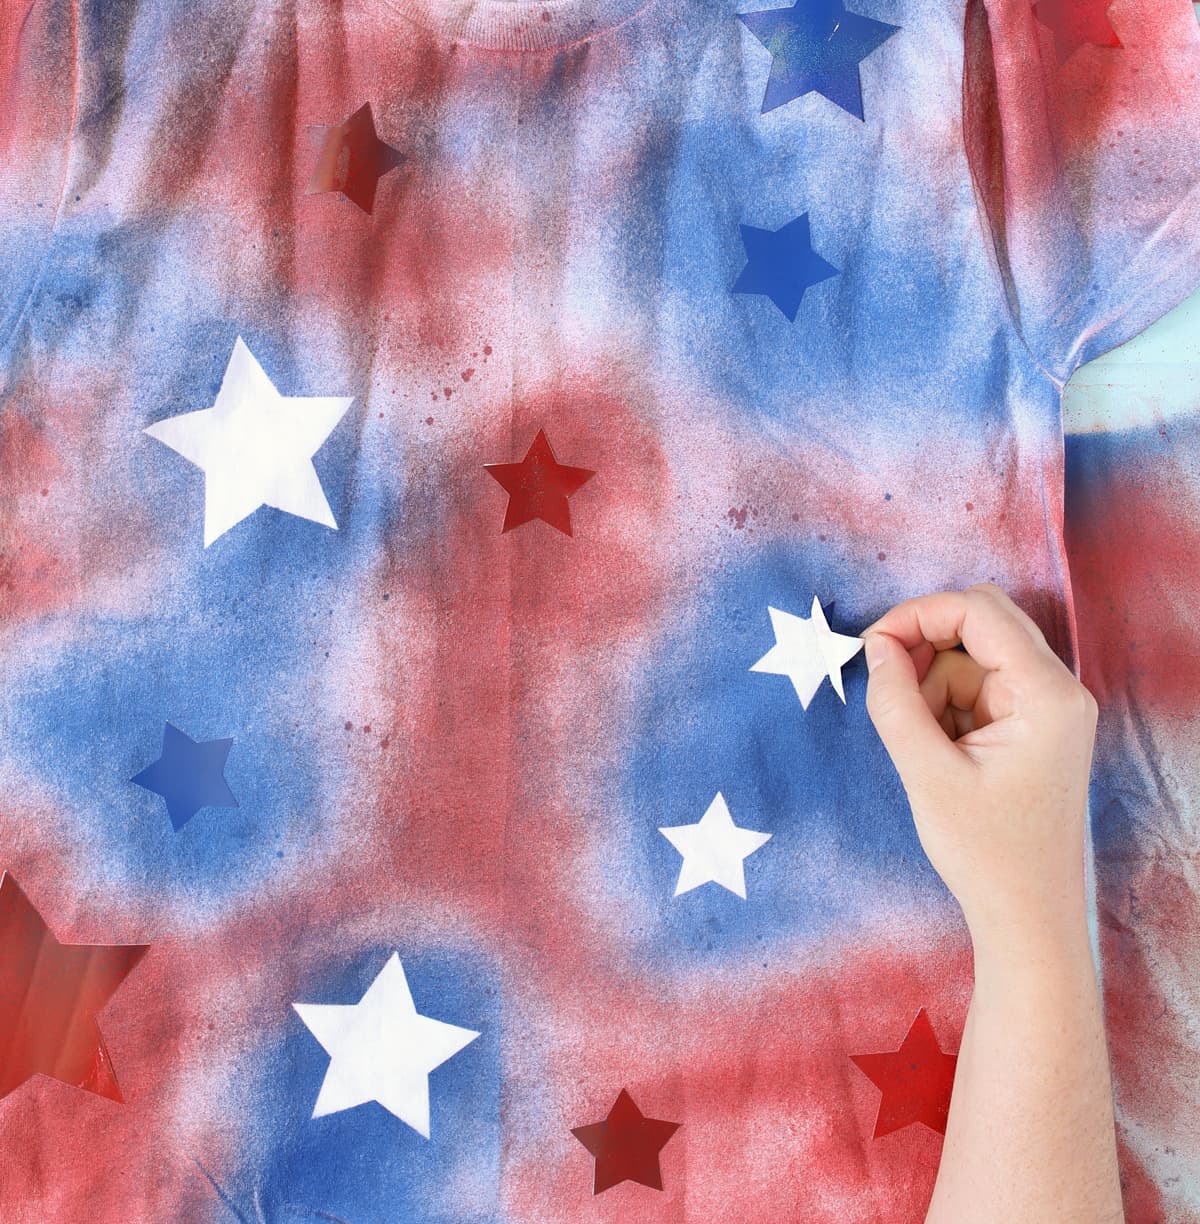
- Let the shirt dry completely, then peel off the adhesive vinyl to reveal the white stars underneath!
The packaging says the shirt is washable after 72 hours. I took pics before then, but I’ll let you know how it washes up.
You’ll for sure want to do this shirt outside. The fumes from the paint were pretty stinky. But otherwise it’s much less mess and quicker to do than traditional liquid dye, so I will definitely be using it again, especially for stripe designs.
DIY Fourth of July Tie Dye Shirts Video
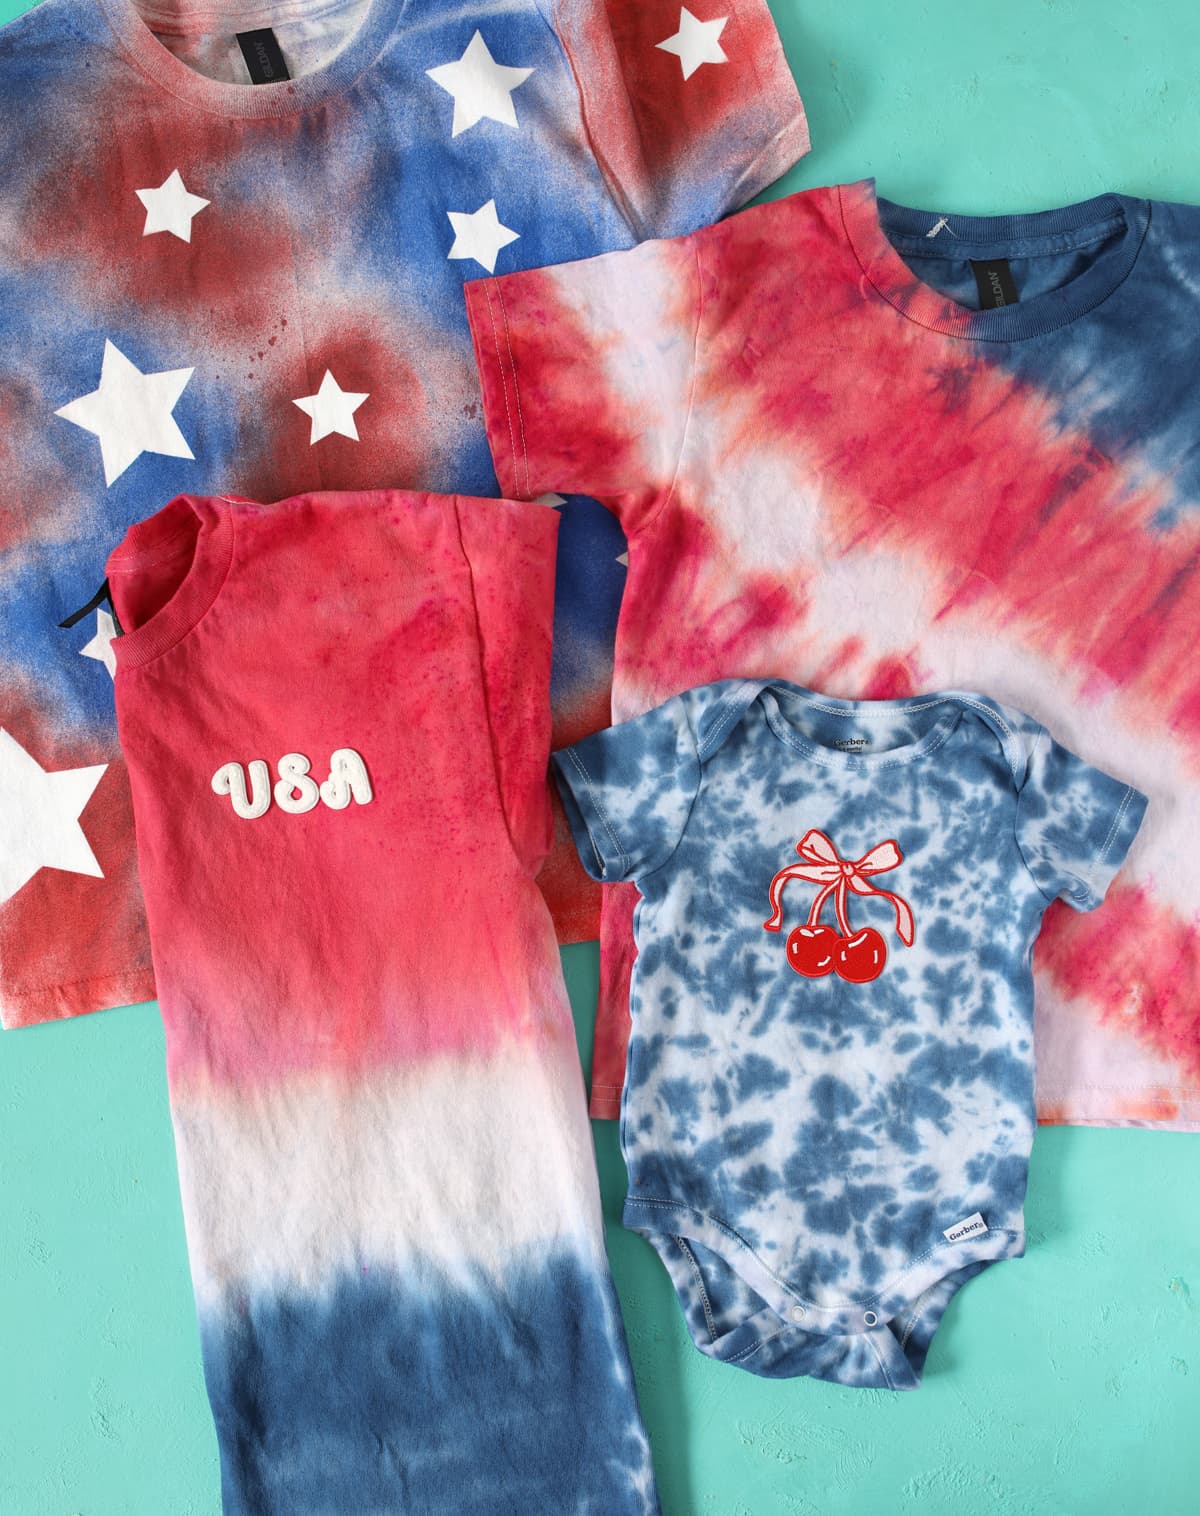
Okay, which shirt is your favorite? Which one will you be making for the Fourth of July? Let me know in the comments!

More Cool Tie Dye Patterns to Try
If you are looking for even more tie dye patterns, be sure to check out this post.
More Ideas here