Make a patriotic candy shop using supplies from Dollar Tree. This is a fun and easy Fourth of July craft!
I made the cutest mini candy shop earlier this year using dollar store supplies and it was so fun that I decided all through this year I would make different versions for all the seasons and holidays. So far we have Valentine’s Day, St. Patrick’s Day and Easter and today we’re adding the Fourth of July!
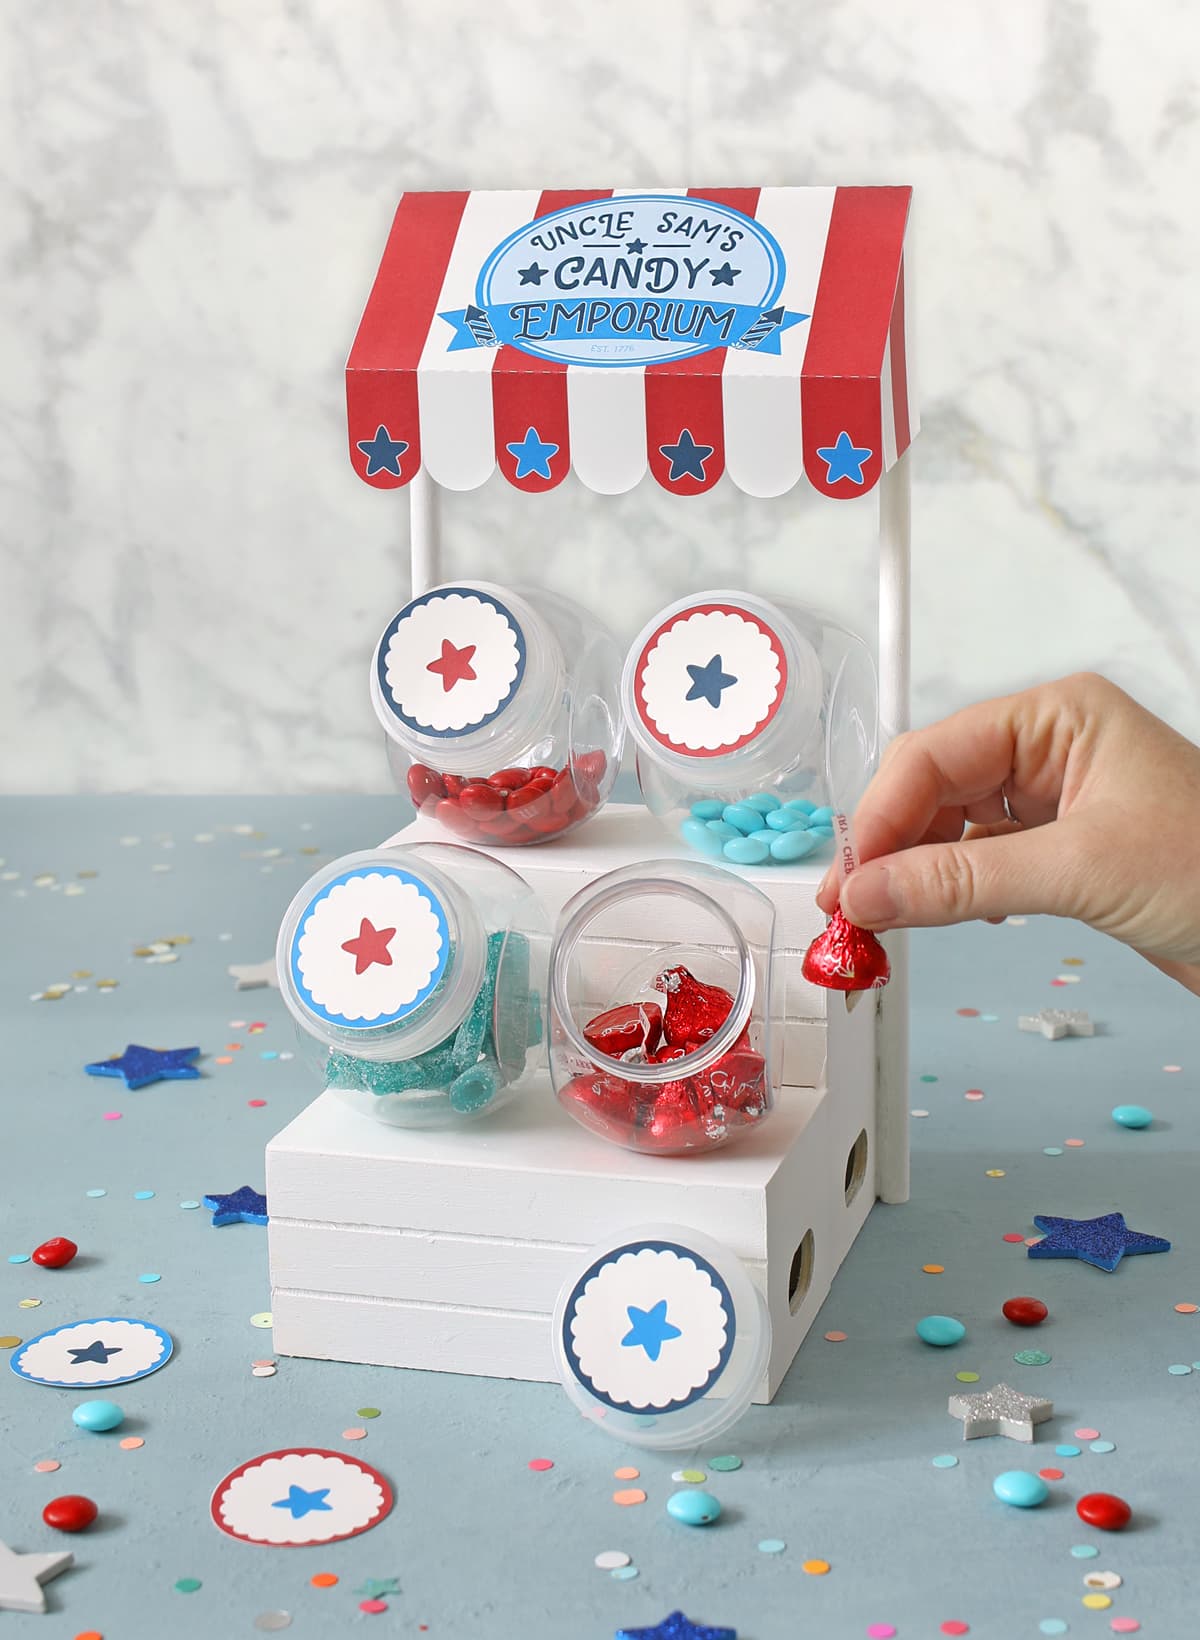
This time the candy shop got a patriotic glow up and is now Uncle Sam’s Candy Emporium. How fun is that?!
Let me show you exactly how I made my dollar tree candy shop so you can make one too. Here’s what you’ll need:
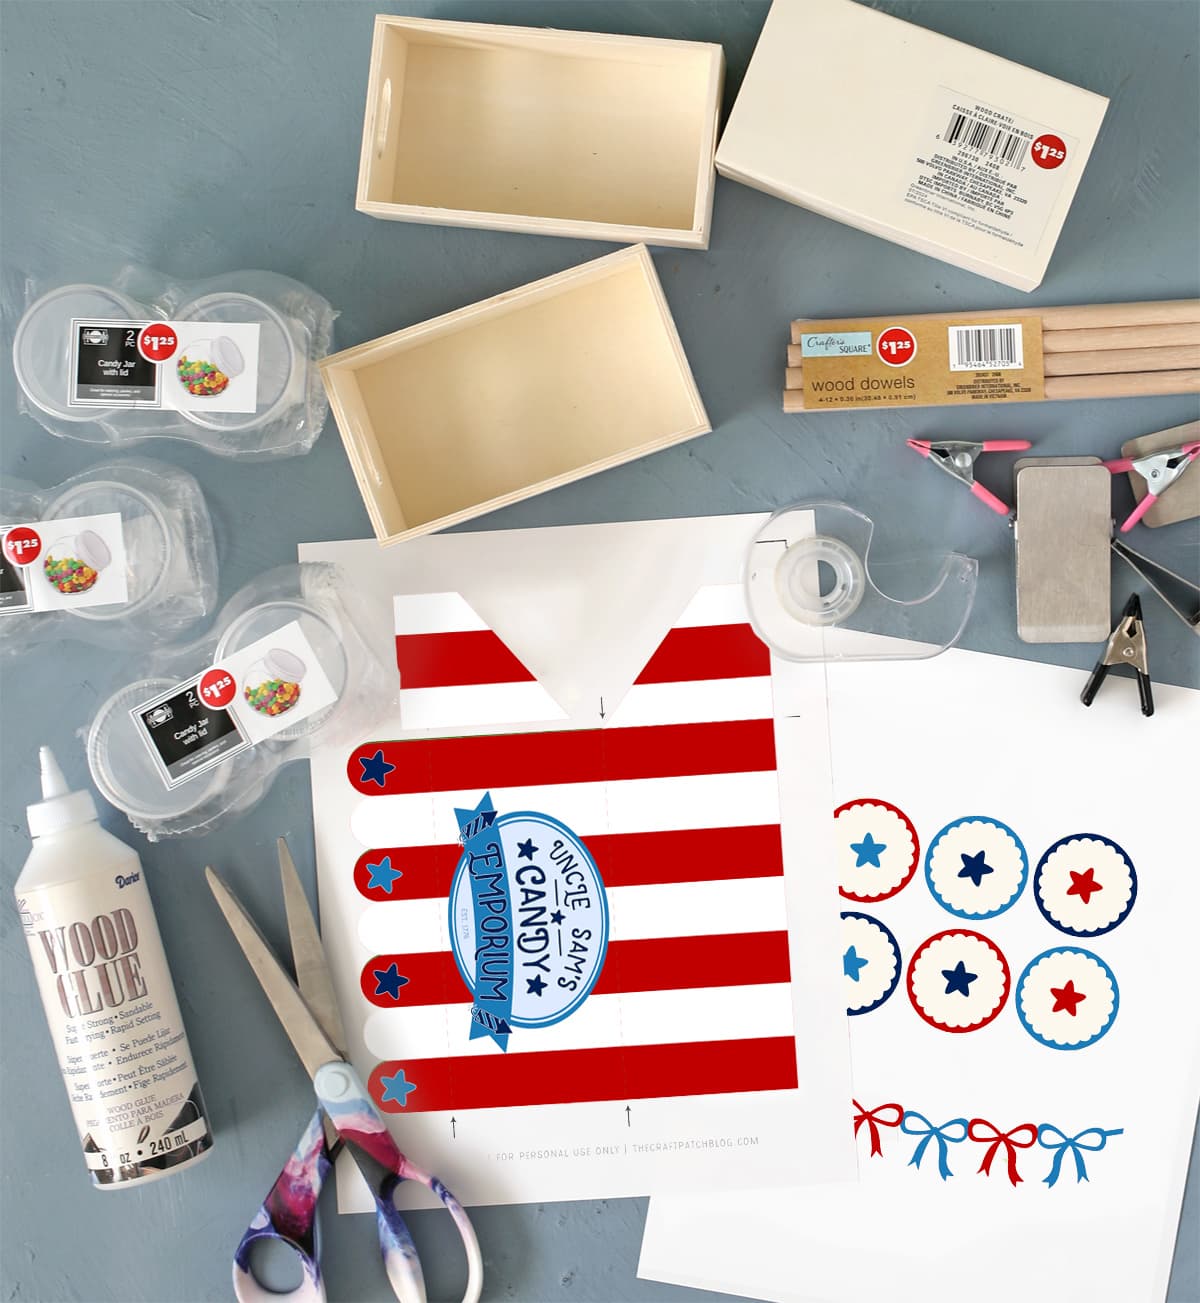
Materials Needed
- Printable Fourth of July Awning (download at the bottom of this post)
- 3 Wooden Crates
- Wooden Dowels
- Small Candy Jars with Lids (4 total)
- White Cardstock
- Wood Glue
- Clamps
- Hot Glue Gun + Glue Sticks
- Clear Tape
- White Craft Paint + Paint Brush
I’ve linked to the exact items I purchased at Dollar Tree so you can tell what they are, but you shouldn’t buy the items online since you have to buy like 24 of them. Just head to your local store instead.
I purchased six candy jars but ended up only using four. I was originally planning to place two on the table in front of the stand, but then decided I didn’t like that as much. But you can do that if you like.
Instructions
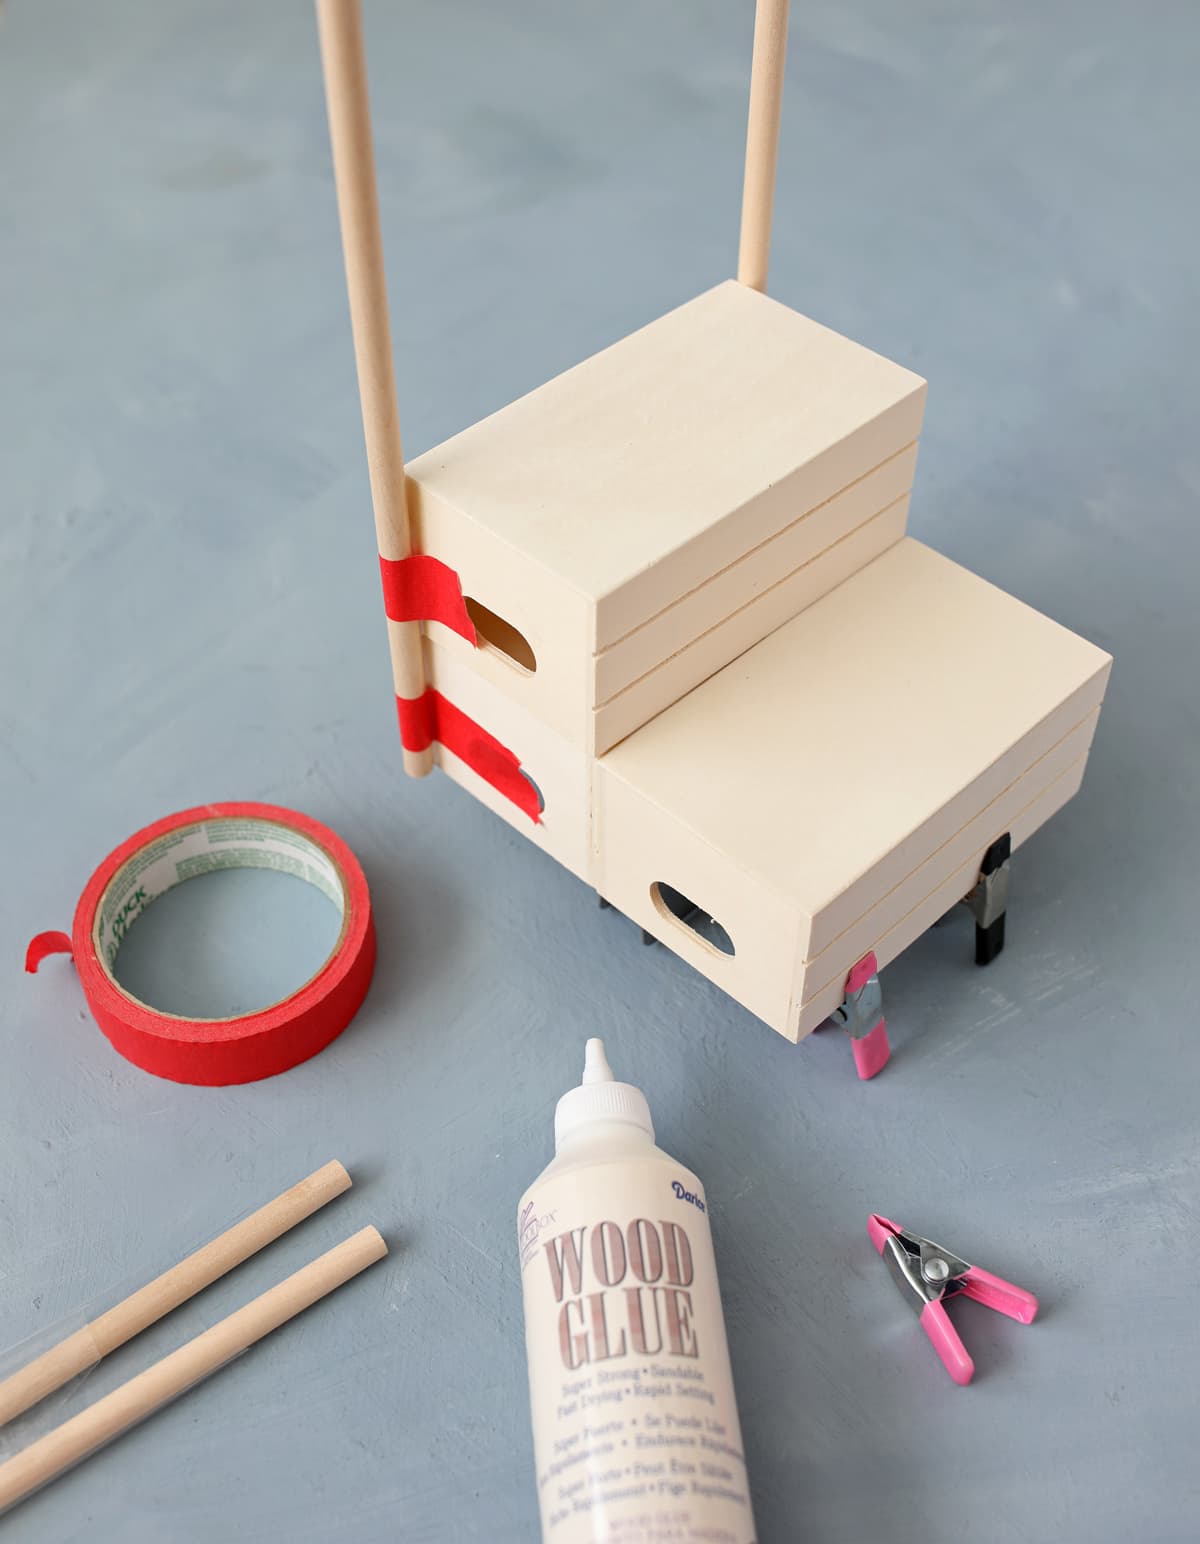
Step 1: Remove the store stickers from all three wooden crates, then use wood glue to glue them together as shown, with two crates on the bottom and one stacked on top. You want the crates to be upside down so the solid bottom sides face up. Clamp the wood together as it dries. I’d give the crates a good hour to dry so they are nice and stable before moving to the next step.
Step 2: Use hot glue to attach the two dowels on each side of the back crates that are stacked on top of each other. I tried using wood glue and it was the worst. Why did I cheat on my trusty glue gun? The hot glue molds around the dowels, fills in any uneven spots and definitely gave me better adhesion.
Step 3: Paint everything you’ve assembled so far. You could use spray paint or regular craft paint. I suggest painting it white if you want to swap out the awnings for different holidays.
Step 4: Now it’s time to print out the awning. You’ll want to print it onto white cardstock.
I created two variations: an SVG file for use with an electronic cutting machine and a PDF version for cutting out by hand. You’ll see both file types in the download folder at the bottom of the post, so double check that you download the correct one for your situation.
Both printables have the main large shape and one small separate piece that will become one side of the awning. I had to design it this way so that the whole thing could fit on a regular piece of paper.
I’ve reused some of the tutorial photos from Cupid’s Candy Shoppe to save time and get this posted for all of you quicker, but the methods are the same.
ELECTRONIC CUTTING MACHINE INSTRUCTIONS
If you have a Silhouette or Cricut machine, I included an SVG file so you can print and cut the design. So fast and easy. If you are new to using a Silhouette machine or need a refresher, follow this Print and Cut tutorial.
Just a few notes:
– Don’t forget to turn on your registration marks before printing. This is what tells the cutter exactly where the printed design is on the page, so it’s vital to getting the cut lines aligned with the printed design.
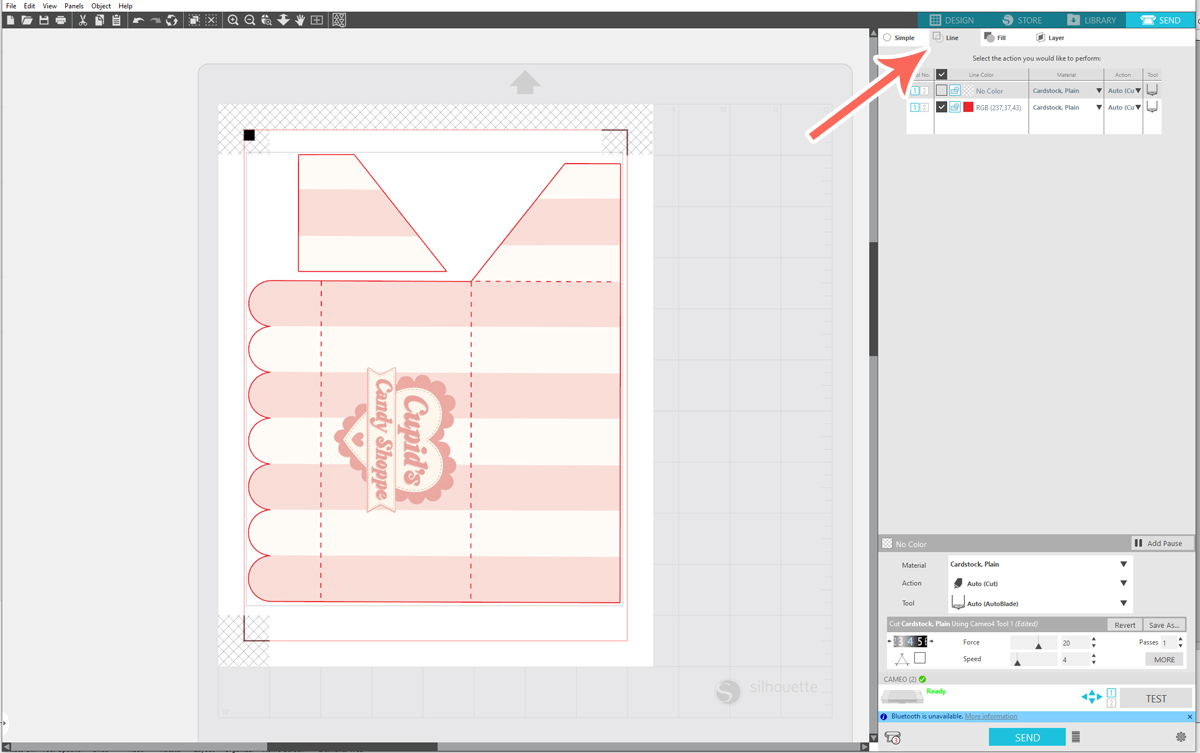
– When you go to the SEND tab to send the design to your machine, if you see a bunch of cut lines all over where they shouldn’t be, you’ll need to select the LINE sub-tab so that it only cuts around the design. It should look like the image below when it’s ready to send to the machine.
CUTTING BY HAND INSTRUCTIONS
If you don’t have an electronic cutting machine, you can still make this craft! Just download the PDF version of the design and print it onto white cardstock. Before cutting it out, use the gray arrows to make fold lines using a scoring tool and a ruler. Then cut out the shapes. I designed it this way so that there are no visible lines on the finished project.
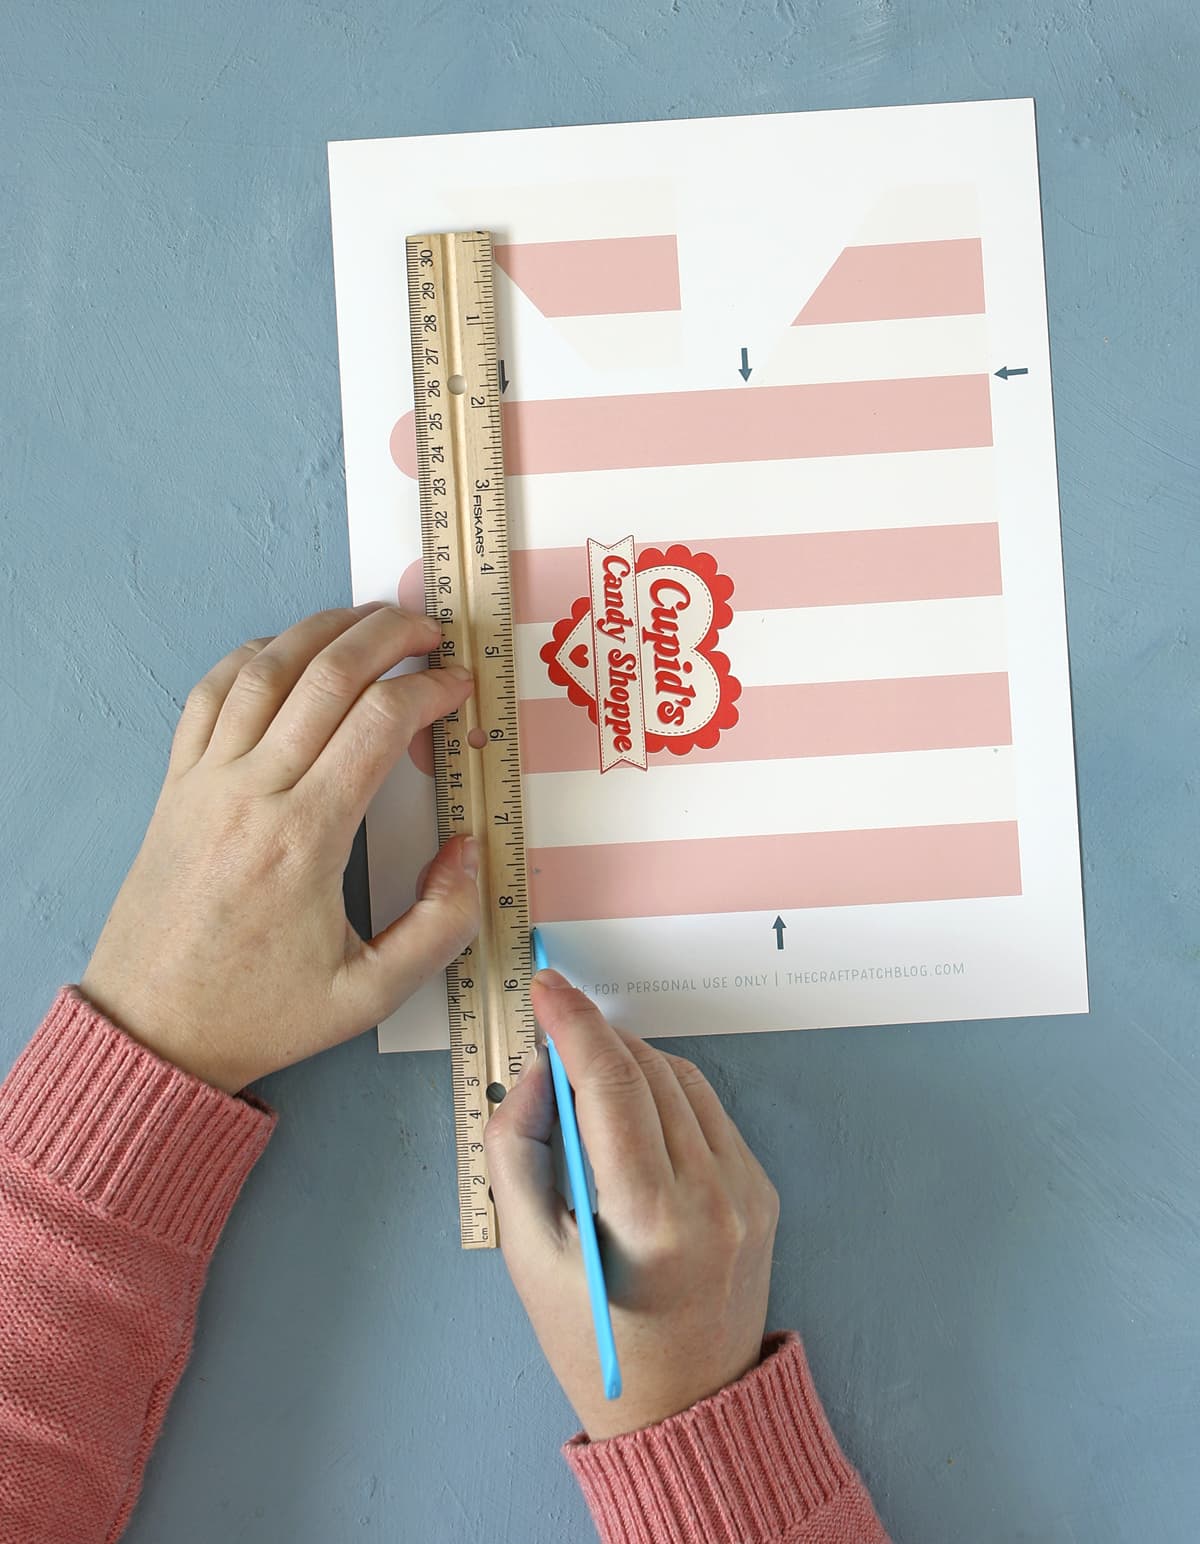
Cut around the two shapes. I outlined the shapes in the photo below to help clarify where you should cut. Can you see the extra piece and where it attaches?
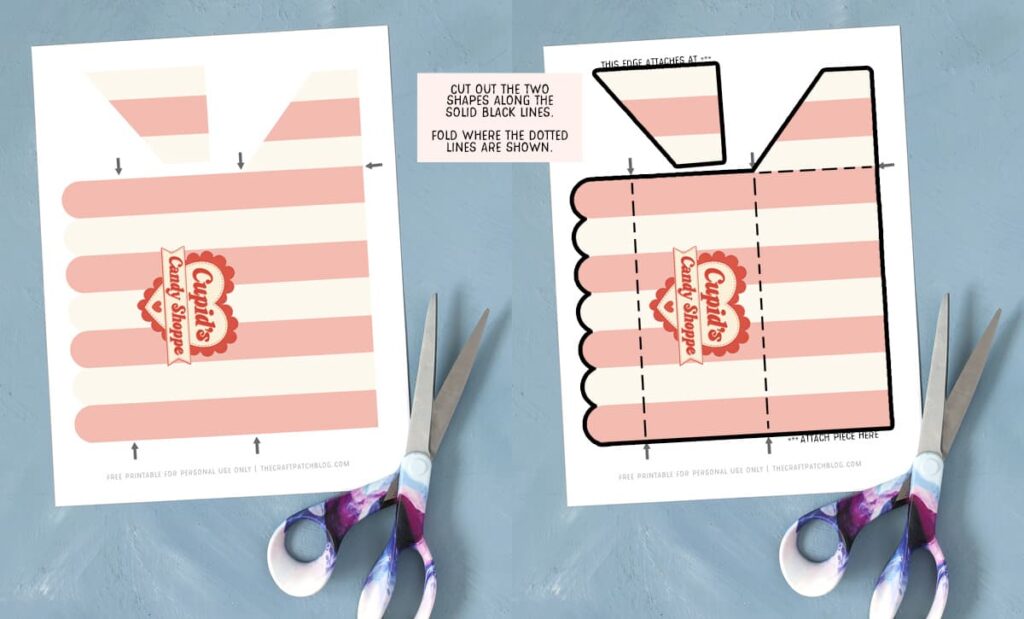
Once you’ve got the pieces cut out, it’s time to fold..
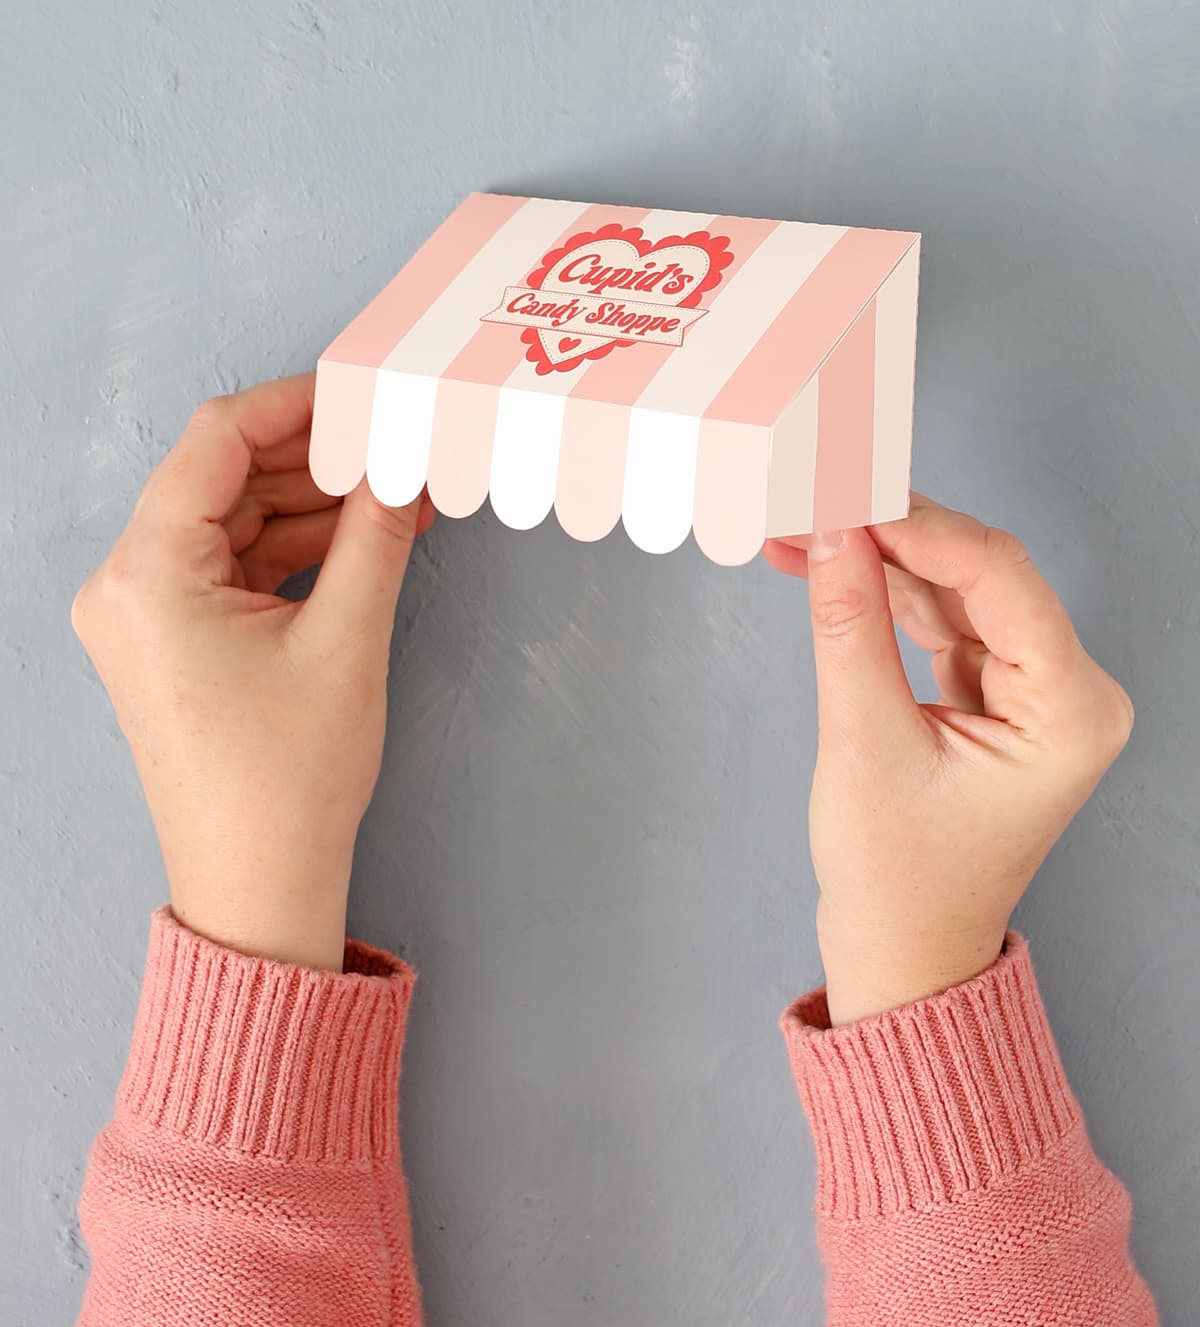
Fold all of the fold lines away from you, then use clear tape to attach the side pieces of the awning to the center. Refer to the video below if you’re not sure how to do this. It should look like this when you’re done:
Step 5: Attach the cardstock awning to the dowels with a bit of tape. Then you can easily peel off the tape and add a new awning for a new holiday down the road.
Step 6: As a fun extra, I printed out matching designs to add to all the jar lids. I’ve included those printables in the same folder as the awning if you want to use them too.
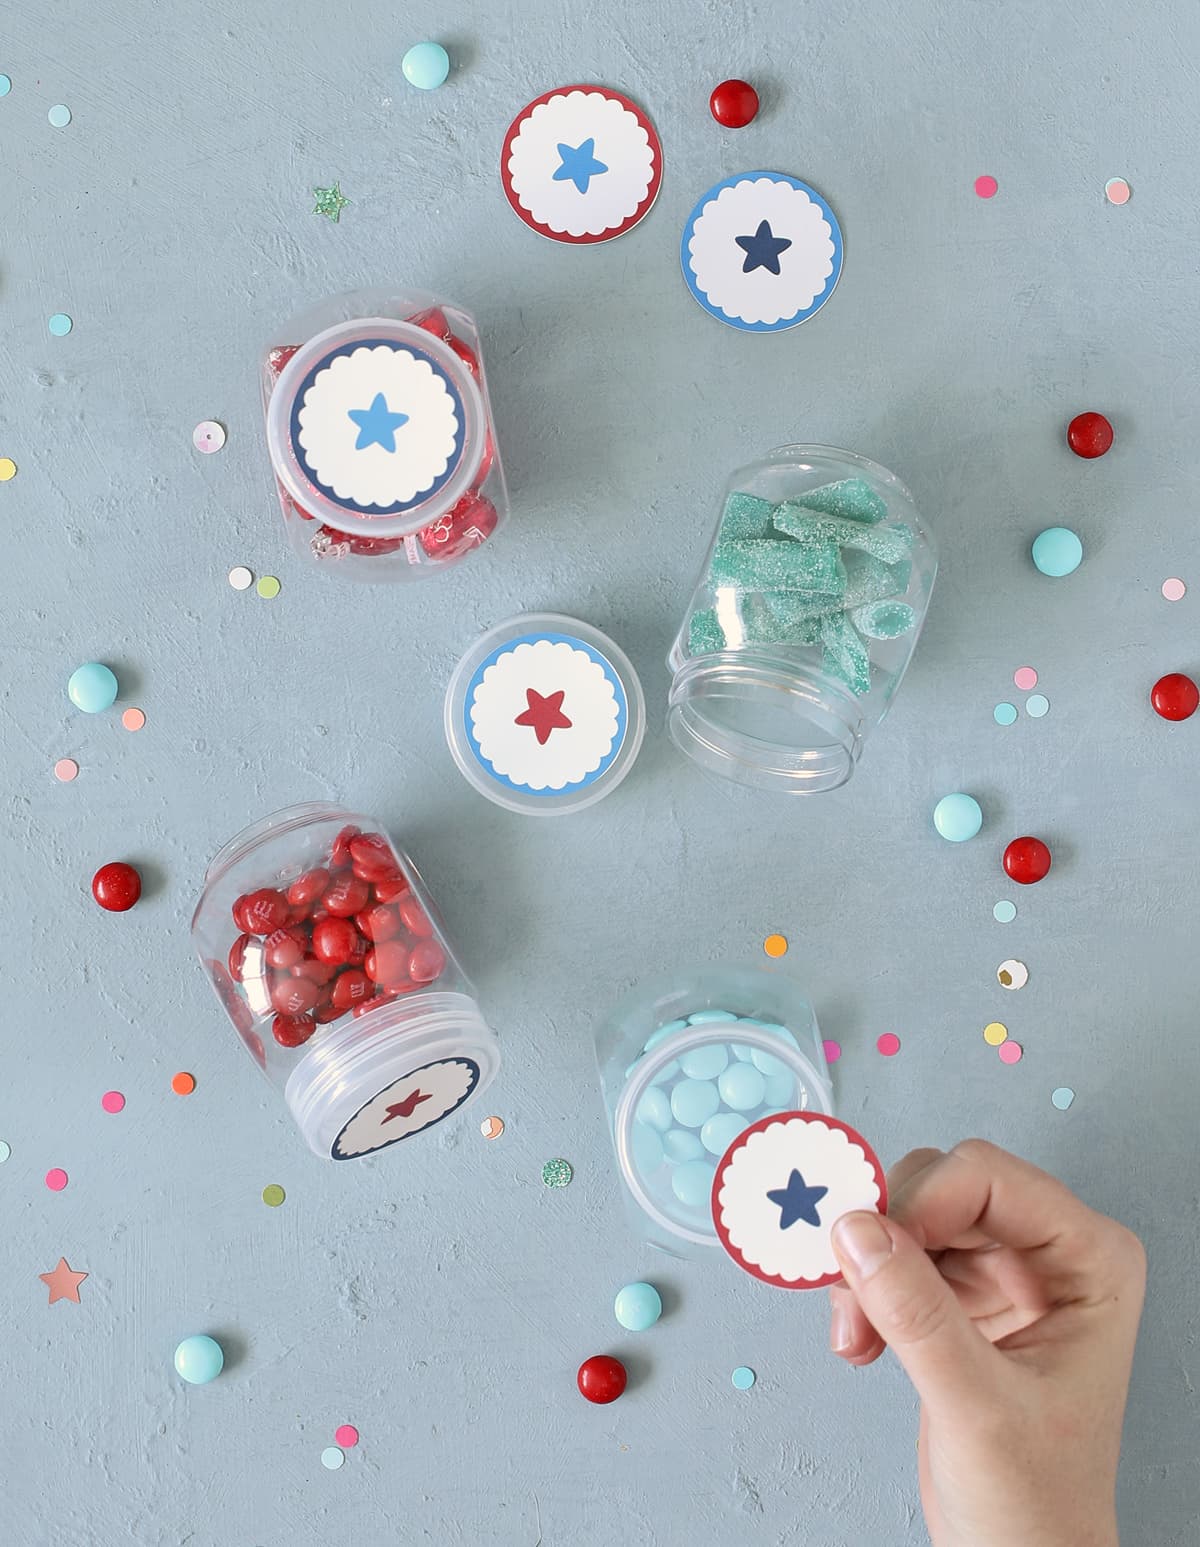
All you have to do is print, then cut them out. Attach them to the little jar lids using a loop of tape. Easy peasy!
Video Tutorial
I love how this one turned out. Three cheers for the Red, White and Blue! This candy shop will be so fun to use in June and July. I am also finishing up a summer themed candy shop design that is so cute, you’ll definitely want to check that one out too.
 Get the printables here
And don’t forget to grab the printable candy shop versions for Easter, St. Patrick’s Day and Valentine’s Day too! Happy crafting!